If your school provides only a generic-looking homework planner, or if it is just the ugliest thing you have ever seen, you don’t have to be stuck using it. Instead, you can use Google documents to make yourself a new homework planner, one that you can access online or off.
Getting Started
Sure, your school might give out a planner but does it really do what you need it to? Does it have enough space to write everything in and if you happen to lose it can you print it out again? Well, if you convert your calendar to Google, you can do it with ease.
In order to do this you will need to have a Google account. If you have signed up for Google Documents, Gmail, iGoogle, or Blogger then you already have one ready and waiting. If you have one simply sign in; if not go to the Google documents site and sign up. It is easy and free.
Now you have to find the section that suits your situation. You may know at the beginning of the week all of the assignments that are due thanks to syllabus, which is more likely for a college student or you may have to write it in as it is assigned, which is more likely for high school students.
I Know My Assignments
If you want to organize by subject:
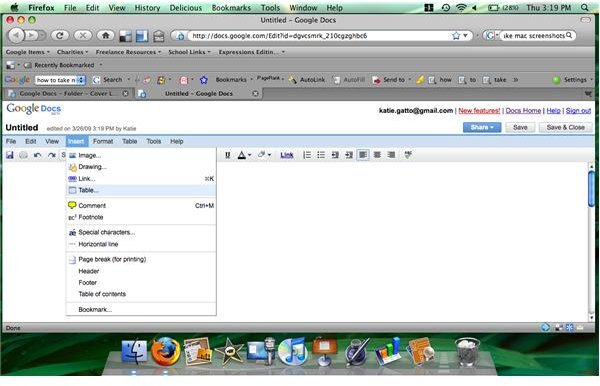
- Open a new document.
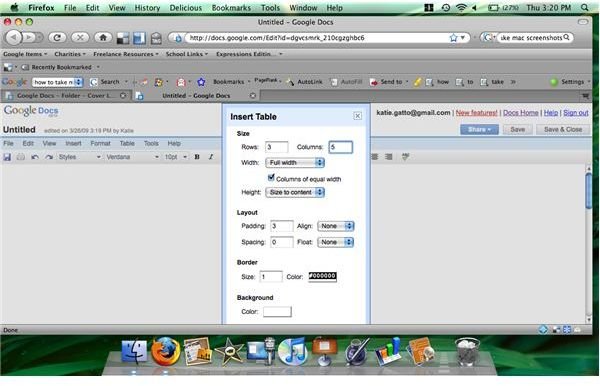
- Click on “insert” and then on Table.
- Define your rows as 3 and your columns as the number of subjects +1. Leave the, pull down menu to “fixed width” and click on “insert”.
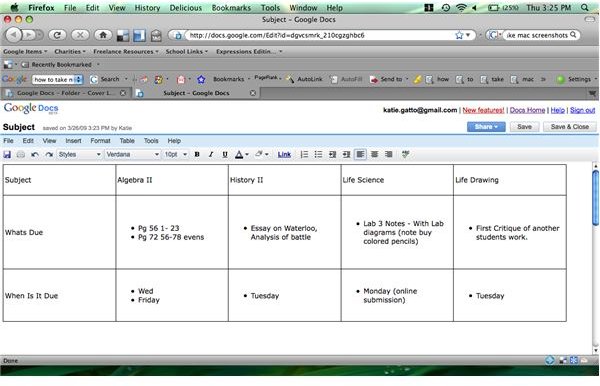
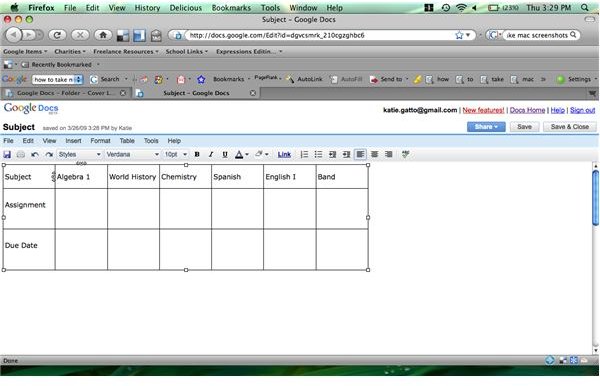
- In the furthest left column place the word “subject” in the box, “assignment” into the second and “due date” into the 3rd.
- Fill in the table with your subjects, assignments and dates.
If you want to organize by date due:
- Follow steps 1 to 3 from above only make 8 columns, and as many rows as you need for your subjects plus one.
- Put subjects in the left top box. Across the top fill in the days of the week. Down that left row fill in with your subjects.
- Fill in all assignments in the box that corresponds to the right day and subject.
I Have to Write my Assignments In
If you want to organize by subject:
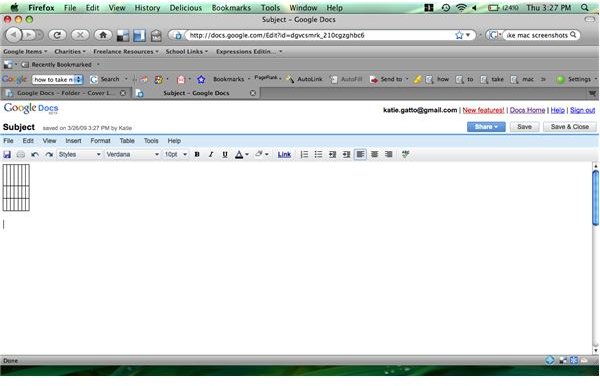
- Open a new document.
- Click on “insert” and then on Table.
- Define your rows as 3 and your columns as the number of subjects +1. Leave the, pull down menu to “adjust to text” and click on “insert”.
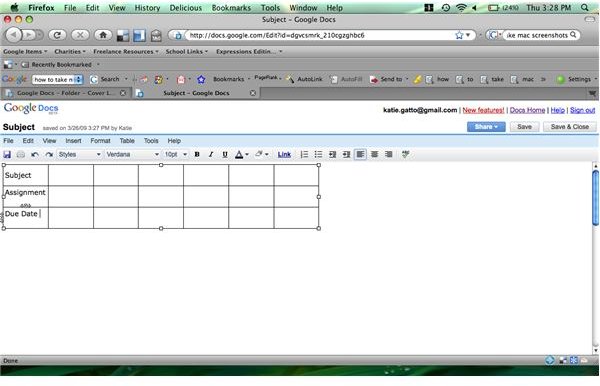
- In the furthest left column place the word “subject” in the box, “assignment” into the second and “due date” into the 3rd.
- Fill in the table with your subjects, assignments and dates. You may find the spaces too small to write in. Simply use the enter key to expand 1 row or column or drag the bottom of the table to expand the whole table. Use the enter key trick if you know you have 1 teacher who will assign a lot of work, and the dragging to adjust the whole table.
If you want to organize by date due:
- Follow steps 1 to 3 from above only make 8 columns, and as many rows as you need for your subjects plus one.
- Put subjects in the left top box. Across the top fill in the days of the week. Down that left row fill in with your subjects.
- Fill in all assignments in the box that corresponds to the right day and subject.
How to Print
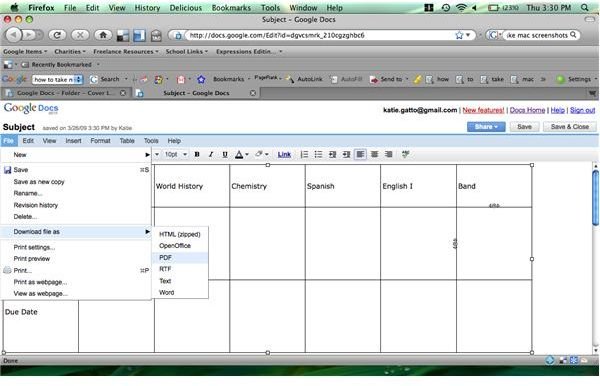
When you want to print just follow these instructions:
1. Click on “File”
2. Click on “Download File As”
3. Choose the “PDF” format
The document will now be a PDF on your desktop that you can open and print as usual.
Conclusion
Now that you have your calendar enjoy it. Remember that you can access anywhere you have internet so you can update on your laptop or your iPhone. Enjoy your organization.
Screen Shots