How to Make Valentine's Day Cards in Microsoft Word: A Guide for Creating Cards on the Computer for Free

Don’t Spend Money on Cards When You Don’t Have To
With Valentine’s Day right around the corner, it’s time to get the little one’s cards for all of their classmates and teachers. If you have several children, the price can add up. Did you know you can create your own personalized kids’ Valentines cards using Microsoft Word right on your computer?
In this tutorial, I will give you tips on how to create the cards with Word and show you an example of how easy it is to create printable cards. You are free to create your own Valentine’s cards with your own design - this is simply a outline and a few tips to get you on your way with making free Valentine’s Day cards for your child.
So why spend money when you don’t need to?
Microsoft Word Tip for Valentine’s Card Graphics

The first thing you will want to do before getting started with your own cards, is find some free Valentine’s Day graphics you can use to decorate them with. Start with this article for a collection of free graphics you can use. Many more can be found with a simple Google search. To stay organized, you may want to create a new folder on your computer to place these graphics in.
Making a Basic Valentine’s Card
Let’s create a basic card to give you an idea of how to do it. Start out by opening a new document. With the new document open, click Table > Insert > Table. When the box opens, change the properties to one column and one row. Click OK to create the table. Press
the Enter key on your keyboard and insert another table just like the one above. You can insert as many tables as you want. Each table will represent a Valentine’s Day card.
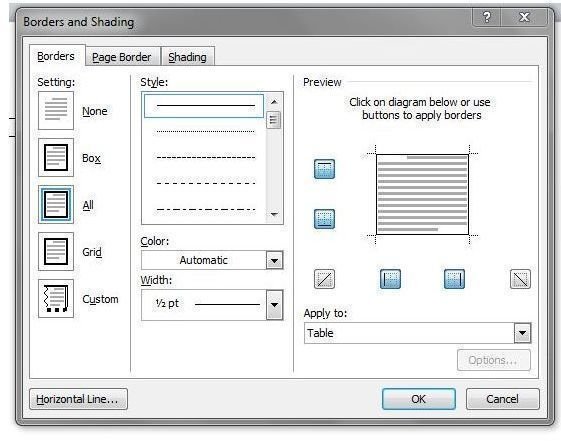
Now, let’s go back to the first one and decorate it. Right click in the first table and click Borders and Shading in the menu that drops down. In the box that opens, click the Border tab. The middle column in this section is where you will change your border properties. Select the border options of your choice and click the OK button.
Once you have added your border, you can add the graphic. Click inside the table and click Insert > Picture > From File. Locate the graphic and double click it. Then type the text you want to appear in the table. Change the font options to what you want.
Now you can go to your other table and create the next card. Once you have a page of Valentine’s cards created, you can print them. This is a great way to create personalized Valentine’s Cards for your child’s classmates.
Other Valentine’s Day Card Options

If you do not have Microsoft Word, but Photoshop instead, you can also create the cards by following the steps in this guide. This guide will walk you through the basic steps of creating Valentine’s Day cards in Photoshop and you can run with your own ideas and graphics.