This article will take you through the steps to use to create a stylized ultraviolet text effect for your website or blog using Adobe Photoshop.
Ultraviolet text effects are popular among most community websites. Follow the steps below to create ultraviolet text effects for your blog or website using Adobe Photoshop. Simply use different fonts and color schemes to create your own customized designs
Step #1
Open a new canvas (Ctrl+N) in Photoshop. For the purposes of this tutorial, we shall use a 490x110px canvas. Select your desired font and font color. Type in the text you want to have stylized.
TIP: Select a background color and a font color and that are in contrast to each other. In our example, we are using a dark blue (000B5F) for our background color, and a shade of red ( 9D0101) for our font color.
Step #2
Rasterize the text.
- Right click on the layer and then select Rasterize
- Click on the magic wand tool and use it to select your text
- Feather your selection by 3px (Select > Feather).
- Contract your selection by 2px (Select > Modify > Contract) and then delete the selected area. The result will be similar to the image below.

Step #3
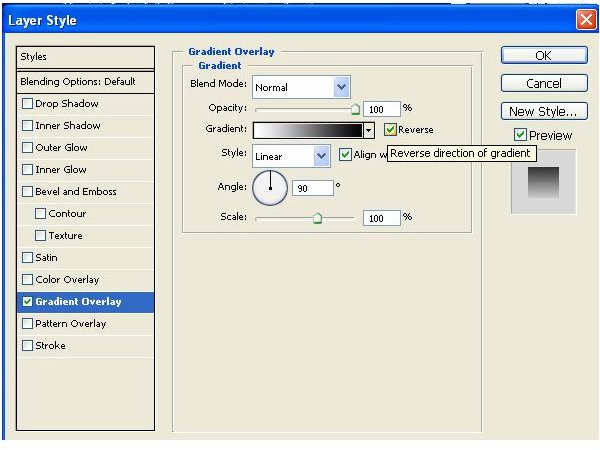
- Open the Layer Options without canceling the selection.
- Select Gradient Overlay in the left hand column of the Layer Options dialog box.
- Adjust the gradient settings to your desired level.
Once you complete your gradient overlay, your text will be similar to the image below:

Step #4
- Create a new layer and then move it to the layer before the outline layer.
- Expand the selection by 2px (Select > Modify > Expand)
- Feather the selection by 6px .
- Fill the selection with a light color. In our example, we used a light shade of blue ( 52B177).

Step #5
- Create another new layer, and then move it behind the previous layer.
- Expand the selected area by 4px and feather it by 10px.
- Fill the selection with a bright color. In our example, violet (8939D2) is used.