
Have you ever found yourself asking “In Adobe Photoshop, how do I get a picture from 66% size to 100% size?” Don’t feel alone! This problem trips up many new Photoshop users, and luckily has several easy solutions. This article will show you three quick and easy methods to viewing images at 100%.
How Do I Get a Picture From 66% Size to 100% Size?
You might have noticed that Photoshop has a habit of showing your images at 66%, and no matter how hard you try you can’t seem to get it to show up at 100%. Believe it or not, this is a fairly common problem that many people run into when first using Photoshop, and it has an extremely easy fix.
Why Does Photosohop Do This?
Why does Photoshop pick certain intervals to display images at? If you’ve opened enough documents, you’ll notice that Photoshop actually has a few favorite “distance” intervals to display images at, the main three being 33.3%, 50% and 66.7%. These three specific, predefined distances allow Photoshop to show your image with the least amount of distortion.
Photoshop will normally pick the size that is closest - but not over - the amount that can be shown without clipping off the canvas. For instance, if your image can be shown easily at 66% without clipping off of the canvas in any direction, Photoshop will pick 66%. If it cannot be shown easily at 66%, it will round down to 50%. Most other distances between these, from 1-99% will almost always show a slight amount of inaccuracy, such as blurred or slightly crooked lines and strange blurs.
Method One
Still, it is easiest to work on details of pictures and get the most accurate view by viewing something at the 100% zoom setting. How do you fix the issue to see the actual size of your image? Well, it’s as easy as using Photoshop’s various zoom settings , of course! There are a few ways you can go about doing this.
The first and foremost is to press CTRL and your + button (CMD and the + button for Mac users), which will allow you to zoom in to pre-defined zoom levels, one of them being 100%. Simply tap as many times as you need to get to 100%. If you zoom in too far, you can simply hit CTRL and the - size (Mac users, just hit CMD and the - button) to zoom out at the same intervals.
Method Two
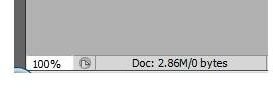
Another easy way is to look to the bottom left of your screen where you will see a small box that reads out 66.7% It should look like this:
Simply click within this box and type 100% like so, and then hit enter when finished!
Method Three
A third, easy way to do this is simply to hit the Z on your keyboard (this is the shortcut for zoom), or click the icon on your left side menu that looks like a magnifying glass, as shown here:
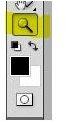
At the top of your screen, your tool-based menu should change to show a variety of options. Simply click “Actual Pixels” for a one-click fix.

References & Image Credits
References: Personal experience as a graphics designer.
Image Credits: All screenshots were taken by Amber Neely and are for demonstration purposes only.


