Review of AutoCollage - AutoCollage from Microsoft Research
AutoCollage - One of a Kind
Seldom does Microsoft ever release a small product, but Microsoft Research did just that with their release of AutoCollage. This program does only one thing, make photo collages, but it does an excellent job at it.
The program can create collages in a completely automatic mode, or you can override some of that to allow more manual tweaking.
Custom Manual Collages
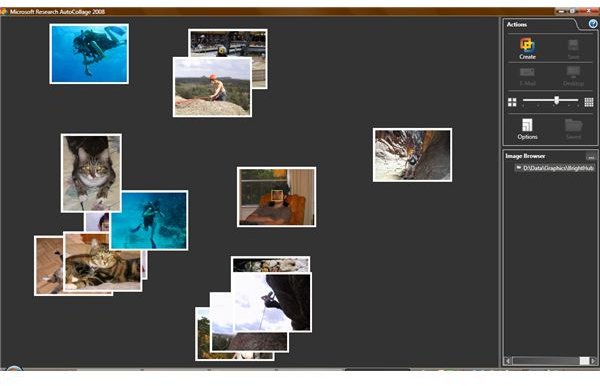
Create a new directory, and copy in only those photos you want in your collage. If any are in portrait mode, rotate them first. AutoCollage can create collages that use between 4 and 25 photos. In the options dialog, enable both Face Detection and Manual Face Detection. Select an output resolution – they are not given in pixels so you may want to experiment. The 8x10 entry seems to be the highest resolution. Set the “number of photos” slider to match the number you have in your directory. Point the file browser at your directory, and wait for the photos to load.
Once the photos load, you can click on any photo to expand it. Some photos will have a yellow box - that is where the face detection software found something that looks like a face. You can Ctrl-click-drag to draw a new yellow box, in case the software did not find a face. While the program can detect and outline multiple faces, you can only enter one selection box.
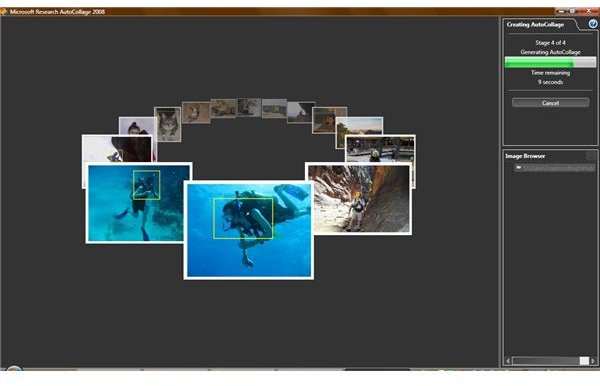
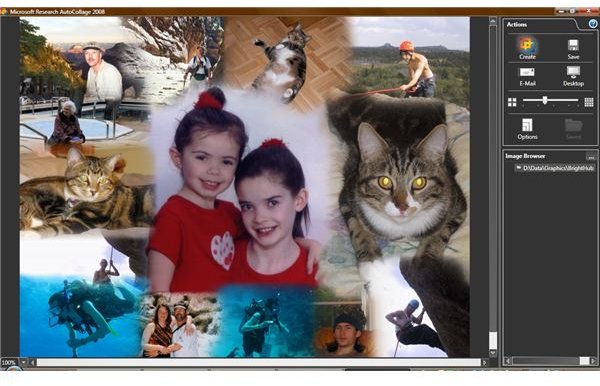
This technique is useful in a number of ways. For instance, we seem to have a lot of pictures of pets, but AutoCollage doesn’t detect their faces. However, the selected area doesn’t need to contain faces, but rather any “area of interest”. Once all photos have selected areas, click the Create icon and watch AutoCollage do its job. Once AutoCollage is finished, you can save the output to a file, your desktop, or send it in an email.
Loading Photos
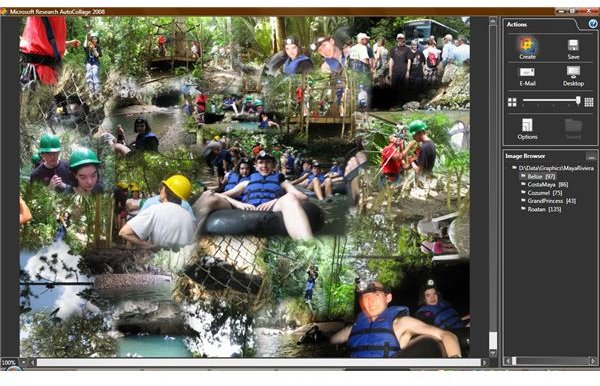
Automatic Collages
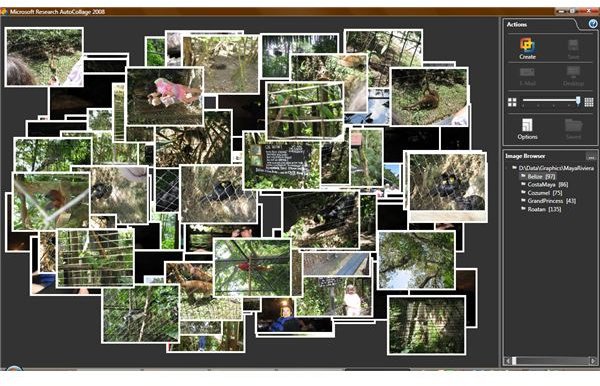
AutoCollage excels in generating collages automatically from large directories of photos. It does this by assigning each photo a priority, based on the number of faces and other factors. Only the highest-priority photos make it into the final collage.
I’ve had interesting results with this. In the sample photos I used, a high percentage of them were of poor quality– some were underexposed and some were out of focus. AutoCollage seems to have managed to detect that, as none of the bad photos ever made it into a collage. Here’s the results when I let AutoCollage select the photos.
Images
A Worthy Tool (5 out of 5)
For under $20, AutoCollage is inexpensive enough to find a home in everyone’s toolbox. I have not seen any other programs with this capability. Future versions will expand on its capabilities, including perhaps the ability to manually select multiple faces. One annoyance I found that may be resolved in a future version is the ability to use photos from a network – the current version is limited to local disks for speed and error-handling considerations.