HDR + Interior Photography: Taking Great Indoors Photos
Why Use HDR Photography Indoors?
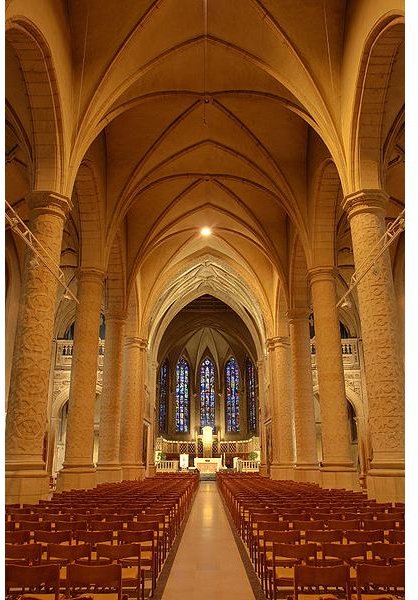
Photographing interiors during the day is often difficult due to the difference between bright light coming in the windows and dark shadows elsewhere in the room. We can use HDR photography to capture the full range of the scene. HDR + interior photography = better photos!
In order to take advantage of these techniques, you’ll want to have a tripod and preferably a camera with exposure bracketing.
What is HDR Photography?
Any camera can capture only a limited range of light; in this context,that means the difference between the darkest and brightest areas of a scene. DSLRs can generally capture a range of 300:1, which means that the brightest area is 300 times as bright as the darkest area; this is a 6-8 stop difference. Film camera can capture up to 2,000:1, or 10-11 EV. However, in outdoor sunlight, a scene may have a dynamic range of as much as 100,000:1! The human eye is capable of capturing all of this information, but the camera is not. How do we avoid missing out on any important details?
The idea behind HDR photography is that we take multiple shots of the same scene, using the same aperture but different shutter speeds, in order to capture different details. Generally at least three shots will be used: one that is correctly exposed, one that is overexposed, and one that is underexposed; we then use the overexposed photo to collect details from the dark areas and the underexposed photo to collect details from the light areas.
HDR + Interior Photography
When photographing the interior of a house, you’ll often want to have the windows open so that the incoming light will make the room look bright and inviting. Unfortunately, this generally means that in your photos, either the windows will be blown out, or other parts of the room will be too dark to see details. HDR photography is the solution!
You’ll want to check whether your camera does multiple exposures; if not, you’ll have to change the shutter speed between shots, being careful not to move the camera or change the aperture. Make sure that the camera is on full manual mode; otherwise, it will automatically adjust the aperture to compensate for the changed shutter speed. Put the camera on a tripod, compose your shot, and start shooting! You’ll want to meter based on the wall next to the window but without the window in view, then take a shot based on that exposure, a shot two steps under, and a shot two steps over. After that, it’s time to break out the software!
HDR Software
There are a number of software programs available to combine multiple shots into one HDR photo; the most popular are Photomatix Pro and the free Picturenaut; newer versions of Photoshop contain HDR capabilities as well.
Regardless of what software you use, you’ll select two or more photos and tell the computer to combine them. If the camera moved slightly during the photos, the software will try to align them; if there was too much movement, this will be unsuccessful and the process will fail.
The software will present you with several sliders that let you make adjustments to the tone mapping process; there are no correct settings, so play with them until the preview shows a result that you like. Note that pushing the sliders to an extreme can generate very unrealistic photos, which might or might not be what you want.
HDR photography can be challenging to get right, as you have to be even more careful in taking the photos, as well as gaining experience in manipulating them afterwards on the computer; however, the results can be extremely rewarding.