Recolored Software Tutorial - How To Colorize Black and White Photos With The Recolored Software Tool in 10 Easy Steps - Including Tips and Tricks!
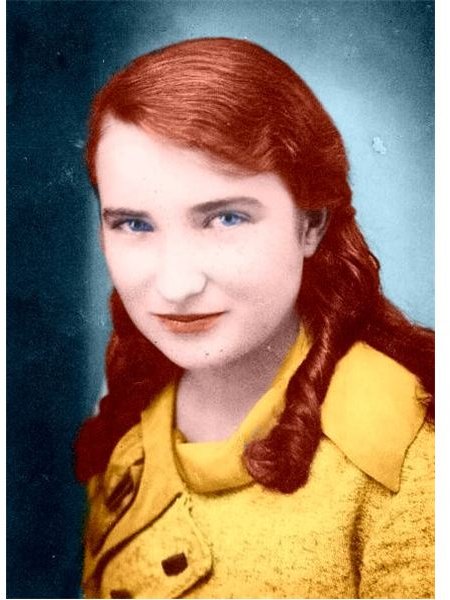
Wouldn’t you like to see your old black and white photos come to life? Thanks to the amazing modern technology, what once used to be just a dream is now a reality. With specialized software like Recolored or Black Magic, or even with some of the complex graphics editing programs such as Photoshop, GIMP or Corel Paint, you can now give color to your past. In this tutorial you will learn how to colorize a black and white or sepia photo using Recolored, a program specially designed for this purpose.
Recolored is a little software tool you can use for colorizing black and white or sepia photos, replacing colors in color photos and adding special effects. It costs $29 but you can download a 21-days trial version at www.recolored.com. Recolored has a very simple interface and it’s very easy to use. You won’t need any special skills. Their first promise to you is that you won’t have to worry about layers or other complicated settings. All you have to do is mark the color zones with a few brush strokes, press a button and let the program do the rest. You are just a few steps away from a perfect color photograph.
What you need
-
a version of Recolored (installing the trial version costs you nothing and takes only a few minutes)
-
a digital black and white or sepia photograph (preferably a portrait for the start). You can either scan it or photograph it with your digital camera.
What to do
1. Open Recolored. A start window will appear with three options: Buy Online, Enter License Key or Try Recolored. Click the last one.
2. Open your photo (File > Open / Ctrl + O / icon on the toolbar). Save your project as a .rcl file (File > Save As).
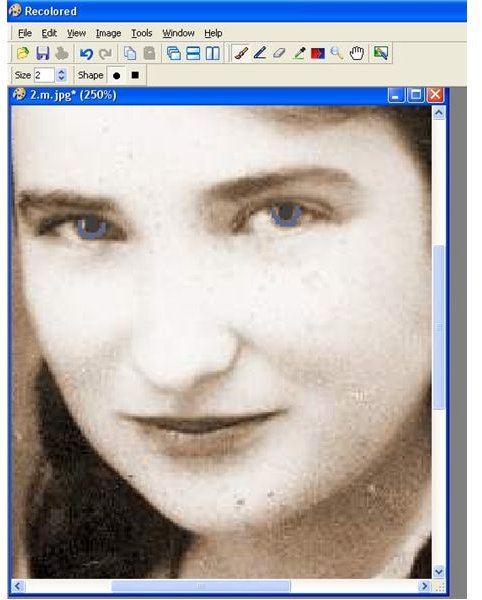
3. Zoom in your photo by selecting the Zoom tool in the Tools bar and clicking your image one or several times. Scroll until you get a good focus on the face.
4. Select the Brush in the Tools bar and set the size to 2.
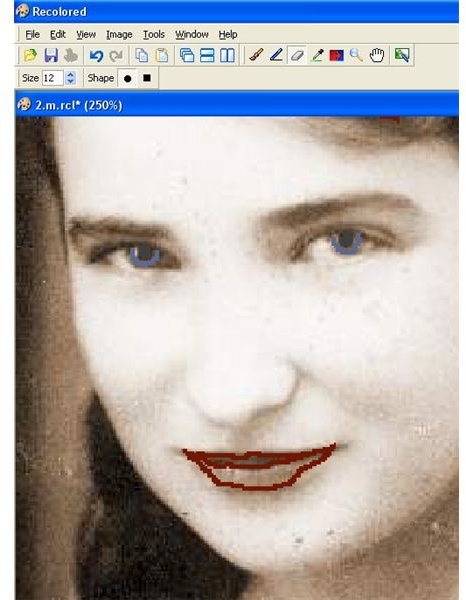
5. Pick an eye color from the Color Presets or from the Color Picker. Paint the eyes as in Fig. 1, then paint the spot in the middle with black or dark gray.
6. Choose a color for the lips and paint them as in Fig. 2. Paint all the other small details such as buttons, earrings, etc., in the same way.
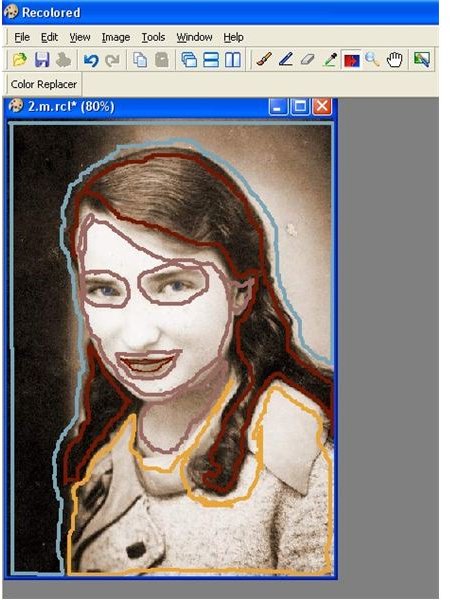
7. Zoom out by selecting the Zoom tool in the Tools bar and right-clicking the image one or several times until it gets to the desired size.
8. Select the Brush tool again and change the size to 5.
9. Draw the color zones. Start with the face, go on with the hair, the clothes, etc. End with the background. (Fig. 3)
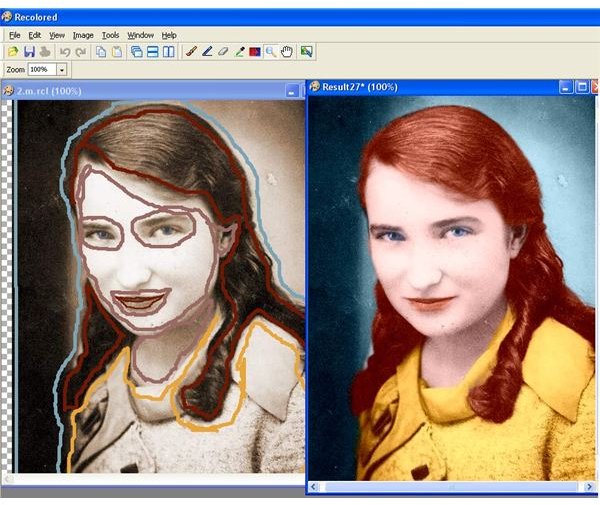
10. To see what you’ve achieved so far, click Colorize. The result will open in a new window. (Fig. 4) If you’re pleased with the new image, you can save it. If not, close the window without saving the changes and go back to the original photo to do the necessary adjustments. You can open a result window after every change you make and save several versions of your image.
Tips
For longer and straighter surfaces like the background, use the Line tool. To correct a mistake, use the Eraser tool, to pick a color you’ve already used, select Eyedropper from the Tools bar and click the color you want. To change a color, select Color Replacer, pick the new color and click the old color to replace it. You can only replace the color in the lines you painted, not in the actual photo.
Click image for full size