Learn How to Replace Color in Photoshop in This Photoshop Tutorial.
Renaming Your Image
Color adds effect and interest to your photographs and images. But sometimes, a certain color is just not what you want it to be. You can, however, learn how to replace color in Photoshop. And, this skill is so easy to learn that even beginners will quickly catch onto this skill.
The first thing that you need to do is check your version of Adobe Photoshop. This Photoshop tutorial is for people using Adobe Photoshop 6.0 or later versions. Now, you want to open the image in which you want to manipulate color.
After you open it, go to File and Save As. Then, save a copy of the image with a different name. While you may never want to use the original image again after you make your adjustments, it makes sense to keep a copy of it. Why you may ask? Well, if you don’t like the how the manipulations look in the final version, you’ll always have your original.
This allows you to do multiple changes to the photograph. Just keep renaming the new versions with a name different than the original.
Replace Color Eyedropper Tool
Now that your photograph is open, go to the Image dropdown menu, and select Adjust -> Color Replacement or Replace Color. The exact color replacement name may be different depending on your version of Photoshop. But, it should have color and some form of the word replacement.
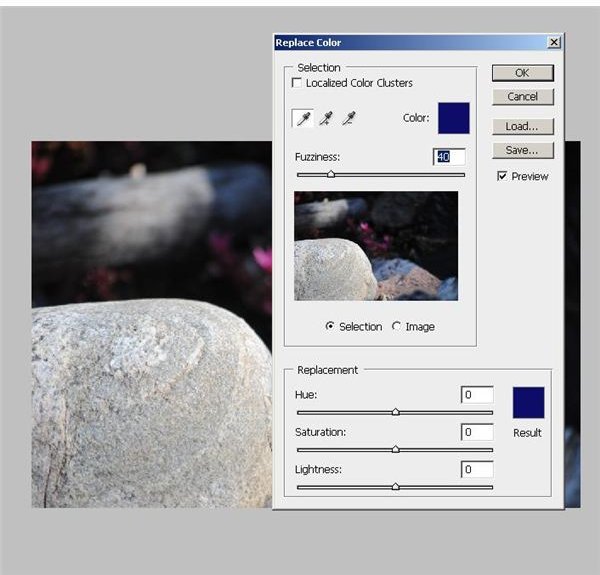
Once you select Color Replacement, you’ll now see the Replace Color palette. On this palette, you’ll see an eyedropper tool. Select it, and then select the color that you need replaced.
If you are planning to replace the color in multiple areas, then you need to use the Plus eyedropper tool. This tool allows you to keep adding sections of your image to the cache of areas where you want to change the color.
If you accidentally add too many sections to this cache, simply select the Minus eyedropper to remove those sections.
Changing Your Image’s Color
After you are done with this step, you will now see the color that you want to replace in the Sample box. This Sample box is at the bottom of the Replace Color palette next to Hue, Saturation and Lightness amount sliders. Before you used the eye dropper to select your colors, this area was black. Now, it’s filled with your selected color.
Now, you want to use the amount sliders to get to the color to which you want to change your color. The Hue slider is going to be the most important since this will physically change the color. Use the other two to simply tweak the final color. Select OK.
You will now see that the selected color has changed to the Hue color. If you still see traces of the previous color, then you probably didn’t get all of that color during the selection process. Just repeat these steps to change that last bit of color.