Sunset Photography - Top 3 Tips for Taking the Best Photos of Sunsets
I Would Have Paid Money to Watch this Sunset
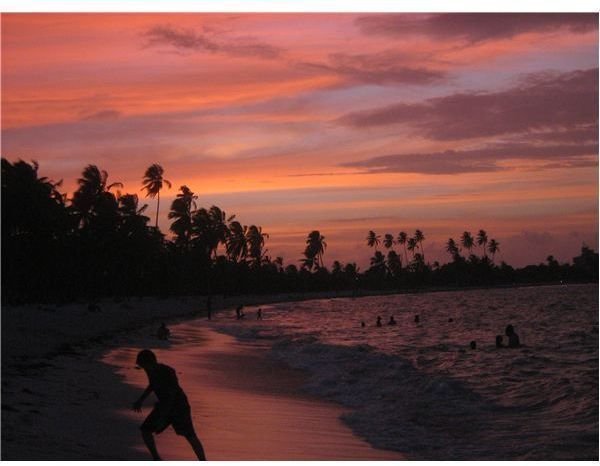
When I turned around knee deep in the azul blue and turquoise surf, the sun was painting the sky with brilliant hues of violets, golds and burnt umber in a stunning range of hues and pastels. I would have paid money to watch this. Sloshing to the white sand beach, I snapped up my Canon digital camera and prepped it for a series of unforgettable sunset shots at the beach.
The sun goes down every day anywhere you might live (unless you’re a coal miner or a cave dweller), but some places have more than their fair share of sunsets worth photographing. I happen to live in one of those areas, a tropical region of Colombia in South America. Wherever you are though, you’ll likely have lots of opportunities to photograph some spectacular sunsets unique to your particular neck of the woods.
If you want to capture the original beauty that many sunsets can display, then you should prepare in advance using these tips for photographing sunsets.
3 Tips for Photographing Sunsets
1. Start Getting Ready Early
For sunset photography and night photography, you need to get set up before the main event begins. You don’t walk into a movie theater right as the first scene is beginning now do you? Well then, look in the newspaper, an almanac or online for the time the sunset will occur that day and go out to pick a likely spot. If you’re away from home ask a local what time the sun goes down and more often than not they’ll have a pretty good idea. Then around 35 to 45 minutes or more ahead of that time go get set up.
2. Know your camera’s light metering system
You really need to know how your camera’s light metering system works. The best and fastest way to get the full lowdown on this is to read your camera’s operating manual. If you’ve “misplaced it” don’t despair. You can work “on the fly” while you’re outside on location. You should also know about creating silhouettes, as explained in the article, How to Photograph Silhouettes: Seven Key Tips and Tricks.
3. Meter Off of Different Sections of the Scene
Where I happen to be shooting sunsets right now in July, the sun sets around 7:30 pm. So we’ll use that for our examples. By 6:45 pm at the latest, I’m outside and more or less in the location I want to shoot from. The sky is relatively clear and a visible sunset is imminent. Look at where the sun will be going down. Now be sure to pay some attention to the foreground. What’s going to be in the scene? Don’t like it? Then move – now.
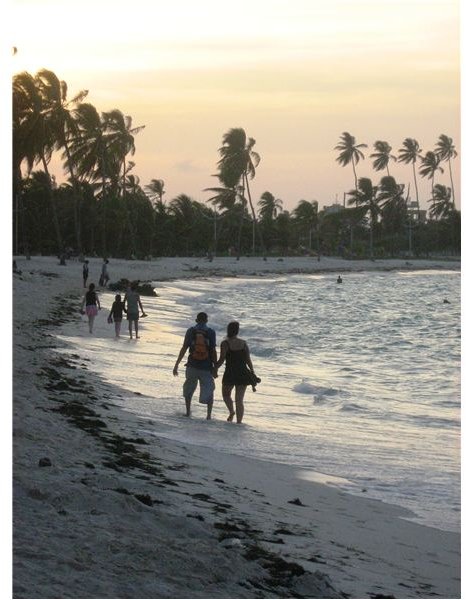
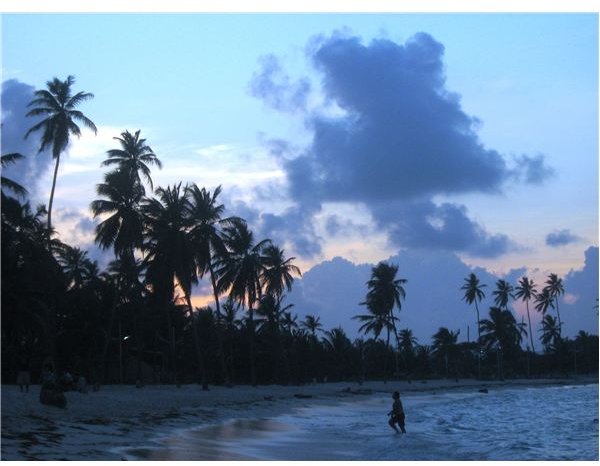
At around 7:05 pm sunset colors are starting to become much more pronounced. Tall trees and buildings block the direct rays of the sun in many view points. People and other objects in the foreground are stating to become deeply shaded or silhouettes. It’s nearly 7:10 pm and I start framing and shooting sunset-lit silhouette scenes.
Here’s a Procedure You Can Try
You should frame the scene in your camera image screen. Got it? Okay, press the shutter button only HALF WAY DOWN to “lock” the focus and light meter settings. Move the view back over to the shot you’ve framed, still holding the shutter button half way down until you have the scene you want to shoot “framed” again. Press the shutter button all the way down now to take the shot.
Now, do it again, but this time point the camera at the brightest part of the sky you can see, then press the shutter button halfway down. Shift your camera view back over to frame the scene you want and take the shot. It’s a bit different, right?
Now do the same procedure a third time but this time point and meter off of the darkest area of the scene before moving the camera back over to the scene you are shooting to take a third shot of it. You now have three different photographs of the same scene which are different because you metered differently and the sun continued going down while you were at it.
You’ll only have about fifteen or twenty good minutes – at the most, to get great photos of the sunset, so keep changing where you’re standing for different positions and shoot bracketed scenes until there is no more color in the sky to speak of. It’s now 7:33 pm.
Practice Makes Perfect
When you review the sunset scenes that you have just photographed you’ll have a far better idea of which ones you like or dislike. Next time put this information to good use in selecting scenes, locations and the types of compositions you want to use. Remember that practice, as they say, makes perfect. You’ll be shooting sunsets to be proud of in absolutely no time at all. Personally, I like photographing sunset silhouettes. In fact, I’ll even bet you got at least one or two good ones on just your first sunset photography session, now didn’t you?
Great, now keep up the good work.
Note to skeptics: These photographs have NOT been digitally enhanced or altered in any way. What you see is what I shot because that’s what was there, honest!