Lightroom selective coloring allows you to keep color in part of a photograph while eliminating it from other areas, and it’s easier than you think! Learn how with this Lightroom tutorial.
Lightroom’s Adjustment Brush
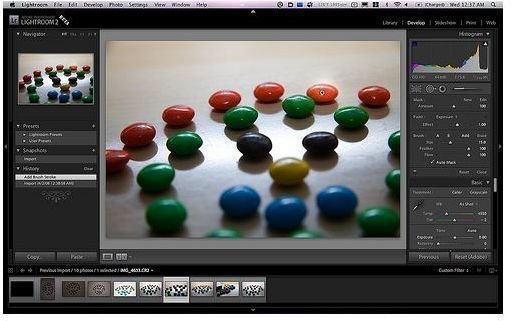
Adobe Photoshop Lightroom is similar to Photoshop, except that it’s exceptionally cheaper. One of Lightroom’s standout features is the ability to use Lightroom selective coloring. This allows users to select one section of a photo and make it stand out from the rest.
The selective coloring method is done using the Adjustment Brush . The Adjustment Brush is located within the Develop Module of Lightroom . The Develop Module allows users to manipulate their photos without ever affecting the original photograph. The Develop Module basically makes copies of the original so that the source is never corrupted.
The Adjustment Brush allows users to add effects to photographs, including brightness, sharpness, clarity and exposure. To selectively color a section of a photograph, you will only be using the saturation effect. Saturation allows you to manipulate the vividness of colors by adding or decreasing saturation.
The Adjustment Brush also has two different brush sizes and an eraser. You can also add a feather effect to the brush, which creates feathered edges.
Using the Selective Color Feature
To begin selectively coloring a section of photograph, you first have to remove the color from the entire photograph. To do this, follow the below steps:
- Open up the photograph that you would like to manipulate, and then go into the Develop Module.
- The Adjustment Tool will be the last one in the right-hand panel.
- Go to the Saturation effect.
- Using the Amount Slider, set the Saturation to negative 100. If you are planning on doing this for several photographs, turn these steps into a preset.
- Select a brush by clicking on the letter for the brush.
- Edit the brush size. For this project, use the largest brush size since you will be coloring the entire photo.
- Start painting the photo, and paint over the entire photograph. The saturation of the photograph will decrease, basically turning the entire photograph into black and white.
- Next, select the Eraser tool, and reduce the brush size to the smallest size. Also, add some feather to the eraser tool.
- Erase over the area that will be selectively colored. Zoom really close to the area that needs to be colored over. You can use the shortcut Z to do this. Color should return to the section of the photograph that you are painting.
- Close the Adjustment Mask tool.
You can continue adjusting the photograph. Once you are done, hit Export.
You may also want to use the shortcut keys for adjusting brush size as well. Hit the left bracket key to decrease the brush size and the right bracket key to increase the brush.
Another way to do the same effect is by setting the Adjustment Brush saturation to 100 and then painting over the section of the photograph that will remain colored. Then, create a new Adjustment Mask. Go back to the brush, and set the saturation to negative 100 again. Paint over the entire photograph with a large brush. The section where you created the mask will remain colored while the rest of the photograph will turn to black and white.


