Learn how to use a Lightroom template to showcase your photos.
Lightroom 3 comes equipped with many tools which were available in Lightroom 2, but have been vastly improved. It also comes with many new tools which were not available. It has become a one-stop program for any photo enhancement, and eliminates the need for any other software in post studio work. However, those who are not familiar with Lightroom 2, or simply use Lightroom casually or for family photos may have trouble mastering the entire program. Those who’d like an intro to the Lightroom interface may be interested in reading this beginner’s guide on how to use Lightroom 3 .
One tool available in Lightroom 3 which is great for both professional and hobbyist photographers is the Lightroom template. This allows a professional and creative layout for any set of photos and can be very fun to use if you know how. Here is an overview of this Lightroom tool and how it can be used.
Getting Templates
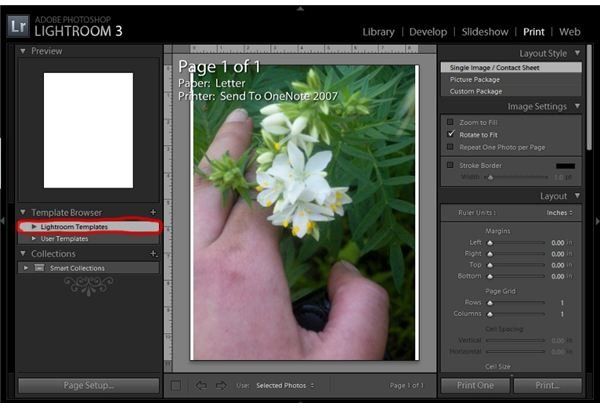
Lightroom does come with several templates already available for use. You can navigate to these by going to Print at the top of the workspace, and then Lightroom Templates on the left sidebar. There are several templates which may be used here, and may be suitable for many project types. For those looking for more artistic layouts, there is the option below Lightroom Templates called the User Templates.
Lightroom 3, like many Adobe products, allows for the addition of plug-ins and add-ons to customize the program to the specific users’ needs. This is the strongest attribute to Lightroom, and allows for thousands of presets and customizations to speed up your workflow . Lightroom templates are available for download all over the Internet either for free or a small charge. These templates tend to be a bit more creative than those already included in Lightroom, and allow for a more professional or even scrapbook feel to your picture layouts.
A couple of sites with Lightroom templates available are:
https://www.halinav.com/blog/2010/04/lightroom-collage/
https://www.lightroomgalleries.com/category/template-downloads/
Templates Menus
Customizing the Lightroom Template
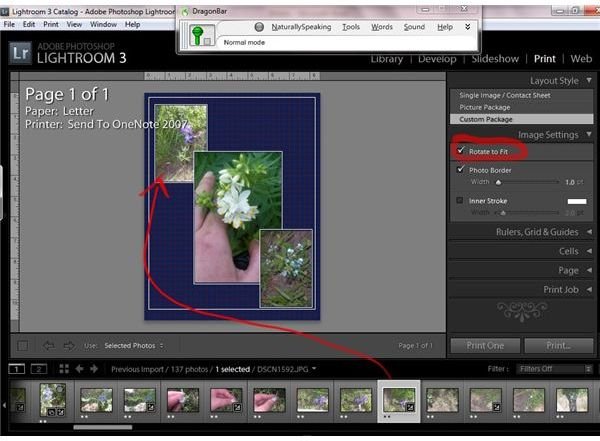
Once you’ve chosen your Lightroom template, you can add the images you want to it. You can even move the specific boxes in the template or change the background color to change it up a bit. Once you have the layout and background color set, you can begin in deriding the photos from the film strip below into the cells of the layout. I like to make sure that the Rotate to Fit box is checked under Image Settings on the side, so that I don’t have to worry about image sizing prior to creating my layout.
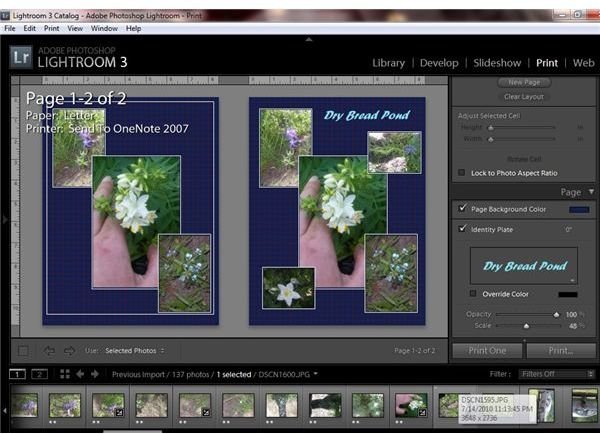
Under the Cells menu, you can add more cells of different sizes to the layout for more pictures, and finally you can change your background and even title your template under the Page menu. There are many possibilities for a completely customized layout for print or web sharing.
Customizing Lightroom Template
Finalizing Your Project
Once you are done with your collage, you may choose to print straight from Lightroom, or export it from Lightroom for other uses. You can also save your Lightroom template as a new template if you think you may be using it again. This makes future printing much easier!


