Digital Cross Processing in Photoshop: Tutorial on How to Cross Process Your Images with Photoshop

What is Cross Processing? Photoshop Tutorial
Cross processing - sometimes shorthanded as Xpro - is the act of intentionally processing photographic film in chemical solutions intended for a different kind of film. This often leads to wild colors and strange levels of light and saturation, and has often been regarded as some of the most beautiful and daring photography out there. Originally, this effect was reserved only for people who had access to dark rooms and knowledge of processing film. Now, as long as you’ve got access to digital photography and Photoshop, you can achieve a cool cross processed effect in your own images! This tutorial is written using Adobe Photoshop CS4, but should be compatible with version of Photoshop 7.0 or higher, and will work well for beginners who have at least a little knowledge of the layout and functions available in Photoshop.
Getting Started
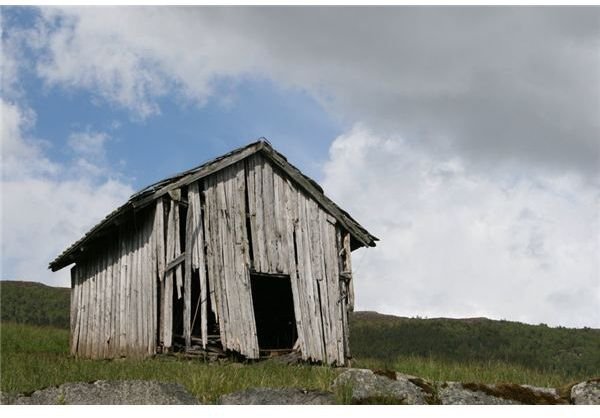
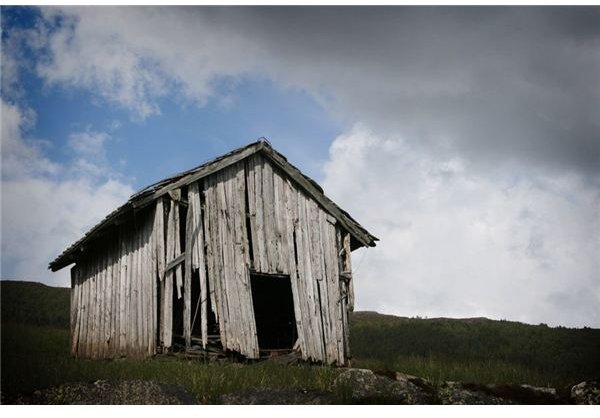
Open the photo you would like to use in Photoshop. It can be a photograph you took yourself, or a stock image that you are given permission to use. Here I’m using Old Building by Mirk-stock on deviantART.
Create a Vignette
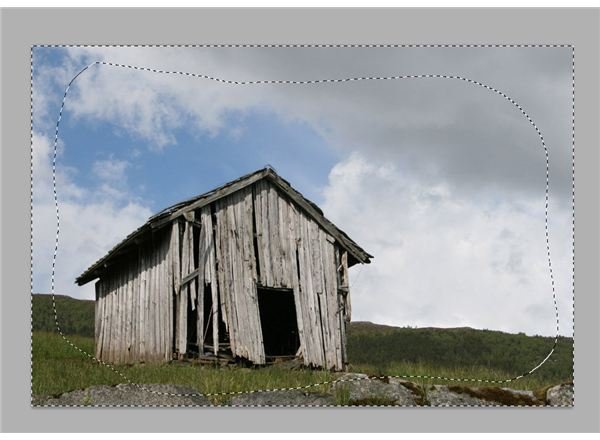
Some film photos are known for having slightly darker edges around them. This is called a vignette. To achieve this, simply take your freehand lasso tool and draw a decent sized circle around the center of your image. It does not need to be perfectly round, and for authenticity’s sake, the messier the better. When you’re finished, press CTRL+SHIFT+I (CMD+SHIFT+I for Mac users). This makes sure the edges of your image is selected.
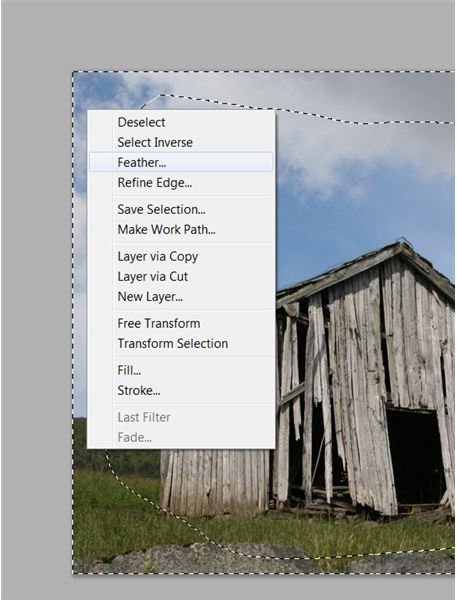
Left click inside the selection and select Feather. Feather your selection roughly 60-80px to prevent a hard edge.
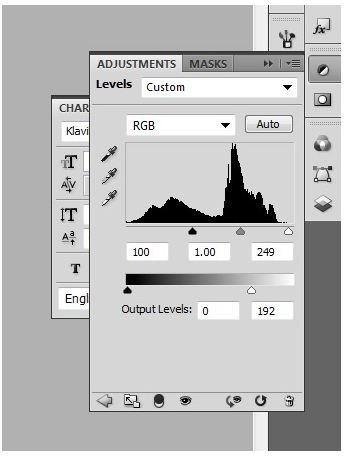
Add a levels layer. To do this, simply click on the button that enables you to create a fill or adjustment layer on your Layers window. Select “Levels” from the menu. This will bring up a new window, called “Adjustments” and inside will be a Level slider. You will have to slide the little arrows directly under the level graph to darken the edges as much as you want. Now, because each image is unique, the amount you will need to slide your arrows will vary. Here I slid mine to 100 - 1.00 - 249 and for the output levels I did 0 and 192.
Here’s the current effect:
Not too shabby, eh? Already looking more film-like and you’ve barely broken a sweat! You could stop here if you would like. If you would like to take it a little further into cross processing, Photoshop can make that easy too! Simply flatten your image by pressing CTRL+SHIFT+E (CMD+SHIFT+E for Mac users) and continue reading the next page…
Creating the Cross Processed Effect
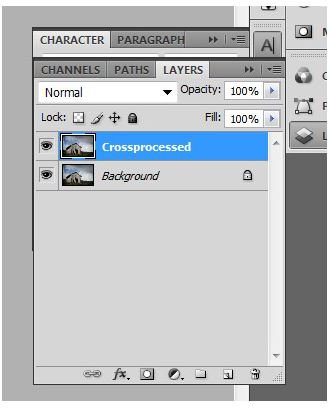
If you’re like me, one of the nice things you can get from film is the over-saturated color and contrast of film. There’s a classic feel to it that you just can’t achieve with digital film. However, you can get that feeling with Photoshop! This is where we get into the real act of digital cross processing! With your image flattened, duplicate the layer and rename it to “Cross Processed.”
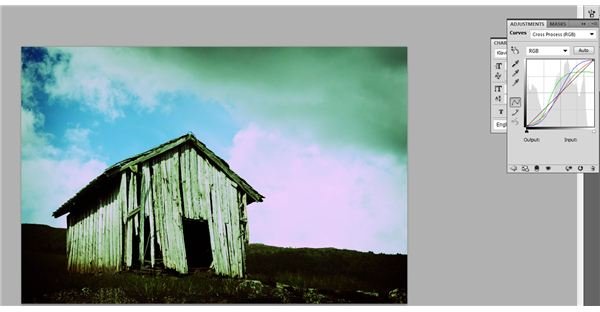
On that layer, create a curves layer. Curves layers are in the same menu as the level layers you used before.
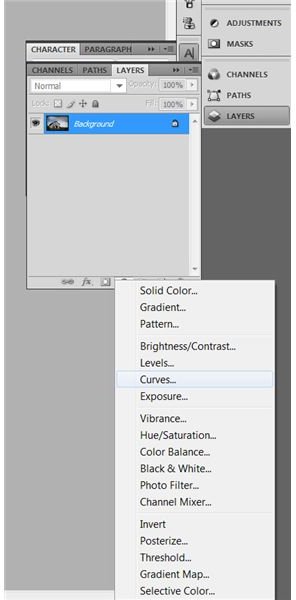
In the drop down box, select Cross Process. You’ll notice that the effect is very overdone. It looks cool, but it’s a bit much, don’t you think? Don’t worry, we’ll fix that too!
Flatten your curves layer - CTRL+SHIFT+E (CMD+SHIFT+E for Mac users) - onto the “Cross Processed” layer. Now you have some options to pick from. In the layer window, there’s a drop down menu that you can select quite a few different options from. For the effect we’re trying to achieve, the best options are Screen, Overlay, Soft Light, Hue, and Color. Feel free to also slide the Opacity settings around a little to achieve the desired effect. This is where it all comes down to your personal tastes, and where you get to have complete control! Don’t be afraid to play around with the settings a little. When you achieve the effect you would like, flatten your image once more. Here are three examples I’ve come up with, as well as the settings listed below them:
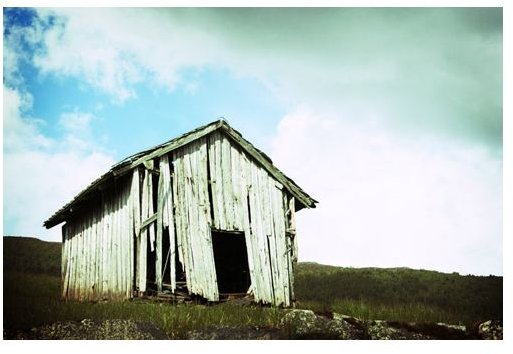
Screen - Opacity 100%

Soft Light - Opacity 50%
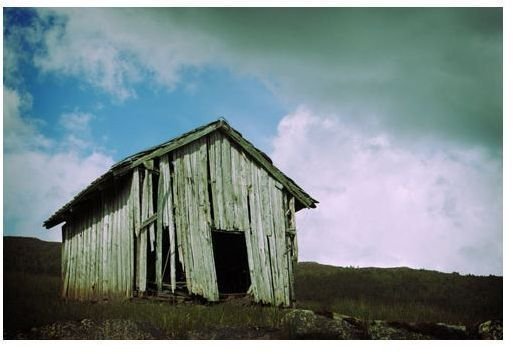
Color - Opacity 55%
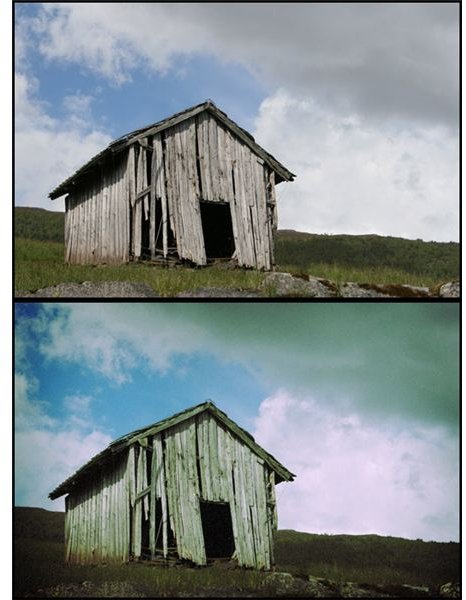
All done!
Here is the before and after of the image we started with! Not too shabby, eh? So go ahead and have fun with some digital cross processing, Photoshop-style!