How to Make Wooden Picture Frames: Easy Do-it-Yourself Photography Craft Project
How to Make Wooden Picture Frames
Wooden picture frames give your photos a dramatic effect. You can play up with your materials for your design and give your photo frame a stylish feature. To get started follow these few simple steps to make your own wooden picture frames.
Materials Needed
Here’s what you’re going to need to make your wooden picture frame:
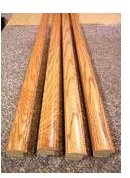
- 1 stick of wood frame moulding - you can buy this from the hardware store. This is sold by stick (5 feet long) with many designs to choose from.
- Picture - take note of the height and width measurement
- Measuring tape
- Saw
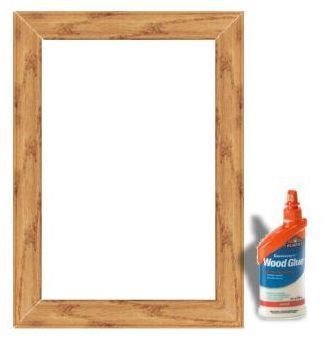
- Wood glue
- Matte piece of crystal (.5 cm thick) - same size as the picture
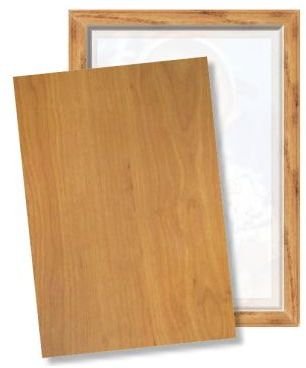
- A piece of thin wood board - same size as the picture
- 3 small pieces (5 x .25 inch) of thin wood
- Screwdriver and tiny screws
- Any kind of frame hook for hanging
- Varnish and paintbrush
Let’s Get Started
See to it that all needed materials are at hand.
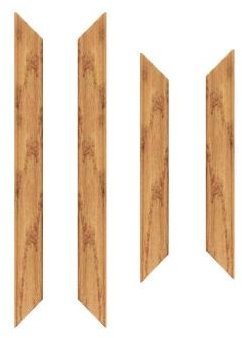
Step 1: A wooden picture frame is made up of four moulding sticks. Measurement of these sticks will be based on height and width of your photo. Now, cut the wood frame moulding into four with diagonal edges. Make sure that the diagonal cuts are equal to all edges.
Step 2: Connect the edges together using the wood glue to form a rectangular picture frame. Let it dry for 20 minutes.
Step 4: Place the crystal sheet at the back of the frame followed by the picture and the wood sheet.
Step 5: Hold the wood sheet cover in place using the 3 small pieces of wood (.5 x .25 inches) and screws as shown below. Place the hook at the top center part.

Step 6: Now, to get that rustic old wood feel, brush the frame with varnish and let dry for a couple of hours. After that, you are ready to hang it on your wall.

We’re Done
Once you get all these steps right, you’ll pretty much be happy with the result. It sure would be fun to work on a decorative project for your home. You can try out various designs and you can base it on the hue and color of your picture or the color of your wall. Black and white photos and Polaroid photos go really well with light toned frames while colored photos are excellent with darker frames. Enjoy making your very own wooden picture frames.
For more do-it-yourself photography craft projects, check out the DIY Photography section of Bright Hub’s Digital Photography channel.