Corel Painter X photo editing tips for the pro or amateur photographer. Learn the basic workflow to quickly edit your images for that extra professional quality. These tips also work for Corel Painter 11.
Mastering the Photo Editing Workflow in Corel Painter X
I used to believe that editing photos once they are taken was something that only amateur or unskilled photographers needed to rely on. I thought if you were good enough at taking pictures, then you shouldn’t really need to edit them. I very quickly realized this was not true.
Professional photographers in any industry have long been flexing their photo editing muscles in a variety of software programs . This can be done for many reasons and purposes, but almost always leads to the overall goal of turning good photos into fantastic ones. Just imagine the photo editing workflow for those in the business of making Hollywood look good.
Over the last 6 years, I have narrowed and honed my workflow in Corel Painter into two possible “paths”, and which I use depends on whether the image is panoramic (such as landscapes), or zoomed in (such as portraits and macro photography). Both of these are very easy, and I will teach you a bit of both of them here.
Before and After Photo Editing

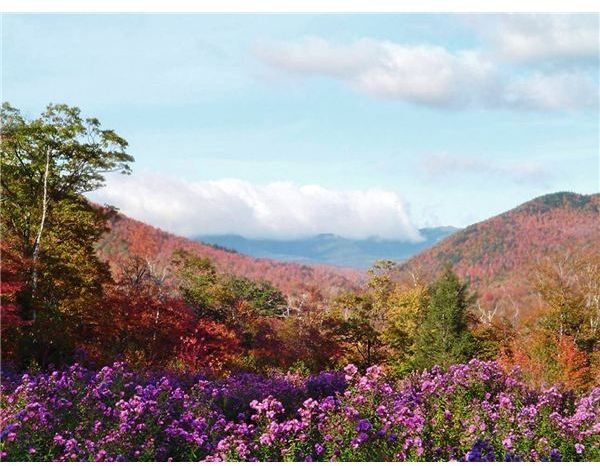
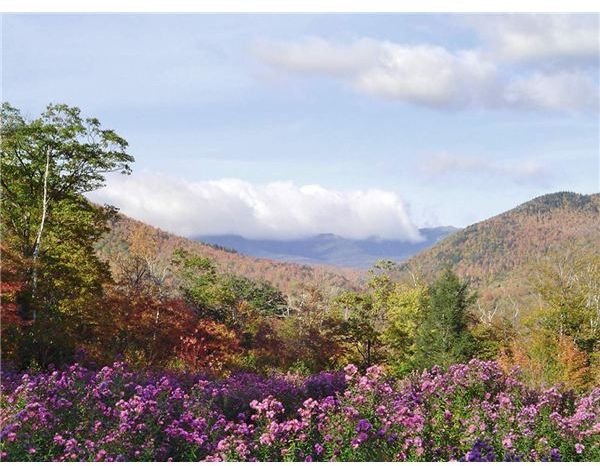
Editing a Landscape Photo
Say you took a picture of a mountain meadow while hiking this summer and you are fairly proud of it. You’d like to have it framed or printed out as beautifully as it can be, but the colors don’t seem to really match the brilliance you saw while you were hiking, so you’d like to adjust them.
This is very easy to do and takes very little time, which is the reason I favor working with landscape photos.
Load the photo onto your computer and open Corel Painter. When the dialog box comes up, select Open an Existing Document, find your picture, and select Open. You will now have the image ready for editing in the center of your workspace.
Make sure the Underpainting dialog box is open by going to WindowsShow Underpainting. Here, you can adjust the hue, saturation, contrast, value, brightness, and more. Unless I want to turn my photos into paintings, I don’t normally mess with anything besides the normal color and tone correction tools.
For my picture, I decided to go with -3 Brightness, 12 Contrast, -3 Hue, 17 Saturation, and didn’t touch anything else. Each photo will be different, and the particular values will depend on what you want from your image, so play around with the sliders for a while until you get the result you like. Then you can close the Underpainting palette.
My image is just about complete. I don’t like to do a whole lot to nature shots, as each step may take it further and further away from looking natural and realistic. However, I do want to fix the depth of field just a bit by slightly fading out the mountains in the back and the sky.
I select the entire layer by hitting Crtl+A, copy it with Ctrl+C, and then Paste it with Ctrl+V. This is a very easy way to simply duplicate the layer. If your Layers Palette is not already open, go to Window–>Show Layers and be sure that you have two layers with the same image, and that the top one is selected.
Editing a Landscape Photo (Continued)
Now go to Effects–>Focus–>Depth of Field. It would be nice if this tool could just do all the work for us, but it is really more like the Gaussian Blur feature in Photoshop. Adjust the Min. scale as much as you’d like, but try not to go overboard. I set mine to 8.6 on Image Luminance.
Now, it will blur all of the image, but don’t panic. This is why we created a duplicate layer. Now you need to take the eraser tool, set it to about size 30 soft, and lower the opacity to about 20%. Now gently erase from the middle ground to the foreground of your image. And then run over the foreground with the eraser one or two more times. This will clear away the blur, and create a gradual depth to the image. There are much more complicated ways of doing this, but why make things more complicated than necessary?
Now you have adjusted this nature shot, and it is perfect for printing or sharing with friends.
Before and After
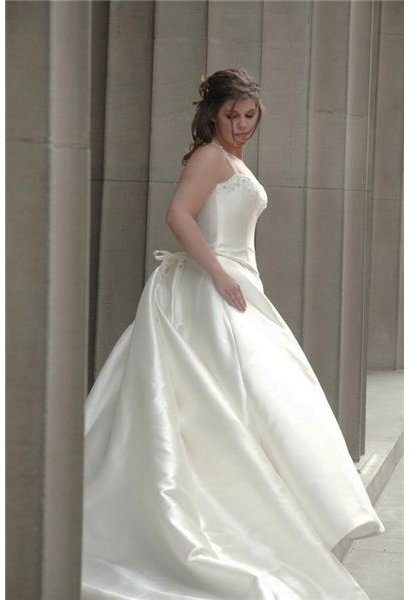
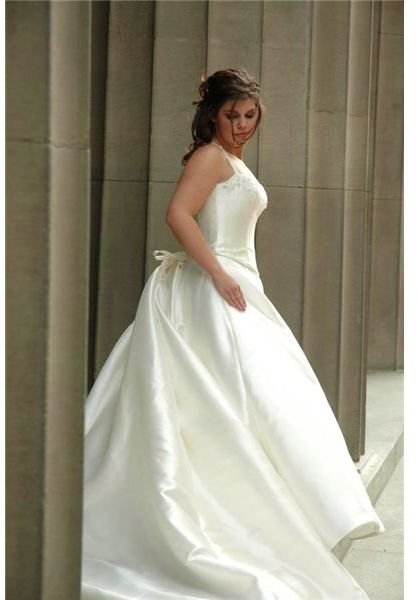
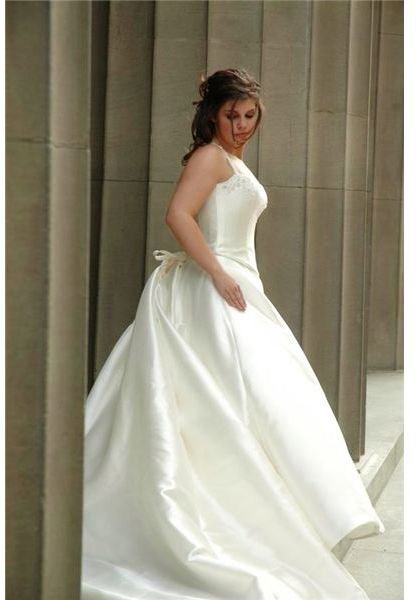
Editing a Portrait
Editing a portrait does require a few more steps than what editing a nature shot might, but it is still pretty easy. As usual you will need to open Corel Painter and then the file you want to work with.
As with other images, you always want to start off with color and tone correction. But you want to be extra careful with portraits, so I always make a duplicate of the layer before changing anything. Then you will need to adjust the brightness, contrast, hue, and saturation until you are happy. Don’t worry too much yet about details like blemishes or achieving glowing skin quite yet. Just get the overall color and tone.
Obviously, the focus of bridal shots is the bride, so it is important to make her glow and look flawless in these images, but you need to do so with a natural touch. To do this, I work on each part separately.
For the dress, I create a new layer, use the airbrush tool Soft Airbrush 20 set to about 15%, and paint over the entire dress using white. Once that is done, I change the layer’s blending mode to Soft Light. You may need to adjust the layer opacity and erase a few odd looking places, but it creates an instant glow to set the dress apart from the background.
Now I want to work on lightening the face and evening the skin tone. To do this, I use the Erasure tool set to Bleach on about 7% opacity. The size will depend on how large of an area you will be working on. For this part, be very careful not to over lighten shadows or cause a plastic look. This step is to bring out highlights and add a glow, not overpower.
You can also use the Soft Blender 20 set to 6% opacity to clear away any blemishes on the skin, and alternate back to the Bleach tool to lighten the area, creating perfect skin very quickly.
Using Corel Painter to Edit Photos
Your best friends in the photo editing workflow with Corel Painter are the Underpainting and Layers Palette, and their trusty sidekicks are the Blur, Blend, and Bleach Tools. You always want to start off with some overall adjustments in the Underpainting box, and then move on to fine tuning if the changes aren’t enough to satisfy. Remember that when in doubt, duplicate the layer! Then you can make adjustments and tweak all day long if you wish, without fear of ruining a thing.
Once you have perfection, it is always a good idea to have an objective eye look it over and tell you what they think. It is easy to go overboard or ignore something after you’ve been working on the same image for a while, so get fresh eyes to chime in before you run off to have it framed.
Other Examples Using Photo Editing in Corel Painter