How to Capture and Apply Editing in PaintShop Photo Pro X3 - Image Editing Tutorial
Applying Changes to Multiple Photos
In previous versions of Paint Shop Pro, if you wanted to quickly apply the same collection of edits to an entire group of photos, you had to first create a script and then run that script against the files you wanted to change. A new feature in version X3 lets you bypass the script creation process with a functionality that is very similar to the “copy and paste” method found in applications like Microsoft Word and Excel.
Now, we’ll take a look at how to use the Capture and Apply editing tools.
Capturing Edits
To capture edits made to a particular photograph, you really don’t have to do anything special. Whenever you edit a photo, Paint Shop Pro remembers the sequence of tasks you performed on that image until you exit the program. It’s important to note that all captured editing processes will be deleted once the software closes, so if you’re performing a series of editing tasks that you think you’ll want to use again at a later date, it’s a good idea to go ahead and create a script which you can call up again at any time.
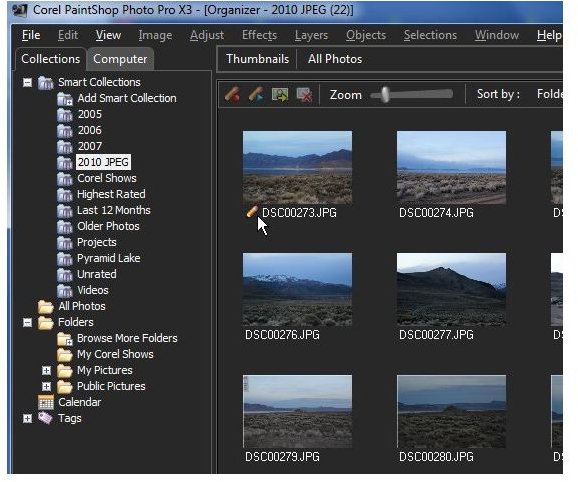
Any photo that you’ve edited and saved in the current session of Paint Shop Pro will have a small pencil next to the file name of the thumbnail image in the Organizer. The screenshot at the right shows how this appears. (Click any image in this article for a larger view.) You will have to save the changes made to a photo first in order for the sequence of edits to be marked as captured.
Applying Captured Edits
Once you’ve edited and saved a photo, you can apply the changes made to that file to one or more other photos with just a couple of clicks. To do this, follow these steps.
Step 1: In the Organizer, right-click on the photo that has already been edited and select Capture Editing.
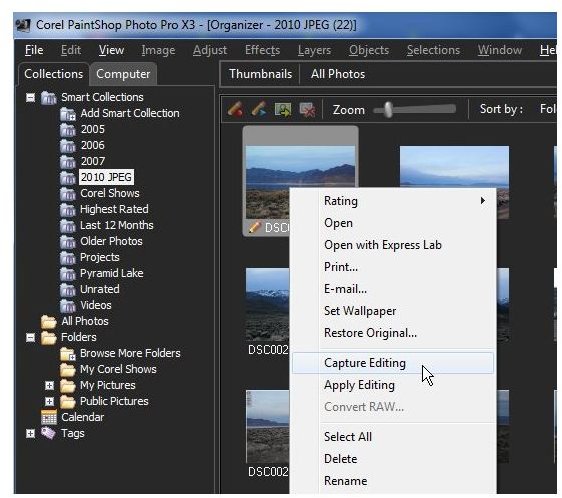
Alternatively, you can select that photo in the Organizer, and then click on the Capture Editing icon in the Thumbnail toolbar.
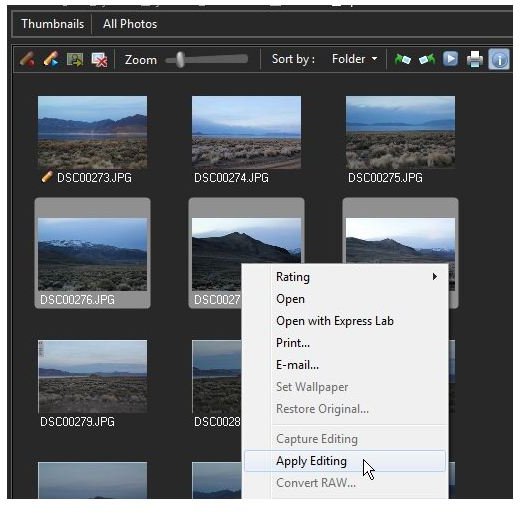
Step 2: Select all of the photos to which you want to apply this collection of edits. Note that holding down the Ctrl key will let you select multiple photos. Once all of the photos have been selected, you can either right-click on one of the images and choose Apply Editing or click on the Apply Editing icon in the Thumbnail toolbar.
Note that you can only apply edits to closed files and that any changes applied will overwrite the original image. So, if you want to keep your original photos intact, you may want to make a copy of them all before using the Apply Editing feature.
For more tips and tricks, be sure to check out the other items in Bright Hub’s collection of Paint Shop Pro tutorials and user guides.