Learn How to Change Hair Color with Photoshop - Photo Editing Software Tutorial
The Crowning Glory
Hair as the crowning glory is a significant aspect of our physical appearance. Frequent change of hair color using dye can make hair more prone to thinning and hair damage as effects to the chemicals used. So before you rush to the hair salon to change your hair color, try this tutorial and see how you would look in different shades.
Photo Editing Tools
In this tutorial, you will learn how to change your hair color using Photoshop CS3. You will be using Curves to adjust the brightness and contrast of the image, the Magnetic Lasso Tool as your selection tool, Color Balance Adjustment for solid hair color and Gradient Fill Tool for blending hair colors.
Changing Hair Color Step by Step Process
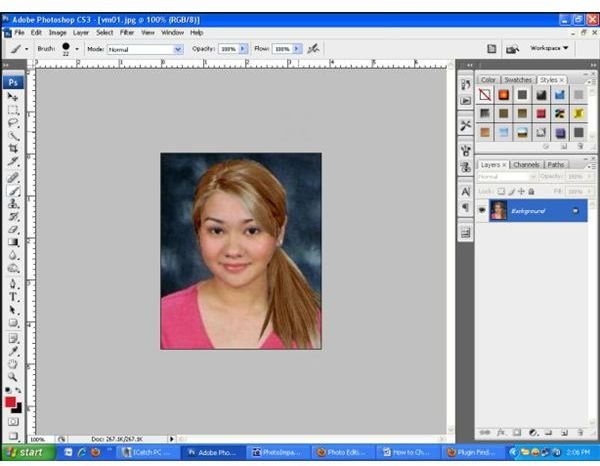
Step 1: Choose the photo you want to edit. You can do this by pressing Ctrl O and then look for the location of the file.
To make sure that you will not overwrite your original photo, press Shift Ctrl S to save it as another file and rename it.
Step 2: Now we need to make some adjustments to the brightness of the photo so that strands of the hair are more visible. Go to the drop down menu found on the upper area of your screen. Click Image > Adjustments > Curves.
You can simply use the shortcut of Curves which is Ctrl M but it is better that you know where it is located just in case you forget the shortcut keys.
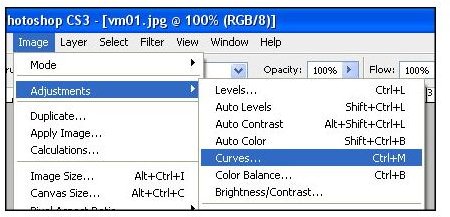
In the Curves pop-up window, click the center of the diagonal line and bend it a little by dragging up to increase the brightness of your photo.

Step 3: Now that we have a brighter photo, we can start using the Magnetic Lasso Tool in the icons menu found at the left side.
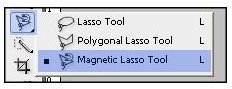
A Magnetic Lasso Tool options will appear at the top of your screen. We will be using the Add to selection to start outlining the hair. The excess selected areas will be later removed using the Subtract from selection. Change the feather pixel size to 5.
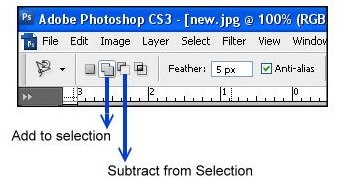
Step 4: Start using your magnetic lasso tool by clicking once at the edge of the hair. Simply lengthen the lasso tool to outline around the hair. It will automatically magnet to the edges. Clicking is also helpful to in order to direct the lasso through the narrow and curvy areas. You should outline around by connecting back to the point where you started.

If there are unwanted areas being selected, you may remove it by outlining that area using Subtract from selection. If you are not contented with your selection, you may do it again by pressing Ctrl D to deselect.
One Solid Color or Multiple Blending Colors
Step 5 and Step 6 are different options. You may follow Step 5 if you want a single dominating color or you may skip it and follow Step 6 for multiple blending colors. You may also try both, one after the other.
Step 5: Now, to change your hair with solid color, press Ctrl B to open up the color balance pop-up window.
 This time it is your turn to experiment with these colors, just move the sliders to change the color. You may also change the color of the shadows, midtones or highlights by clicking the radio button under tone balance. Make sure that Preserve Luminosity is checked. After clicking OK, press Ctrl D to deselect selection in order to view the effects clearly.
 If you don’t like your chosen color, use the Ctrl Alt Z which is the undo multiple previous actions. Press it twice to bring back the selection and to undo color change. Then, you may try another solid color or proceed to step 6.
Step 6: Make sure that the hair is still selected. Now we need to click the fill icon at the icons tray and choose the Gradient Tool as shown below.
 At the top of the screen, click the arrow of the gradient color to bring down more selections. Choose a color combination. You may also select from different gradient color sets as highlighted below. Change the mode to Overlay and decrease the opacity to **35-80%.**You may later undo and change the opacity if the color is too light or too strong.

Now point your cursor at the top of the photo and then drag it all the way down across your hair.

As mentioned in Step 5, you can always undo your previous actions using Ctrl Alt Z to try another blend.
 Changing your hair to solid color is a helpful way to see how you look like especially if you are planning to dye your hair.
Just a Reminder
Photo editing tutorials are guides to get specific effects but the key to learn best with Photoshop and other editing tools is to practice by exploring and trying out each effect. Just always remember to save the image as a different file before you start your editing. You don’t have to worry about testing all the effects, after all Ctrl Alt Z is very useful.