A tutorial on how to use selective desaturation with the free, online photo editor, Picnik.
Picnik is a fun, free and popular online photo editor . Users can upload their photos, add text, and apply neat affects to create a whole new image. One really fun feature that users can do on Picnik is called selective desaturation, which changes a colored picture to black and white, then allows the user to selectively add color back into the photo.
This photo editing technique is very fun and classy, as well as extremely easy to use.
To perform selective desaturation on a photo, you must first choose a photo and upload it onto Picnik.com. To upload a photo, select ‘Get started now!’ on the main page.
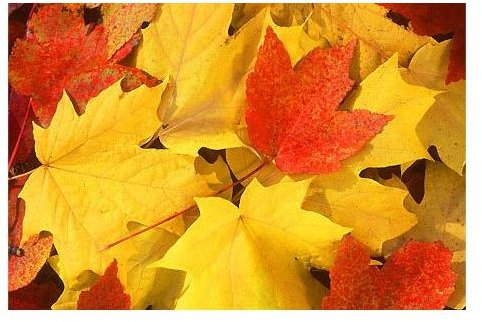
I chose to use selective desaturation on a picture of leaves, as seen below.
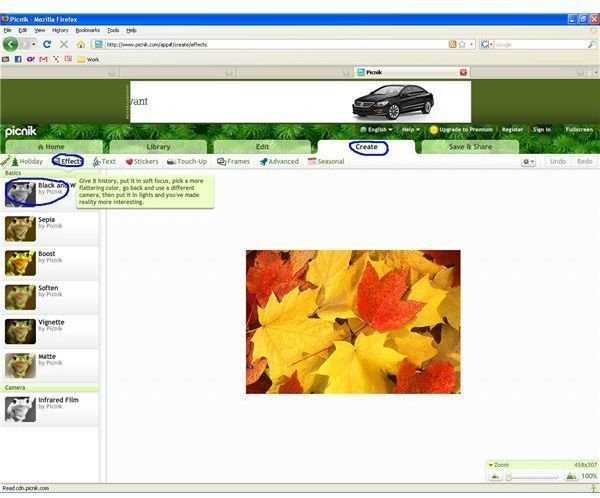
Once your photo is uploaded, click ‘Create’ on the top toolbar. Then, click ‘Effects’, which is circled in blue in the image below. At the top of ‘Effects’, which will be on the left-hand side of your screen, there is the option ‘Black and white’, also circled in blue. Click this option.
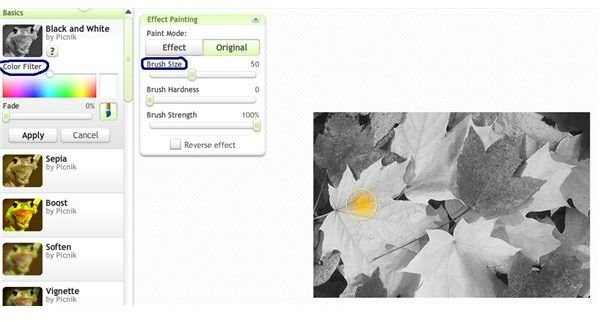
Your image will turn black and white right when you click the option, and you can begin to selectively bring back color to your image. You can change the brush size, the brush hardness, and the brush strength.
If you’re using a mouse with a trackball or if you have unsteady hands, it’s a lot easier to use a larger size brush and go over the color that way. Then, go back with a smaller brush, zoom in the image, and go back over any mistakes.
If you want to change parts of a colored image to black and white, you can click the ‘Reverse effect’ box. Use the brush to selectively change some of the color on your image to black and white.
If you mess up, just click ‘Original’ and go back over the spot where you wish to remove color.

Your final image should resemble the image above. Once you have a knack for using selective desaturation, you can edit extremely tedious images and amaze your friends or make some extra money by selling prints edited this way.


