Get out that box of old negatives and start scanning them onto a CD to save for the future. With these easy to follow tips anyone can scan negatives for print or to save onto a CD.
Scanning Negatives
The days of film are fast fading into history. Film was great in its time and there are still some photographers who prefer to work with negative film, but for most, the digital age has replaced the need for celluloid. But the question is, what to do with all those negatives stored away in boxes and binders. Negatives will deteriorate with time. How fast they fade will depend on how they are stored. So now is the time to save all those images onto CDs. The storage is simpler, smaller and easier to re-archive in the future when new technology gives us better storage options. Follow these simple steps and in no time all those images will be safely scanned onto CDs.
Scanning Supplies
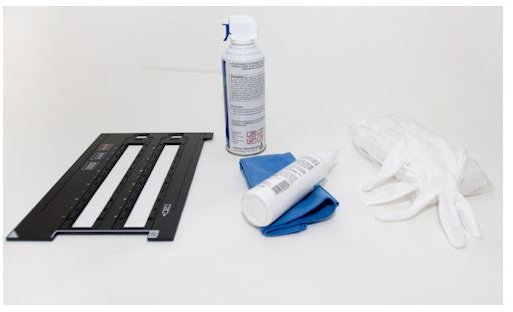
Here are the items to have on hand for scanning.
- Dust Off or any similar canned air
- Cotton gloves
- Scanner glass cleaner
- Lens cleaning cloth
- CDs and covers
- CD burner
- Scanner
Scanning Preparation
Before the actual scanning process , there are some preparations to be done that will make the workflow simpler and therefore save some time.
- First thing is to decide file size . The average file size can be determined by what the image will be used for. If images are to be saved for print later, a TIFF file with a good resolution will be needed. A good resolution is 2400 dpi (dots per inch) for archiving negatives that may be enlarged later.
- After the size is determined, it is easy to calculate how much storage (CD-DVDs) will be needed. It is important to figure this now, before scanning, so as not to run out of CDs in the middle of scanning. To do this, take the size of an average scan and multiply that by the number scans to be made. This will give you the amount of storage needed.
- Label CDs with the image categories, i.e. years, family members, etc. By doing this now, when it is time to burn the CDs it will go faster. Labeling before scanning also helps to organize the images into groups for easy retrieval later. This is one of those things that will be appreciated later when an image is needed.
- Separate all the negatives into sizes, i.e. 35 mm strips, 4x5 sheets, etc.
- Dust off the negatives that are first to be scanned.
- Clean the scanner glass
Now that everything is prepared, it is time to scan negatives.
The Scanning Process
The scanner is on, the glass is cleaned and the negatives are dusted. Make sure to have cotton gloves on so as not to put fingerprints on the negatives or scanner glass. Depending on the film scanner and the scanner software, the following steps will vary. Some scanner software gives you more options for editing than others.
-
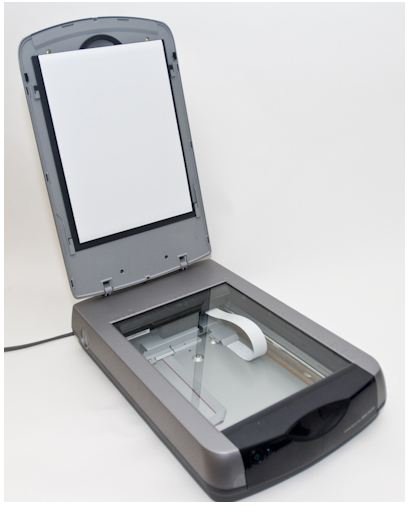
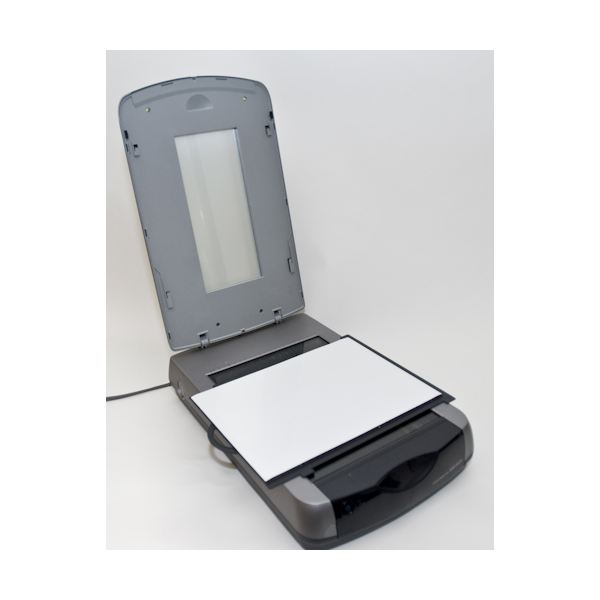
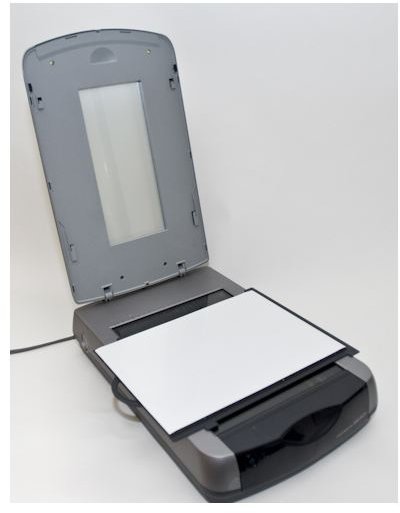
Make sure the scanner plate that is in the top lid is removed. This will reveal a backlight for scanning negatives. This is for flatbed
 Advertisement
scanners if your scanner is a single strip loader, skip this process (Figure 1)
-
Make a folder on the computer for the scanned negatives.
Advertisement -
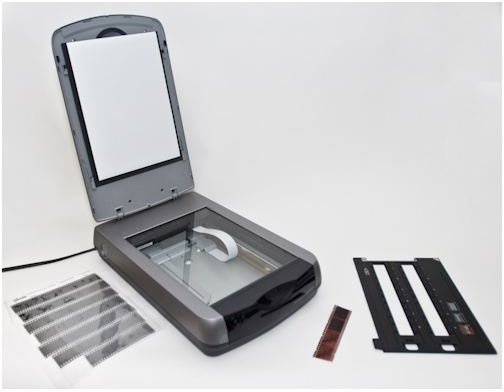
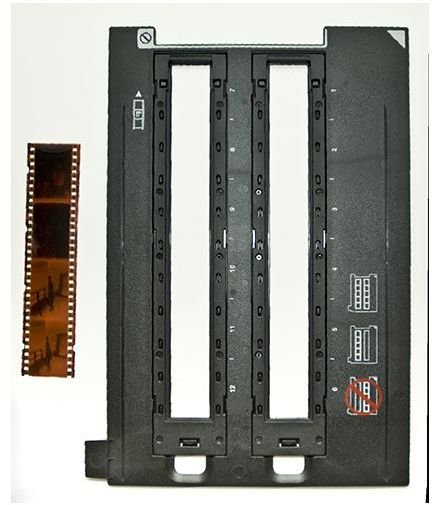
Put the negatives in the film carrier, place on the glass and shut the lid. Make sure the glass is free from lint or dust and spray the negatives with the canned air before placing on the scanner glass. (Figures 2 & 3)
 Advertisement
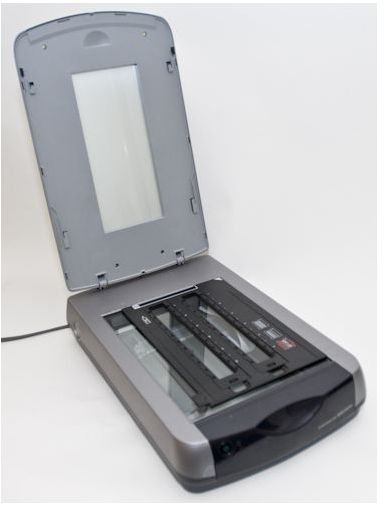
-
Open your scanner software.
Advertisement -
Under Original, set the Document type to Film and the Film Type to Color Negative. (Figure 4)
-
Under Destination, set the Image Type to 24-bit Color, Scanning Quality to Best, Resolution to 2400 dpi, Document Size to Original and the Target size should be Original. (Figure 4)
Advertisement -
Click the Preview Button. This will give you the image of the negative on the screen. (Figure 5)
 Advertisement
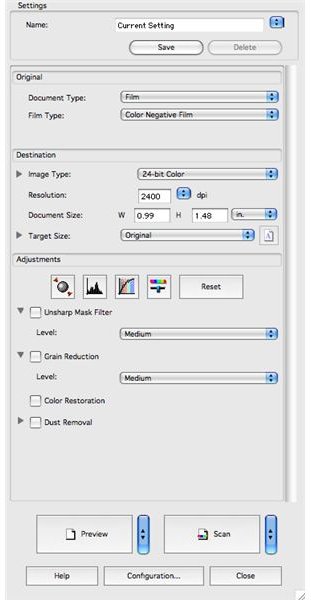
-
Depending on your scanning software, there should be image adjustments. If there is a need for color adjustment or sharpening, do it here. It is best to sharpen in Photoshop or another application after the scan. Unless there is an overall color hue in all the negatives, it is better to make all adjustments after scanning.
Advertisement -
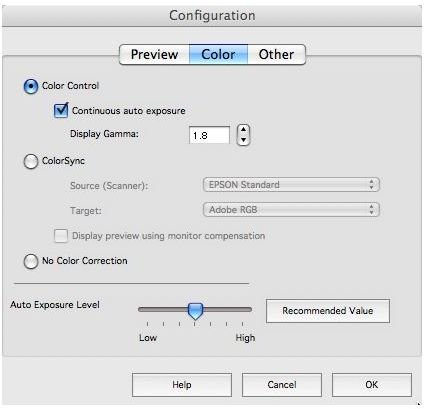
If there is a Configuration Button or another setting button that lets you configure how the negative strip is scanned, set that here for scanning All or Batch. Most film scanners will scan the strip automatically. (Figure 6)
-
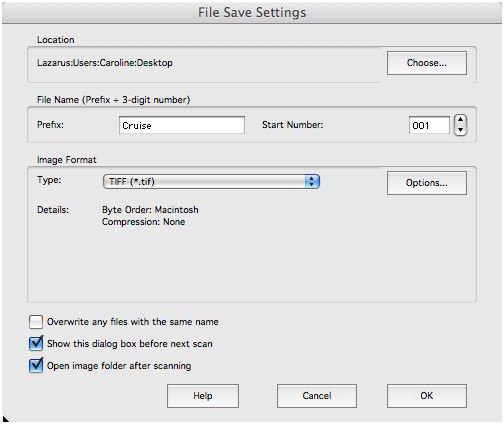
Click scan. A dialog window will open with similar options to Figure 7. Choose the location where the images will be saved, name the files, number the files, set the Image Format to TIFF and click OK.
Advertisement
File Storage
All the scanned images will end up in designated files on the computer. The next step is to burn CDs for all the files. Use these scanning tips and the process will go smoothly and in no time all those negatives will be saved and organized for the future.
Scanner Back Plate On and Off