How to Add or Replace a Background to a Digital Photo with Paint Shop Pro

Changing a Solid Color Background
Based on some discussion from the comments section of the tutorial on using the background remover on Paint Shop Pro, I thought it might be helpful to give some more detailed explanation on changing the background of a digital photo when that background is a solid color. Sometimes when trying to describe the details, the process starts to sound a lot more complicated than it really is so I am hoping that a few screenshots along with the instructions will help.
If you’re actually starting with a photo that has a solid background, you probably won’t even need to use the background remover plugin and can just use some of the other tools found in Paint Shop Pro. The plugin is really for photos that have a more complicated background that is harder to distinguish from the main subject of a photo. This guide will look at some easier ways that you can change the background when it is less complex in nature.
Getting Started - First Steps to Take
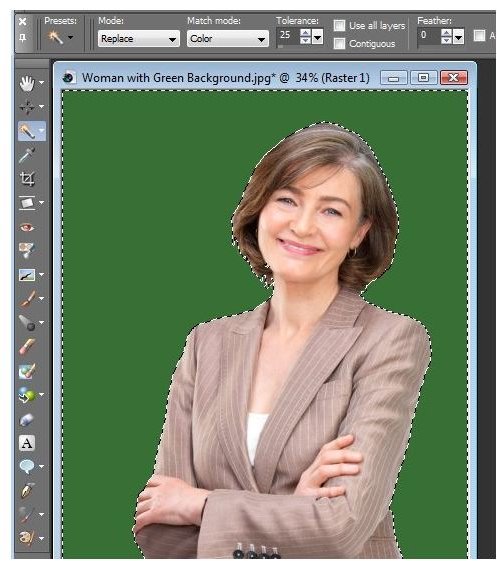
For this tutorial, we’ll start off with a digital photo of a woman that has a solid green background as shown below. (Click any image for a larger view.)
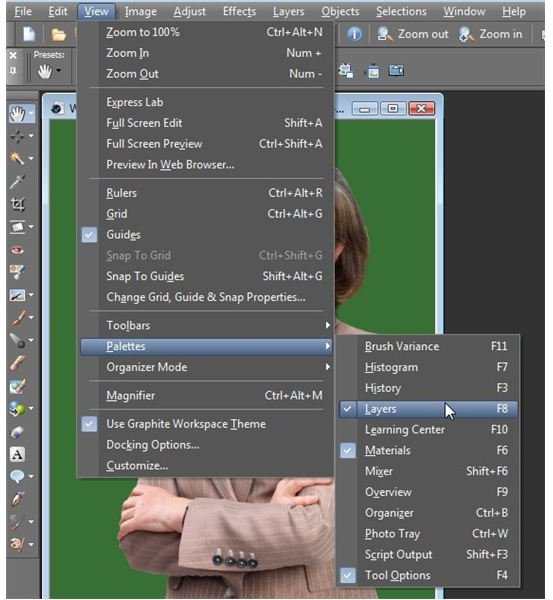
Before getting started, make sure that you have both the Materials and Layers palette open since we’ll be referring to them at various points in the tutorial. If they’re not currently visible, you can toggle them on by going to the View menu on Paint Shop Pro’s main toolbar, selecting Palettes, and making sure there is a check mark next to Materials and Layers.
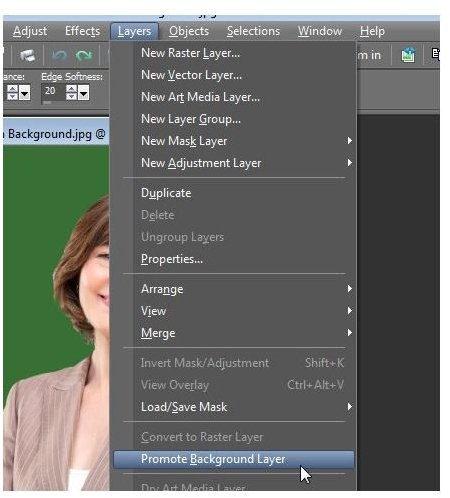
Also, while it isn’t necessarily needed for every example we’ll be showing, it’s a good idea to go ahead and convert your photo to a full layer rather than working on the default background layer that is standard for JPEG images. So, after opening your photo in Paint Shop Pro, go to the Layers menu on the main toolbar and select Promote Background Layer.
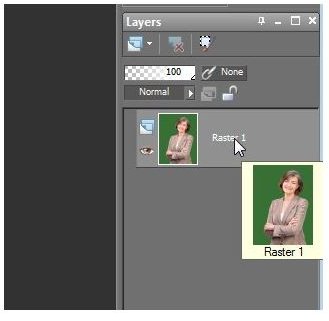
After doing this, your photo will show up in the Layers palette as a raster layer labeled Raster 1.
Now, we can move on to showing how to change the existing background or add a new one.
A Simple Color or Pattern Change
If the only thing you want to change about the background of the photo is the color or if you want to use a pattern that comes preloaded with Paint Shop Pro, walk through these steps.
Step 1: Begin by selecting the Magic Wand tool from the side tool panel of Paint Shop Pro.
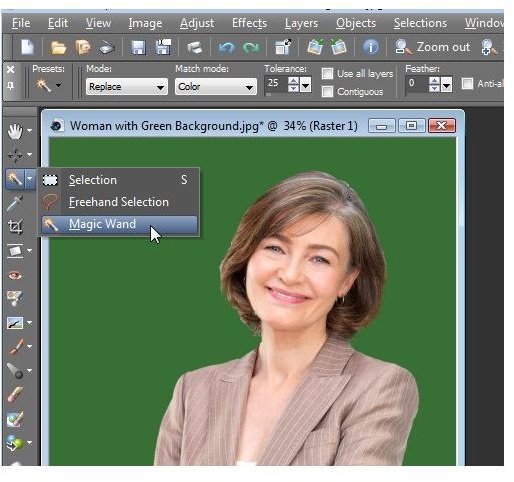
A new toolbar for the Magic Wand will appear underneath the main toolbar at the top of your screen. Here, make sure that Replace is chosen for Mode, Color for Match Mode, and that your Tolerance is set to be around 25. (You may need to adjust the tolerance level depending on the photo you are working with, but 25 is generally a good area to start experimenting with.) If you click the screenshot above, you should be able to see these settings chosen in that larger view.
Step 2: With the Magic Wand selected, click on any part of the solid color background. It should select the entire area and surround it with dashed lines as shown below.
Continue on to the next page for the rest of this tutorial on replacing backgrounds in digital photos with Paint Shop Pro.
Simple Background Changes (Continued)
Step 3: Now, shift your attention to the Materials palette. Click on the Foreground Color.

This will bring up the Material Properties window where you can choose a new color, gradient or pattern.
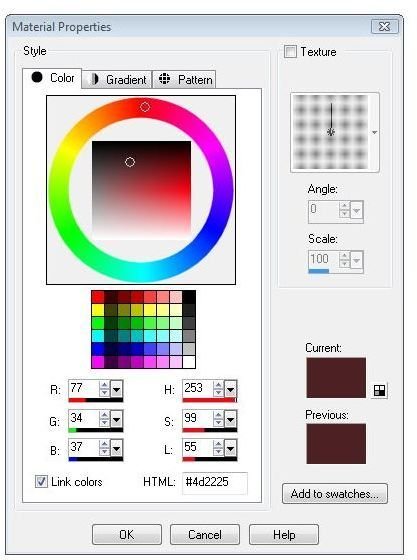
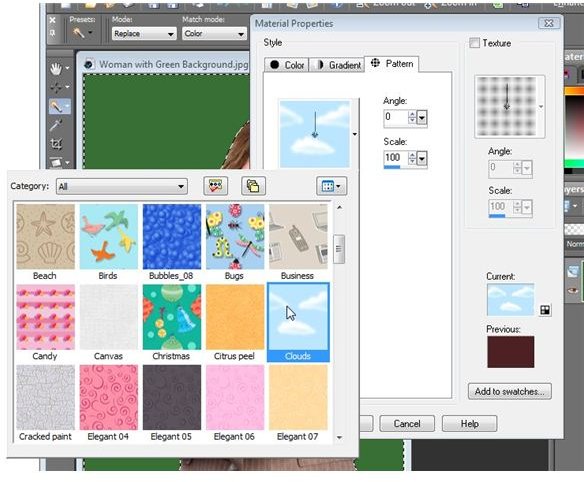
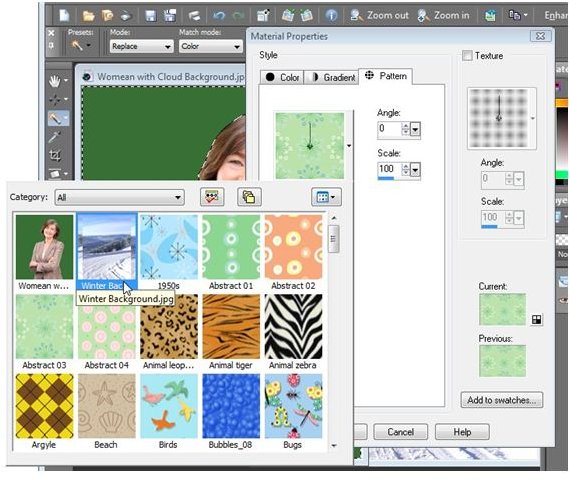
If you just want a new color, you can select it here. However, for this example, we’ll go a little further and use one of the preloaded patterns that comes with Paint Shop Pro. So, click on the Pattern tab.
Once on the Pattern tab, click on the default pattern and a window containing other preloaded pattern choices will become visible. Scroll through and select the one you like. Here, I’ll pick the Clouds pattern.
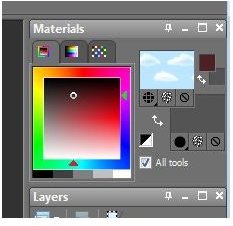
When finished, click OK and you’ll be returned to the Paint Shop Pro main interface. Note that your photo will not have changed yet. However, the new pattern should be visible in the Materials palette.
Step 4: Next, select the Flood Fill tool from the side tool panel.
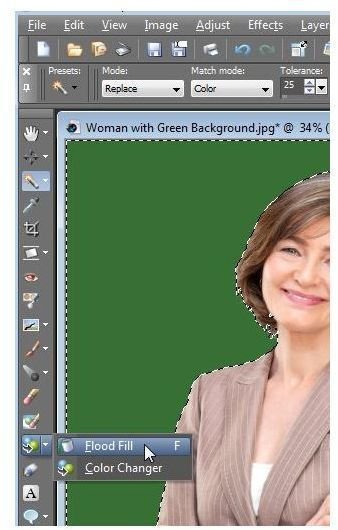
Click anywhere in your selected background area and it will change from the original solid color to the pattern that you’ve chosen.
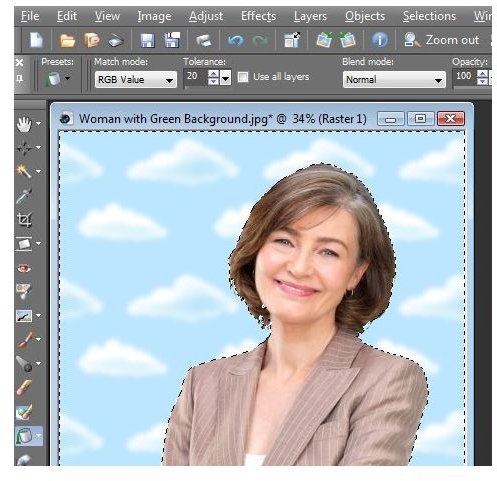
You’ll still see the dotted lines around your selection area. To make those disappear, either choose Select None from the Selections menu or press Ctrl-D on your keyboard. Here’s how our final image appears in this example.

Using Another Photo as a New Background
What if you’d rather use a scene from another digital photo or image as your new background? A lot of times, you’ll have to use layers to combine the two photos. For more information, see this series on using layers in Paint Shop Pro. However, if the photo you want to use as a new background is the same size as the original photo, there is a little shortcut you can use that can save a lot of time.
First, make sure you have both photos open in Paint Shop Pro. In this example, I’ll use the original photo of the woman with the green background from the previous section. Here, I’d like to replace the background with a winter scene that I’ve cropped to be the same size as the original photo.

Here’s the trick – with the new photo open in Paint Shop Pro, it will shop up as one of the patterns in the Material Properties window. So, you can use the steps from the previous section to change the background of your original photo to this new one.
Following the steps outline in the previous section, we obtain the following photo.

For more tips and tricks, be sure to check out the other items in Bright Hub’s collection of Paint Shop Pro tutorials.
This post is part of the series: Corel Paint Shop Pro Photo X2 Ultimate’s Background Remover Plugin
In this series we’ll take a look at how to install and use the new background remover plugin that comes bundled with the Corel Paint Shop Pro Photo X2 Ultimate package.