Image Manipulation with Photoshop
Page content
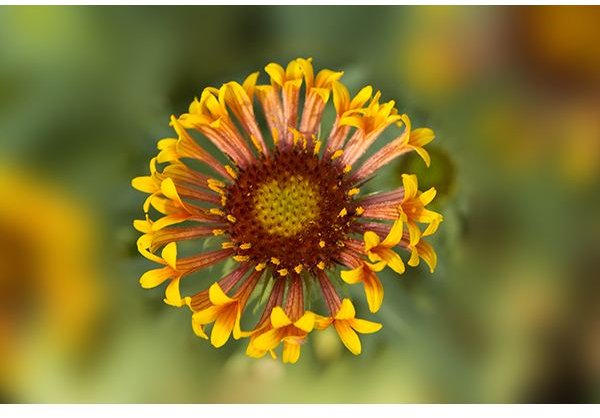
Create Impact with Image Manipulation by Using the Ellipse and Gaussian Blur Tools
Many times images can be improved by drawing the viewers attention to a particular subject. You can emphasize your subject and improve the quality of your picture. This technique works especially well with nature photography, but can be used with portraits also.
The next few steps will walk you through this simple process.
- Open your image in Photoshop.
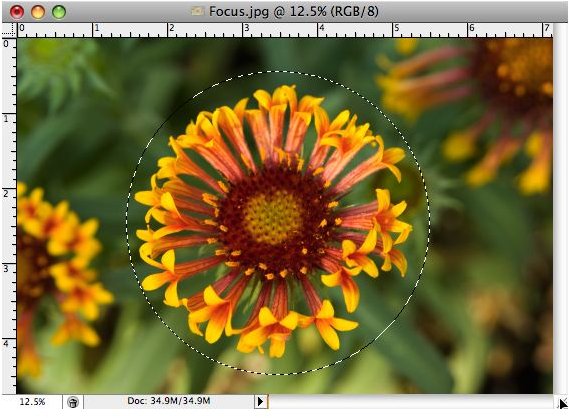
- Use the Elliptical Selection tool and circle the area you want to be the main subject or focal point in the image. (Figure 1)
- Invert your selection so everything else in the image is selected and not your subject by choosing Select > Inverse on the Menu bar. (Shift > Command > I [Mac] Shift > Alt > I [PC]) (Figure 2)
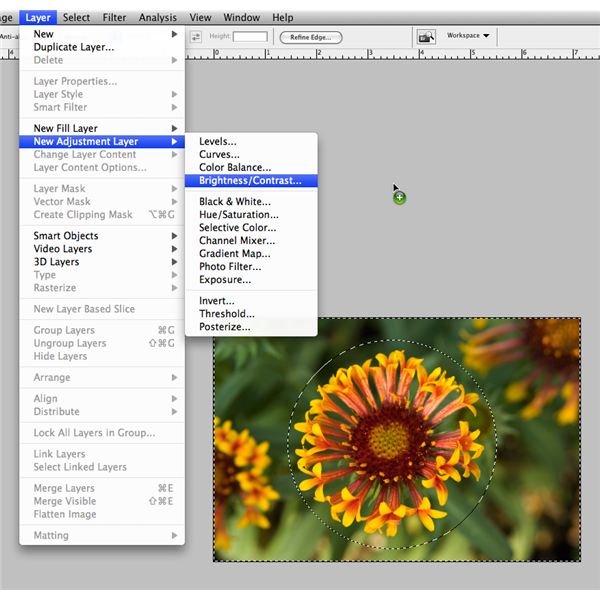
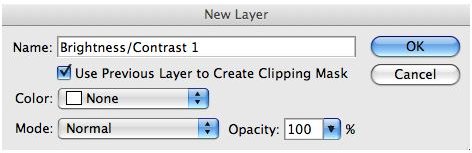
- Brighten the image using an adjustment layer. Choose Layer > Adjustment Layer > Brightness/Contrast. This will give you a layer mask for the background. (Figures 3 & 4)
- Adjust the brightness by eye. A good starting point is around 25-30. This can always be changed. (Figure 5)
- Blur the background by choosing Filter > Blur > Gaussian Blur and start with 100 pixels on the slider. Depending on the image and brightness, this amount will vary. At this point, you can use Curves or Levels to lighten up the whole image. (Figure 6)


Another Variation
Here is another variation on the above method.
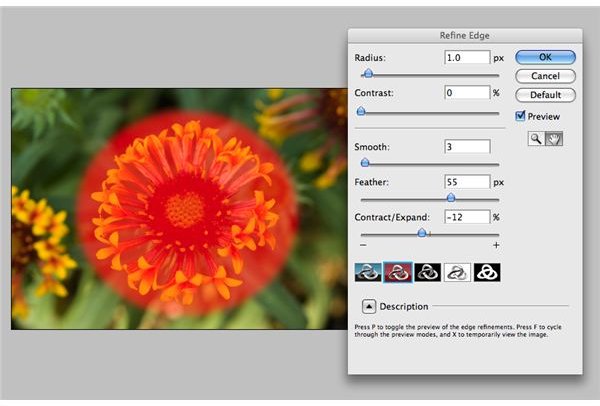
- After you select inverse, refine the edge using the button on the main toolbar. Use these settings: Radius 1 pixel, Contrast 0, Smooth 3, Feather 55 pixels, Contract/Expand -12. (Figures 7 & 8)
- Now, blur the background by choosing Filter > Blur > Gaussian Blur and start with 100 pixels on the slider.
- Brighten the image using an adjustment layer. Choose Layer > Adjustment Layer > Brightness/Contrast, this will give you a layer mask for the background.
- Refine the edge again using the same settings as in Step 1.
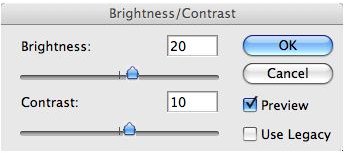
- Brighten the image using an adjustment layer. Choose Layer > Adjustment Layer > Brightness/Contrast. Set the Brightness to 20 and the Contrast to 10. (Figures 9 & 10)