How to Lighten Dark Photos - Photoshop CS3 Tutorial
Introduction
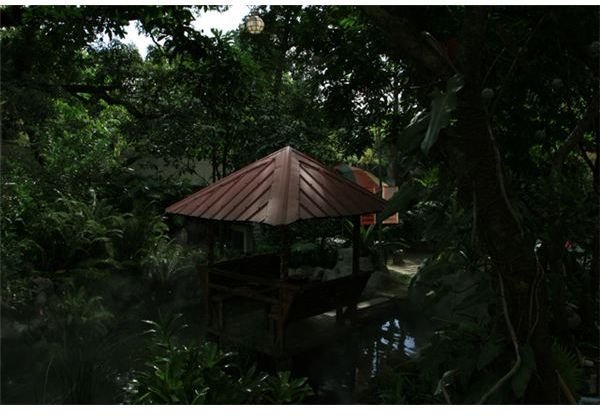
If you’ve taken photos in a low-light environment and you forgot to adjust the necessary settings to add more light unto it, or perhaps you forgot to bring your flash, chances are you have produced dark photos. The good news is you can always enhance these dark photos using Photoshop. There are various ways by which you can do so, and we’re giving you two simple ways.
How to Lighten Dark Photos Using Photoshop’s Shadow/Highlights
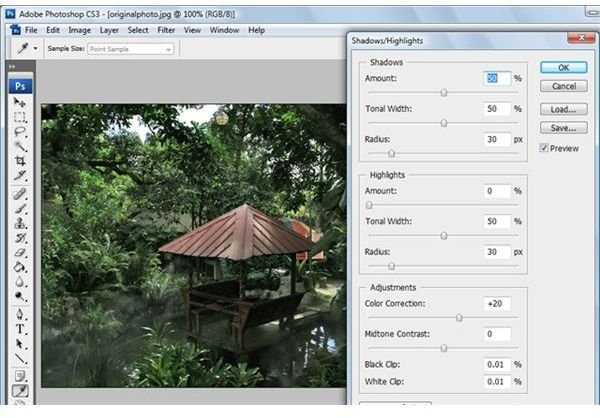
The fastest way by which you can lighten a dark photo using Photoshop is to adjust the Shadow/Highlight feature. It’s a very simple way actually. Here are the steps:
- Open your image.
- Select Image > Adjustments > Shadows/Highlight.
- Adjust the setting for Shadows to a value you want. (Make sure to check out how your image looks after adjusting).
- To sharpen the image, adjust the highlight values as well.
- Click OK.
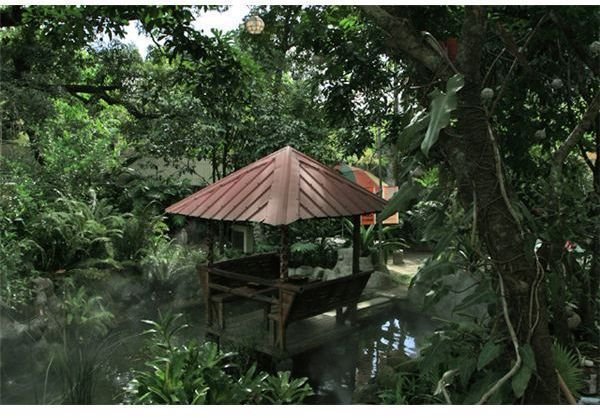
That was easy right? Read on for another easy way of lightening up dark photos.
How to Lighten Dark Photos Using Overlay
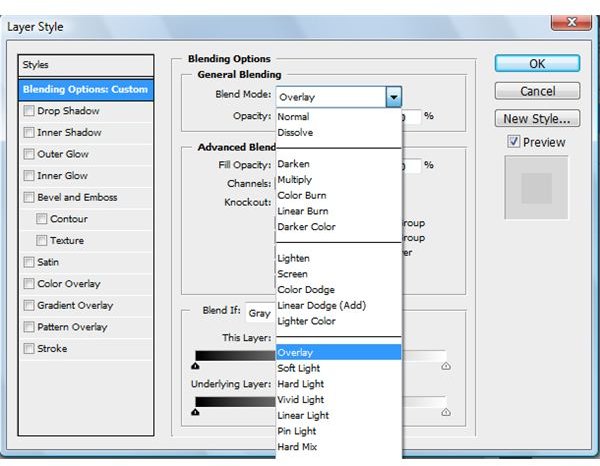
Here’s another simple way of lightening up dark photos using Photoshop. This time we’re going to make use of the Overlay function.
- Open your image.
- Duplicate the Layer, that is Select Layer -> Duplicate Layer.
- Double-click on the duplicate layer you just created.
- Choose “Overlay” from the Blending Option Window.
Easy still, right?
Enhancing the Details and Sharpness of the Lightened Photos
Now, you may have achieved your objective of retouching your dark photos but sometimes doing the two steps may result in not so detailed and sometimes unsharp photos. When this happens you can always do some further adjustment specifically by adjusting levels and other details. Here are some more tips:
Adding some vividness to the lightened photos:
- With the new photo that you’ve lightened open, click Ctrl + M on your keyboard.
- Point your cursor to the top end of the curve and pull it upward or downward.
- Point your cursor to the bottom end of the curve and pull it upward or downward.
Play with this curve until you’ve achieved the quality of photo that you require. Another way of adjusting the quality of the photos you’ve lightened is by adjusting level settings. Select Image -> Adjustment and then select the various settings that you want to adjust. You may select “Auto Adjust” for a quicker way of adjusting photo levels or select individual settings. In this case you may want to select “Hue/Saturation” and adjust the “Saturation” settings a bit. You may also select Brightness/Contrast and adjust the “Contrast” setting. Again, play around with the various settings until you’ve achieved the type of photo that you want for your final output.