Rotoscoping - Photo Editing Techniques
What is rotoscoping?
The rotoscoping technique was invented in 1915 for turning photos and film into images that look more like cartoons or realistic paintings. Rotoscoping is best defined by example. It was most famously used in two Richard Linklater films — “Waking Life” and “A Scanner Darkly.”
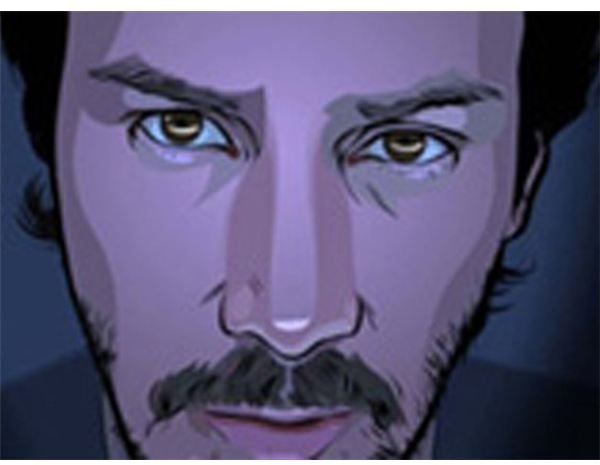
At left a still from “A Scanner Darkly,” an acclaimed dystopian science fiction film based on a novel by Philip K. Dick.
The two movies were the first films to be created entirely with rotoscoping. Linklater used expensive software to link hand-painted film images. The Internet Movie Database reports each minute of the movie required 500 hours of work by 50 animators. They spent a year and a half working on the movie.
The rotoscoping technique was also used in A-Ha’s classic “Take on Me” video and a more recent set of otherwise dull Charles Shwab “Talk to Chuck” ads.
To properly use a rotoscope technique for film, you will need either expensive software or a team of animators, or both. Even the Schwab ads look more digitized than the more imperfect and dreamlike animation of “A Scanner Darkly.”
The rotoscoping effect is more simple for a single image, making a unique piece of art from any photo. There are several rotoscoping techniques. Like most anything, the more time and money involved, the better the results will be.
Here are five rotoscoping techniques, listed from least effective to most effective (and most time-consuming).
Get free software
A free program simply called [Rotoscope](https:// http//webscripts.softpedia.com/script/Image-Galleries/Image-Tools/Rotoscope-28867.html) is available for Windows and Linux platforms. The program automates the “painting” process.
The program is not highly rated by users. Here are some Rotoscope images. They look more like the work of a middle school art student than a professional painting.
Use Photoshop effects
There’s a quick and simple Photoshop rotoscoping technique that achieves a slightly better effect. Open a photo and simply click on the “Poster Edges” filter. It’s in the “artistic” submenu under “filter.” There are several options for heavily blurring the image and imitating various painting styles. There are also sliders for changing various levels under each option. At left is an original public-domain photo and a “watercolor” version with the Photoshop filter (click on image to enlarge).
Get software plug-ins
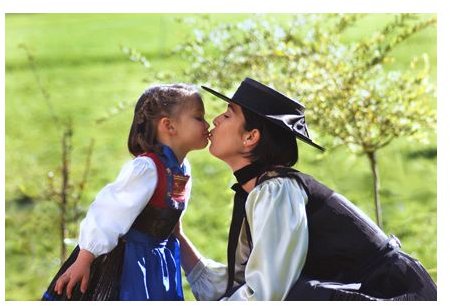
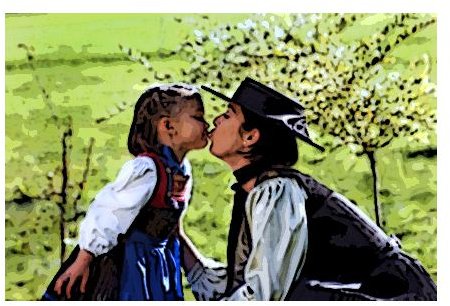
A paid plug-in for Photoshop delivers significantly better results. Sketch Master costs $40 and offers about a dozen different effects. Click here for another image of Keanu Reeves. Note the differences between this Keanu and the Keanu from “A Scanner Darkly.” The perfectly parallel shading lines and other clean effects give away the digitization, but it’s a quick and handy way to create a nice effect with the click of a button.
Spend more time with Photoshop tools
A more effective rotoscoping technique requires more time spent in Illustrator or Photoshop. One distinctive element of professional rotoscoping is the dark line around each face and feature. Start as above with the poster edges filter, then give more definition to your dark lines. This can best be achieved with the pen tool. Create a new layer before starting the process so you don’t mess up the original picture if you make a mistake. Use the pen tool to select the important features and add a 3-pixel pure black stroke. Finally, if you are only rotoscoping a piece of the image, you can nicely separate your subjects from the background with a drop shadow.
Hand-paint the image
Finally, the best rotoscoping technique is the slow process of “hand painting” the photo. This can literally be done with paints or with a slow, meticulous process in Illustrator. The effect is best described in this detailed tutorial, which demonstrates very professional-looking results.