Use Batch Processing to Watermark Entire Folders of Digital Photos in Paint Shop Pro
How to Batch Process Watermarks in Paint Shop Pro
Step 1: The first thing you need to do is create or locate the image you want to use as your watermark. To learn how to make your own, see this tutorial on creating watermarks in Paint Shop Pro.
Step 2: Next, we need to create a basic script that adds a watermark to a single digital photograph. This is a lot easier than it sounds and can be done by following this guide on recording scripts in Paint Shop Pro while using these instructions on how to add a watermark to a digital photograph. (Tip: When saving your script, make sure to give it a name that you’ll be able to easily recognize, such as Watermark 1 or Watermark Signature.)
Now, we’re ready to actually start the batch process.
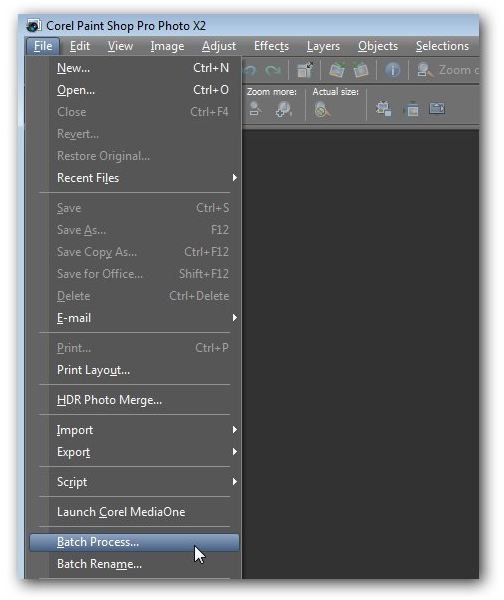
Step 3: From the File menu on Paint Shop Pro’s main toolbar, select Batch Process. (Click any image for a larger view.)
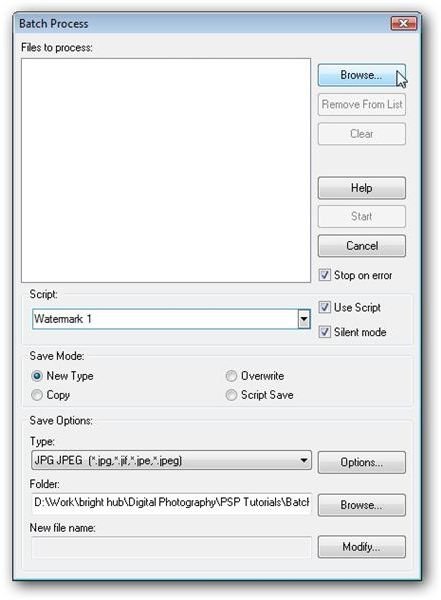
This will open the Batch Process window.
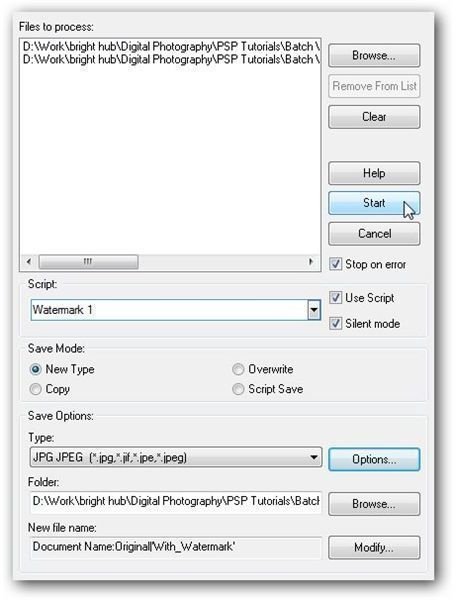
Step 4: The first thing we need to do in the Batch Process window is select all of the files to which we want to apply the watermark. To do this, click the Browse button and navigate to the directory containing the photos.
Select all of the photos that you want to watermark. If you want to choose all of the files in a specific folder, just click the Select All button. Otherwise, you can select multiple photos from the same directory by holding down the Shift key to choose a group of adjacent files or the Ctrl key to pick individual non-adjacent files. If you chose this latter option, click Select once you’ve chosen all of your files to return to the Batch Process window.

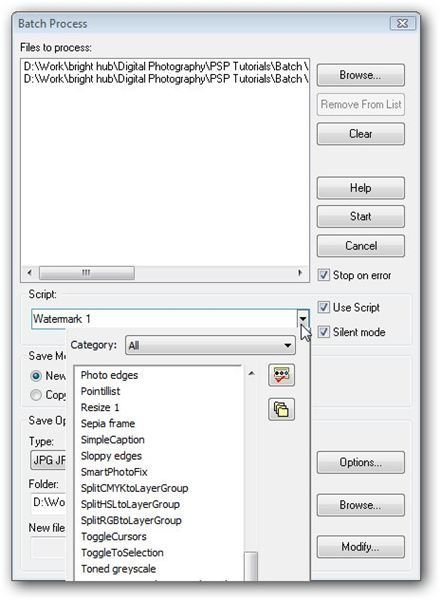
Step 5: Make sure there is a check in the box next to Use Script. Then, from the dropdown box under Script, select the watermark script that you created in Step 2.
If you want the script to process all of the selected images without any user intervention, put a check in the box next to Silent mode. Otherwise, you will be prompted to approve the watermark application for each photo in the batch. Sometimes, that can be a good thing though, especially if you want to verify that the watermark is being placed correctly or if you want to make minor changes to the watermark settings for each photo.
Step 6: In the Save Mode area, decide how you want to save your watermarked images. You have four options:
-
New Type – This is the most basic option. It allows you to choose a new file type for the final image as well as pick a new name and file location for the altered photos.
-
Copy – With this option, you can specify a new name and/or location for your modified photos, but the original image type cannot be altered.
-
Overwrite – This option will run the script and save the new image over the original image. If you want to keep a copy of your original photos, don’t pick this choice.
-
Script Save – Only use this option if the Save command is part of your script or if you don’t want to save the results of the batch processing.
For our batch process, we’ll choose New Type and select JPG as the file type. If you want to make any modifications to the default save choices, click the Options button. In this example, I don’t want any compression to occur, so I’ll change the Compression Factor to 1.
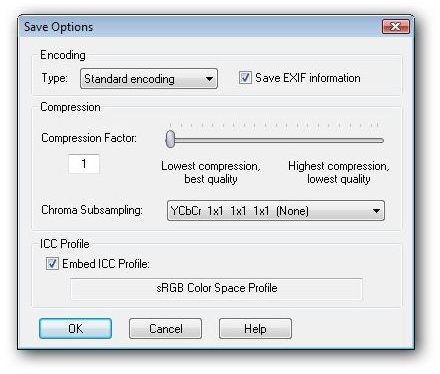
Make any other changes that you would like in this window, and click OK to return to the main Batch Process window.
Step 7: If you want to specify a new folder to save your watermarked images, click on the Browse button and either find and select an existing folder or create a new one.
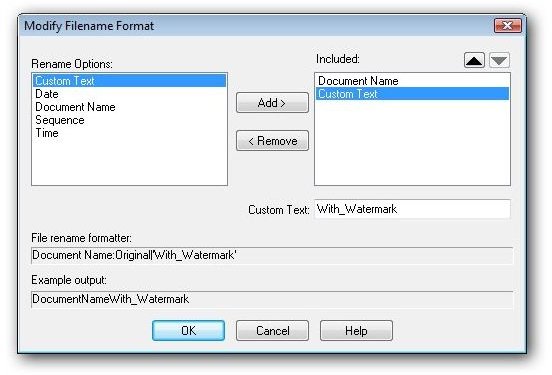
Step 8: To give the watermarked photos a new name so that they’re not confused with the originals, click the Modify button next to the New file name field. Here, you can select from a number of different renaming conventions.
In this example, I’d like to rename the newly watermarked photos by taking the original file name and attaching the text “With_Watermark” at the end. To do this, first move Document Name from the left column to the right one to include the original file name in the new title. Then, select Custom Text and move it to the right column as well. When you do this, a text box will appear where you can type in the additional text to add to the file name. I’ll just type in “With_Watermark”.
When finished here, click OK to return to the Batch Process window.
Step 9: All that’s left to do now is process the batch. Click Start and the batch process will begin to run.
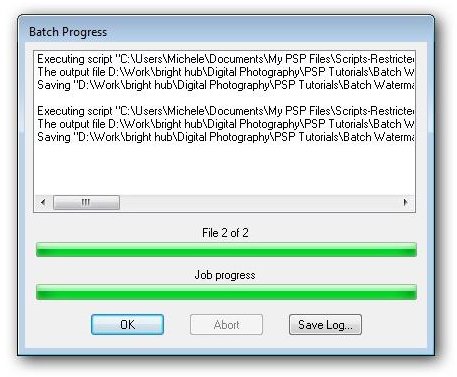
The amount of time it takes to process will depend on the number of photos you are watermarking and the size of the files. As the batch process is running, the Batch Progress window will appear on your screen, letting you know approximately how much time is remaining. When the batch process is complete, click OK to return to the main Paint Shop Pro interface.
Additional Resources: For more tips and tricks, be sure to check out the other Paint Shop Pro tutorials found here on Bright Hub’s Digital Photography Channel.