Turn a Digital Photograph into PC Wallpaper Quick and Easy with ThumbsPlus
ThumbsPlus
In my review of ThumbsPlus, I mentioned how impressed I was with the number of extras and bonus features that were included in the software. One of these little added gems is the ability to take any digital photograph and turn it into background wallpaper for your PC screen with just a couple clicks of a button. If you don’t have a copy of ThumbsPlus yet, check out the review for a link to obtain a free trial of the software so you can try out this cool feature yourself!
Create Wallpaper from a Digital Photo
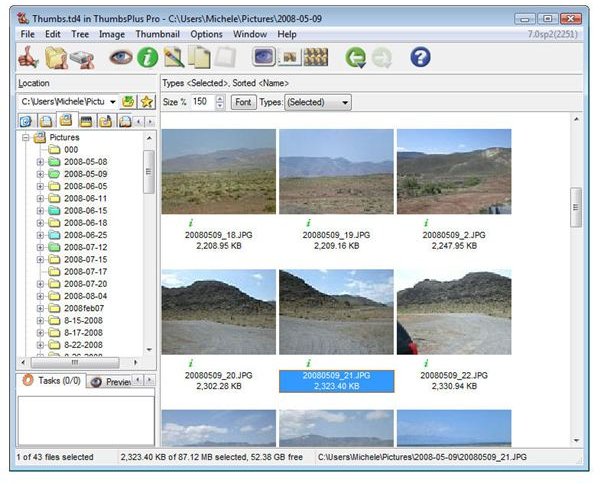
First, select the digital photograph that you want to use as your PC Wallpaper in the ThumbsPlus main viewing area. (Click the image below for a larger view.)
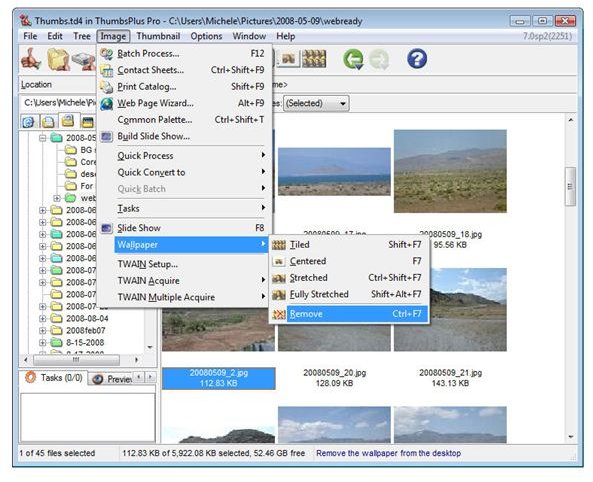
Next, from the Image menu on the main toolbar, select Wallpaper.

There are four options from which you can choose when creating the wallpaper:
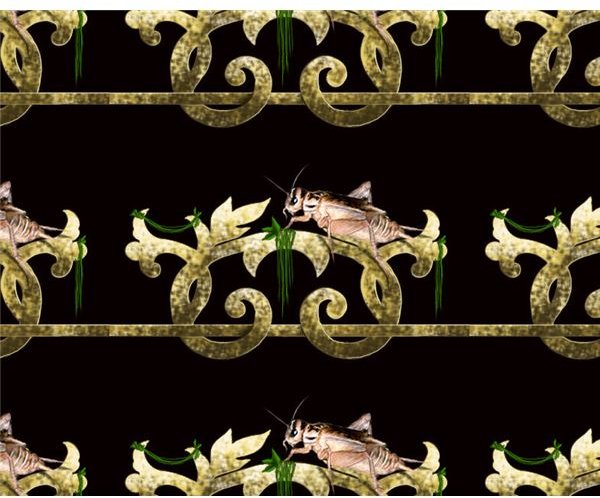
Tiled – With this option, the photo will be tiled across the background of your display. This is a good choice to pick if the image you are working with is small and you want the entire display area to be filled with copies of the smaller photo. See the screenshot below for an example of this.
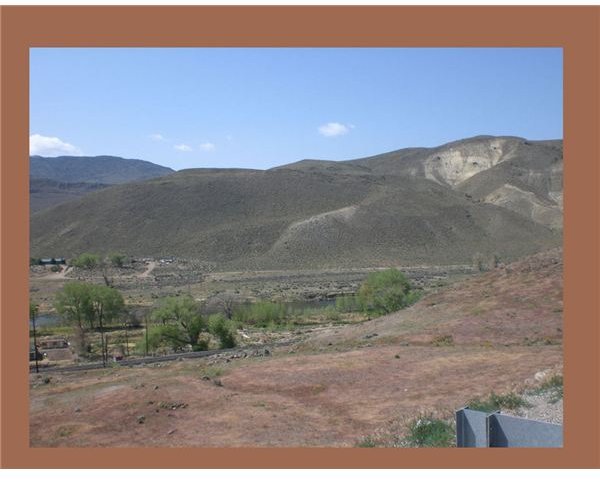
Centered – Choosing this option will center the photo on your screen. If the dimensions of your photo are smaller than your screen resolution, there will be “leftover” space around the edges of your image (see screenshot below). Likewise, if the dimensions of your digital photo are larger than your resolution, only the center part of the photo that “fits” will be displayed.
Stretched – Whether the dimensions of your photo are larger or smaller than your screen resolution, you can use this option to resize the image to fill most all of your display while maintaining the aspect ratios (the relation between height and width) of the photo. One thing to note here is that if the aspect ratios of your photograph are different from your screen resolution, then you will still have some leftover space either on the vertical or horizontal edges of your display when using this method.
Fully Stretched – The only difference between this option and the Stretched alternative is that you don’t have to maintain the aspect ratios of the photograph when choosing this method. So, this is the method to use if you want the entire photo shown in the wallpaper and the wallpaper to completely cover the display area.
Removing the Wallpaper
If you change your mind or if you simply don’t like the result of using your digital photo as wallpaper for your PC screen, it’s easy to remove it and return your display background to system defaults using ThumbsPlus. Just select Wallpaper from the Image menu, and then choose the Remove option.
One nice thing about this feature is that it works with any background image that you’ve assigned as desktop wallpaper, not just ones created in ThumbsPlus. So, if you ever want to revert back to a nice clean background display and don’t want to hassle with trying to remember how to access the controls for your operating system, just open up ThumbsPlus and let it perform the work for you.