Free Lightroom 3 Tutorials: The Ultimate Collection
Becoming an Adobe Lightroom Guru
When Adobe launched its latest version of Lightroom, it included a number of important upgrades that enhanced or built-upon functionality that was found in Lightroom 2. However, it also included a host of new features like noise reduction, tethered capture, lens corrections, improved sharpening capabilities and more. In this guide you will find tutorials to exactly these features, but there is also help with some of the more fundamental skills like perfecting white balance and using clarity. Just look for the links in each section and you will quickly be on your way to becoming a Lightroom guru!
A Beginner’s Guide
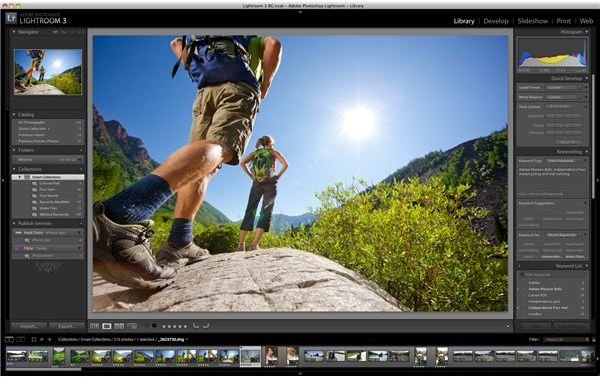
If you’ve never used Lightroom 3 before, you’d be forgiven for thinking it looks a little daunting. In many respects it is, but once you read our Beginner’s Guide to Lightroom 3, you will have a much better understanding of the form and purpose of this powerful image editor.
It walks you through the five main interface modules - Library, Develop, Sildeshow, Print and Web - and shows you how each one plays a part in processing and publishing your digital images. This article is a great introduction to the software and provides you with a gateway to explore more specific Lightroom 3 tutorials.
Read this if you are new to the software, or are switching from another editing program, and you will quickly gain a solid foundation of the functionality and breadth that this program has to offer.
Using White Balance Tools
Getting the right white balance can often be the difference between a good image and a great image. So, if you are finding some of your images look too cold, or they just don’t represent the colors that you remember from the original shoot, then it’s time to read up on the white balance settings and how best to use them to accurately reproduce the scenes you shoot. In Lightroom 3, you have considerable control over your white balance and the resulting color temperatures in a digital image.
In Understanding Lightroom’s White Balance Tools, you will learn how to use features like the white balance dropper tool, you’ll learn the difference between temperature and tint, and explore the additional white balance options you have on RAW files as opposed to JPEG images. You will also get to know the merits of automatic vs. manual adjustments, and explore the creative possibilities that are on offer when you choose the ‘wrong’ white balance.
It is definitely an important skill to master, and although there is no right and wrong way to process an image, white balance is the first thing that a lot of people use when they start editing their images.
Mastering Noise Reduction

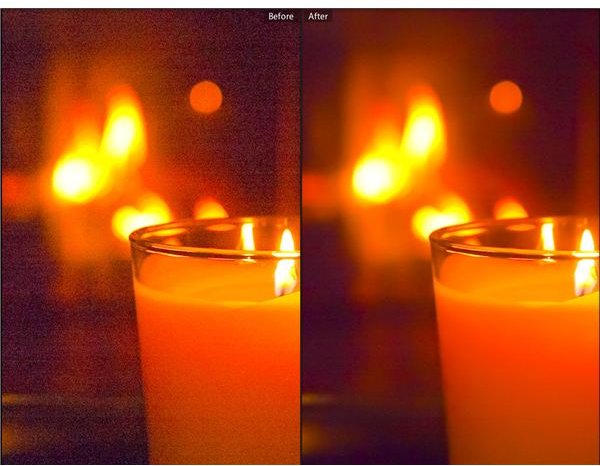
Noise reduction is a new feature in Lightroom 3, so if you are upgrading from one of the previous versions, then this is definitely something that you should know about in more detail. Digital cameras, and in particular digital SLRs, are getting better at processing the digital noise that is created from low light and high ISO shooting conditions. However, they are far from perfect.
Adobe included noise reduction controls in Lightroom 3 because it was one of the top features that users requested for the next version to have, and because it is one more reason to stay in Lightroom and not switch to Photoshop for further editing.
So, make sure you read How to Use the Lightroom 3 Noise Reduction Tool for a full explanation of all the things that you can do to help minimize or erase the effects of digital noise in your images. It will explain what all the sliders in this panel do and help you to get the right balance between erasing noise and losing detail. Even though it ultimately involves a modicum of compromise, you can still get some great results if you know what you are doing.
Improving Images With Clarity
The software’s clarity slider may be one of the most underused or misunderstood tools with those who are new to Lightroom 3. However, the difference that this one adjustment can make to an image is often beyond measurement. It works with the mid-tones of your image and when used correctly, it can really make your images come to life.
In Lightroom: Clarity Tools, Caroline Thompson gives a great explanation of this tool and tells you exactly why the majority of your images can benefit from using this feature. She also talks about the vibrance and saturation tools, tells you the important differences between them, and suggests exactly when to use them. If this is a slider that you don’t use very often, then you must read this article. It may just be one of the most important Lightroom 3 tutorials you do read.
Making Lens Corrections
As we said above, DSLRs are not yet perfect imaging tools. Well, the same applies for the lenses that you attach to them. Pincushioning, barrel distortion and vignetting are just some of the compromises that you need to live with when you purchase anything other than the highest quality professional lenses. Fortunately, Lightroom 3 has a raft of tools to help deal with these problems.
Read Lightroom 3 Profiling: Lens Correction Tools, and you will quickly learn about the best ways to correct lens flaws manually and automatically. The automatic profiling makes adjustments to the image according to what the software knows about the pros and cons of the lens you used. However, not all lenses are in the Adobe database, so sometimes you have to do this manually.
By the end of this helpful tutorial, you will be able to straighten leaning buildings, reduce fisheye effects, and remove unwanted vignettes - all with a few quick clicks and the help of the lens correction sliders.
An Expert’s Guide to Sharpening

Ever struggled with digital images that were just a little too soft for your liking? Are you looking for that tack sharp look you see on magazine covers? If so, Chrissy Dean’s Lightroom 3: Sharpening Tool Tutorial is just what you need.
You’ve probably come across the sharpening controls already, but what do they all do, and which ones do you need to spend the most time with? This step by step guide walks you through each of the controls, explains what each one does, and gives you tips on how best to use it in order to get that super sharp image you thought you got when you first captured your image.
Sharpening is often the last step to a digital workflow, but it is an important step, so make sure you know how to do it properly by reviewing the help that is given in this great tutorial.
How to Shoot Tethered
Even a 3-inch LCD live-view screen can look small and lead to you missing out on crucial detail. Well, shooting tethered with Lightroom 3 can change that in an instant. Shooting tethered means that it is possible to hook up your DSLR to a monitor, laptop or even an HDTV so that you can review the pictures you take on a larger screen. It is ideal for studio photography or photos that involve large groups of people who all want an instant preview of what the final image will look like. Shooting tethered is also a great way to help check your exposure settings and confirm that your focusing is precise and accurate.
In How to Shoot Tethered With Lightroom 3, you will learn which DSLRs are compatible with the tethered shooting feature, and find out how to connect your camera and enter the tethered shooting mode. There are also a variety of helpful hints and tips on how to get the most out of the software when this feature is enabled.
The Learning Steps
The information found in these tutorials may take a little while to digest, but don’t give up on Lightroom too quickly. It is an incredibly powerful and useful editing tool that does probably 90 percent of what more expensive software options do, and it does it just as well. So, bookmark these Lightroom 3 tutorials, use them at your own pace to help further your knowledge, and before you know it, you will have achieved a level of expertise you might never have thought possible.
References
- Press images courtesy of adobe.com
