Making a person in an image the best they can be is a simple process in Photoshop. If you want to make a person have no blemishes, eyes with no dark circles, softer skin or thinner thighs then this tutorial will show you how to acheive these simple tricks.
Creating the Perfect Face
People are not usually perfect; they have spots, freckles, blemishes and uneven skin tones. Photoshop offers the solution to fixing these problems in post-production. The key to making your image look “right” is by not going too far; over-doing your Photoshop glamour makeover will only make the image look fake. The areas that I have included here all aim at improving the face without over-doing it; your finished picture should look natural and beautiful.
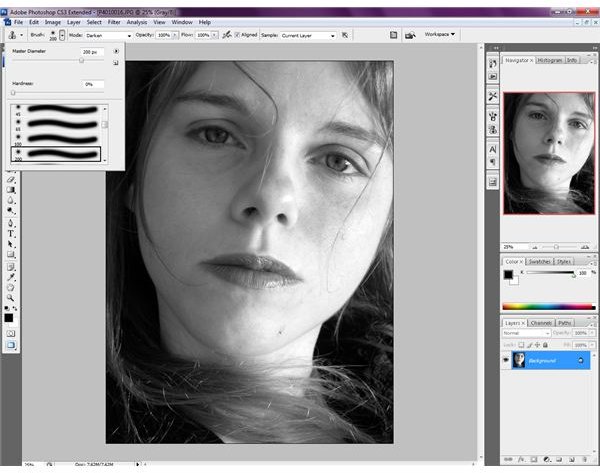
Remove Blemishes
Open your image in Photoshop that you wish to remove imperfections from. Click the Clone Stamp Tool in the Toolbox. Right Click on the Clone Stamp to ensure you just select the Clone Stamp and not the Pattern stamp tool. Now you need to select the correct brush to make your adjustment as invisible as possible. Go to the Options bar and select a soft-edged brush that is just a little bit bigger than the blemish you wish to remove. If you can’t find the correct size in the preset boxes just use the slider on the Master Diameter at the top of the drop down box to get the correct size. Now you need to change the Blend Mode; this can be found in the options bar. Click on the ‘Mode’ Box and a drop down box will appear; click on ‘Lighten.’ By doing this, when you apply the clone stamp only the darker areas should change to match the skin tone. Now you are going to clone the good skin over the blemish. To do this find an area of skin that is clear near the blemish and hold down your ALT key (or Option Key on MAC) and click on the area. You have now selected the clone skin, so hover over the blemish and click; you should only need to click once to remove it completely. If you have any blemishes that are lighter than the skin tone simply change your blend mode to ‘darken.’
Eliminate Dark Circles

This is done in a very similar way to removing blemishes. Open your image in Photoshop and then select the clone stamp just as you did for removing blemishes. This time pick a soft-edges brush that is half as wide as the dark circle under the eye that you wish to eliminate. Again go to the Options Bar but this time change the Opacity setting to 50% and then change the blend mode to ‘lighten.’ Hold the Alt key and then click on an area near the eye that is clear, usually just below the dark circle. Now hover over the area and paint over it i.e. click and move the brush carefully and smoothly over the affected area. This should remove the dark circles. You can go over the area again if it does not remove them completely the first time.
Softening the Skin
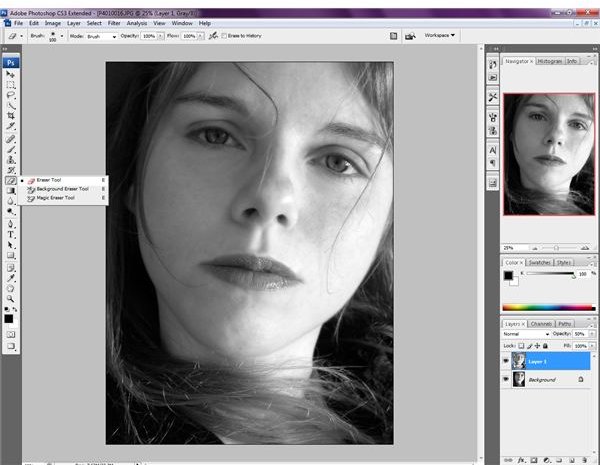
If you want to give the skin a silky smooth look, this is an easy and quick method that will work really well on portraits. Open the photo that you are using in Photoshop and copy the background layer. The quickest way to do this is to press Control-J (On a Mac – Command-J). Go to the Filter menu and click on ‘Blur’ and then ‘Gaussian Blur.’ A dialog box will appear, you will need to enter a setting of between three and six pixels, depending on how soft you want to make the skin. This will put a blur over the whole picture. Now go to your layers box and lower the opacity to 50%. This reduces the blurring effect. You can leave the picture as it is or you can continue to bring back into focus the areas such as eyes, eyebrows, lips and teeth. To do this click on the eraser tool and simply paint over these areas and they will come sharply back into focus and will stand out against the soft silky skin that you have just created. You can also erase over the hair at this point; basically, anything that is not skin will look better if pulled back into focus.
Improving the Body
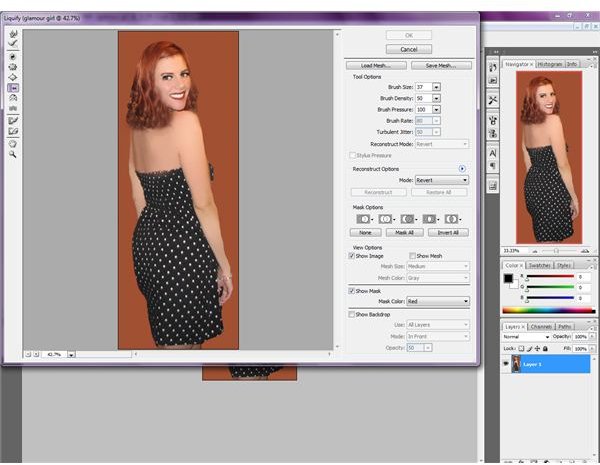
A great way to remove bulges, extra flesh (such as love handles) or large bottoms is to use the liquify function on Photoshop. Open the photograph that you want to use. Now go to the Filter menu and select ‘Liquify.’ A dialog box will appear and this will be the box that you will work in to fix your picture. The first thing you need to do is zoom in on the problem area using the magnifying glass, usually one up from the bottom on the left hand side tool bar. Select the tool and then click where you want to zoom in. In this image the aim is to make the woman’s bottom smaller. Select the “Shift Pixels” tool from the toolbar, if you hover your cursor over the tools their name will appear. This tool may also be called the “Push Left Tool” depending on which version of Photoshop that you have. Choose a fairly small brush size; you will find this near the top right of the Liquify dialog box. Now start painting downward strokes over the affected area. If you are removing on the right hand side you will need to paint upward to remove the bulge. Keep painting until you have a smooth line that you are happy with. If you do not like what you have done, simply hit cancel and start again. When you are completely satisfied with your image, click on OK. You should now have a thinner, smoother subject in your photographic image. This technique will work on any unwanted bulges. If you are careful and create smooth lines the effect can be stunning.
The techniques in this Photoshop glamour makeover tutorial are just a few ways that you can an enhance a portrait or glamour shot in Photoshop. There are many more that can be applied but these techniques will keep your image looking natural.
Improving the Body and Face: Photographic Examples
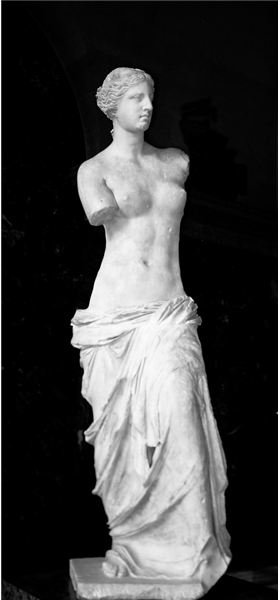
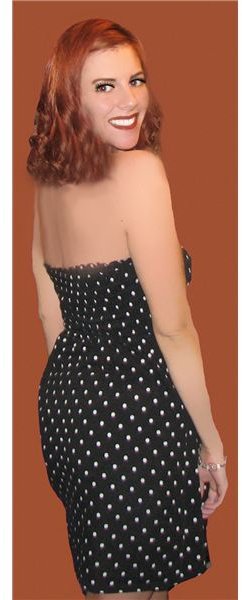
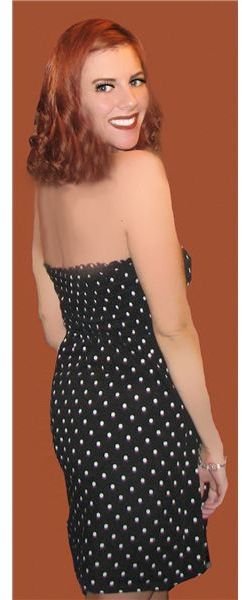

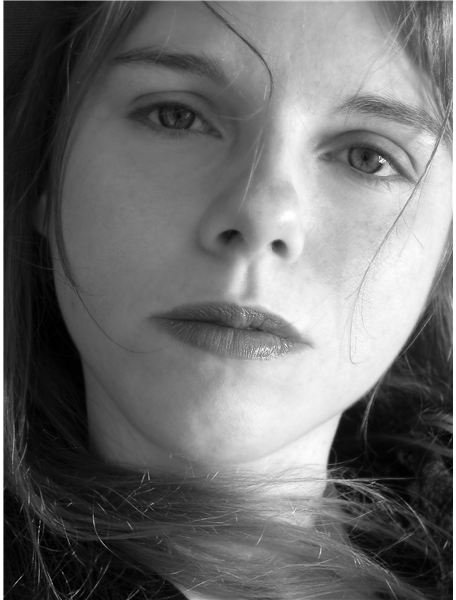
Image Credits
Image One: Zoe Van-de-Velde Self-Portrait Copyright Zoe Van-de-Velde
Image Two: dreamglowpumkincat210 photostream Flickr CC
Image Three: Venus De Milo: Bring Back Words Photostream Flickr CC
References
Kelby, Scott, The Photoshop Book For Digital Photographers, New Riders Publishing, 2003
Design Reviver: 50+ Excellent Body Enhancement photoshop Tutorials


