Mac Finder and Images: Viewing your digital images and pictures with Finder in Mac OS X
Finder vs. Explorer
Viewing photos on a Mac can be somewhat tricky for the Windows user. While Windows doesn’t provide any powerful (and fast-launching) image program like Preview, it does provide a nifty large-scale image viewing mode, which Mac did not have until Leopard (10.5). Before we explore the new features in Leopard, let’s look at the standard features of Finder, and how it operates under a completely different philosophy than Windows Explorer.
Explorer makes heavy use of a tree-structure hierarchy to help you pin point what program, utility, file, or settings pane you are looking for. XP introduced a constantly changing side bar that presents contextual links to folders and panes you might be looking for. This certainly expedites your “explorations,” but explorer is still a monster of a program.
The Mac platform prefers to have a specialized application for each task or group of related tasks. In this way, each program is optimized for it’s task, providing greater simplicity and power. The Finder is no exception. All it does is provide quick and powerful ways to access your files or applications—namely, the dock, the desktop, and the browser. Likewise, if you need to work on a photo, you can quickly open it in Preview or iPhoto, depending on the task at hand. These powerful programs have not counterpart in the Windows platform. We’ll discuss them separate articles.
Traditional Finder Views - Columns and Icons
In Tiger (OS 10.4), the Finder doesn’t let you do anything with your pictures, besides find them. After all, it’s the Finder. Once you’ve found the image files, you can quickly open them in Preview by hitting command-down or command-O, or by simply dragging them to the Preview dock icon.
While in Finder, you have two ways to look through your pictures as thumbnails—Columns view and Icons view.
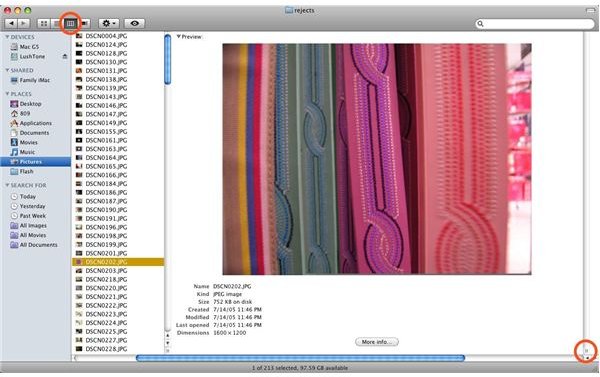
Typically you will be in Columns view. (In fact, I recommend checking the “Open new windows in Columns view” option under Finder preferences. In Leopard, it is located in the view options for Column view.) When you basically know what photo you’re looking for, you can quickly find it in Columns view and when you select a file, you get a thumbnail-size preview. If you drag the resize handle on the bottom right of the preview column, you can get a bigger preview. In Tiger, the max size is 255 pixels; in Leopard it is 640. Once you have the preview column in place, you can scroll through your images using the arrow keys. If the preview column does not appear, if might be turned off in the view settings (command-J).
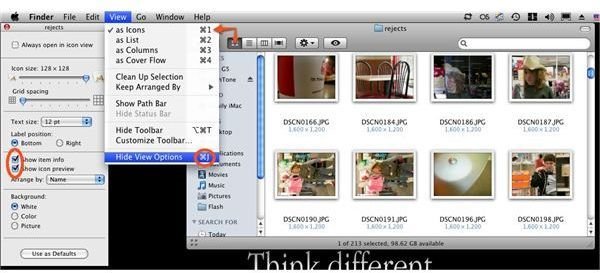
Icons view is great for browsing through thumbnails. To turn on Icons view, press the icons button in the Finder toolbar, or hit command-1. (The hot-keys are shown under the View menu, see the screenshot.) You may have to change a few view options to optimize Icons view for picture viewing, so hit command-J or select it from the View menu. In Tiger, be sure you select “This window only” and not “All windows.” You don’t want every window to open in Icons view, and sometimes it seems tricky to undo that command. Leopard eliminates that issue. The next option is Icon size. You’ll want it all the way up to 128 pixels for images. Leopard also has a Grid spacing slider—you can maximize screen space by reducing the spacing. In Tiger, you can select Snap to grid to preserve an arbitrary file order, or you can select Keep arranged by whatever you like. In Leopard, the non-sorted grid option is included in the Arrange by drop-down menu. You must have Show icon preview selected to see thumbnails, and you can select Show item info if you want to see the image dimensions listed below each filename.
Leopard Finder Features - Cover Flow and Quick Look
Leopard introduces a new view option—Cover Flow—which is a direct duplication of the iTunes/iPod feature. In addition to flipping through photos, you can view any kind of document at surprising detail.
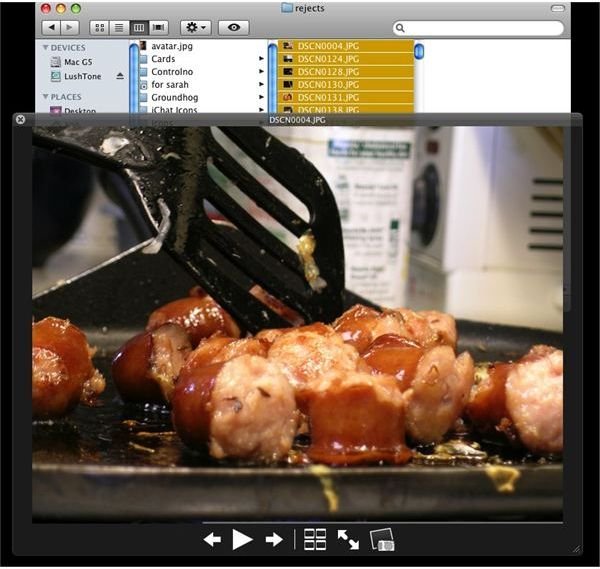
In addition, the new Quick Look feature is like a Preview “Lite” edition. With any file selected, slam the spacebar to open a simple preview window. The window is black to emphasize the photo you are viewing, and has two buttons—Fullscreen and Add to iPhoto. From the Quick Look screen, you can use the arrow keys to flip through the file that is selected in Finder. If you select a group of photos in Finder (using command or shift) and hit the spacebar, Quick Look includes Slideshow and Index page buttons—direct copies from Preview.