Break out that dusty old telescope and use it to photograph the heavens!
What is Astrophotography?
Astrophotography (sometimes referred to as digiscoping) is the technique of using a telescope or spotting scope as a lens for your DSLR camera. Many photographers use this technique for wildlife photography , but I wanted to see how it would work to photograph the moon.
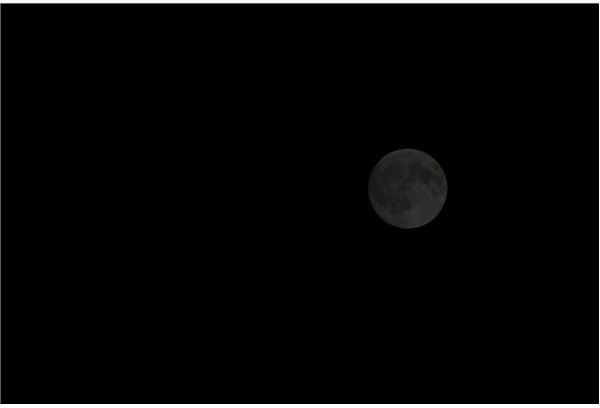
Images
Getting Started
Using astrophotography to photograph the moon presents several challenges. First, you are generally trying to set up and use your equipment at night, making it very difficult to control your camera and the telescope. A red flashlight, used by astronomers, works very well, but it is still not very easy to see what you are doing. As much as possible, have everything set up before getting started.
The other problem is that the moon is basically a big mirror. You are literally trying to capture the light of the sun as it reflects off the moon. So controlling the exposure is critical.
Technically, there are two methods of astrophotography and photographing the moon with your telescope. The first method is called the “afocal method.” In this method, you set up your telescope to view the moon, then you set up your camera to capture the image through the camera’s lens, focused on the eyepiece of the telescope. There are a number of problems with this method. First, both the camera and the telescope must be on their own tripod . Even the slightest vibration will ruin the shot and getting the camera lens and telescope eyepiece lined up perfectly will take a lot of time and patience. Second, you can’t use your auto-metering functions and will have to experiment and bracket in order to determine the correct exposure time.
The easier and more common method of astrophotography is called the “prime focus” method. This calls for the use of adapters that allow you to connect your camera body directly to the telescope. In my case, I used a Meade ETX 70 Schmidt-Cassegrain type telescope and a Nikon D80 SLR. Even this method requires caution because you have to purchase two different adapters. You will need a “T-Mount” and a “T-Ring Adapter.” Be sure to check with your photography supply shop as each camera and each telescope requires specific adapters.
The “T-Mount” goes on the end of the telescope. You leave the cap in place where the eyepiece would normally go as you won’t be using it. There is a little switch that moves the mirror out of the way so you get a straight through line of site. The “T-Ring Adapter” goes on the camera body and allows the body to attach to the telescope.
This is where you have to be really careful. It is very easy to over tighten these adapters, just as it is easy to not tighten them enough. You need to make sure you have a solid, but releasable connection. When you are attaching the T-Ring adapter to your camera, and the camera to the telescope, your CCD is basically unprotected. This is another reason to set up indoors in a clean environment rather than fumbling with the connections in the dark.
Making it Work
Once everything is connected, you simply use the telescope as a manual lens. In my case, the Meade ETX 70 becomes a 1250mm, f/10 telephoto lens. Keep in mind that the eyepiece you would normally attach to your telescope also enlarges the image, so don’t expect the same magnification when using the telescope as a lens. You won’t necessarily end up with a frame-filling image of the moon in all its glory.
At this point, you will use the telescope’s focusing control until you get a nice crisp image, and then use your camera as you normally would. The nice thing about using a DLSR is you can experiment with bracketing your exposures to ensure you get one you like. One mistake I made was viewing the images on the LCD and accepting the exposures based on that limited example. Remember, when you are outside at night, your LCD will look brighter than it really is, so many of my attempts resulted in under-exposed photos.
Final Thoughts
A few final thoughts to keep in mind if you want to try this. I experimented with the full moon, but after thinking about it, I realized I would have gotten better results if I had attempted this during a different phase because the angle of the sun’s light would have highlighted the peaks and valleys, giving the craters and features more contrast. I’m also kicking myself for missing out on the chance to capture the recent harvest moon. Remember, the moon is at a different distance from the earth during different times of the year, and appears larger or smaller depending on when you view it. Plan your astrophotography experiments accordingly, and have fun!


