How to Edit Audio: 10 Tips to Get You Through Digital Audio Mixing

Digital Audio Workstation
Audio editing is often overlooked since it has a history of requiring such extensive equipment and studio space. Today all it really requires is a sufficient computer with the power to really run adequate audio editing software with real time playback, though that is not all that’s needed to do it right. When learning how to edit audio you are going to find that there are a lot of things that you have to add in terms of equipment, and skill, to get things just right. Here are ten of the most important tips to keep in mind when learning audio editing with a digital audio workstation.
The Room
The first thing that you have to remember is that audio playback is much more dependent on the location than video playback is, at least when determining how it sounds in reality. In a professional sense this means a sound proofed room that has its acoustics specially balanced for audio monitoring, yet this may not be what you have available for your digital audio workstation. Instead, you are going to want to simply select an isolated room that has reasonable acoustics and is well insolated. This is going to give you enough protection for almost all form of audio editing, though you will still not have the monitoring abilities you would have in a professional audio studio.
Room Tone
When you are using audio mixing software for voice or real world sound you are going to notice that clean sound does not perfectly match between clips. This is mainly to say that the space between words and clips is not always perfect enough to create a consistent track, so what you have to do is lay a track of room tone under it so that there is some consistency. Room tone is a basic recording of the audio in a room that can then be used to lay under the tracks so that it ends up being smoother. Make sure to always record room tone for the audio mixing process, otherwise you are not going to have the tools that you need.
High Pass - Low Pass
Filters are at the heart of the audio equalization process. Often times filers are used to take out tones or sounds that are objectionable for the final mix and were not intended. This often comes in the form of a high tone or a low tone that is consistent in the area, such as a climate control system or the hum of an appliance that could not be unplugged. To repair this you will want to begin applying the high pass filter or low pass filter, respectively. The high pass filter will cut out certain low tones while allowing for the high ones to pass, and the low pass filter does exactly the reverse. These will consistently some of the most important audio filters you can use and you will want to return to them repeatedly.
Levels
One of the primary aspects of using your audio mixing software is to simply adjust the audio levels of your tracks, and this is true for audio for video as well as music or audio only material. Audio mixing usually sets the audio so that each different clip is comparable to the one before and after so that there is a consistent level that comes through. This means that there does not have to be a single volume level all the way through, but more so that there is a consistent pattern of volume. It is also important to adjust the levels so that they do not peak above a certain level and distort. This often means that audio should not peak above -3db.
Noise Print
If standard filters like the high pass filter or low pass filter do not approach the removal of a specific sound that is in your audio track then you will need to set a noise print, which is available on many different audio mixing programs. To set a noise print you will take an area where there is no foreground audio, such as dialogue, and set that as the noise print. You will then apply that print to the entire track for removal, and the tones that are identified in the print will be taken out of the entire track. This is one of the best audio mixing tips you can apply since it will allow you to really target exactly what you need for removal, though it the noise is too pronounced or broad it will affect the foreground audio.
Labeled Tracks
Though audio mixing is fundamentally different than video editing in terms of the type of finished product you want to create, many principles
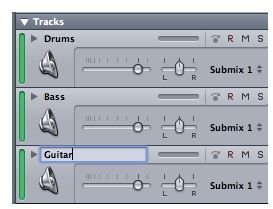
remain the same since digital audio workstations are really similar to non-linear video editing software. One of the main elements of this is that you work on multiple tracks that are layered to create the final sound. When you are mixing complicated songs or audio for video you want to break up the different sounds, or types of sounds, onto individual tracks so that they will be easily referenced. This means identifying tracks specifically for different elements, labeling those tracks, selecting the right audio output for the types of sounds that are there, and maintaining the limtis of each track so that you can ensure that things stay organized.
Reference Tone
You need a reference point when you are doing your audio mix since this is going to give you a sense of how loud all the sounds are, which will give you a good idea of where to set the levels and how you should match each sound. The best way to do this is to actually use reference tone on your field recorder when you are recording the sound, which then broadcast a designed tone at a certain level internally within the recorder. This is then used as a reference point in your audio mix, and this will be crucial for adjusting settings.
Adjust for Microphones
Different microphones capture sound much differently, even though you may not assign superiority to one or the other. Often times when you are fiming narrative scenes you will use both lavaliere microphones and a boom microphone to get audio coverage. Likewise, when you are recording a live symphony you will usually use a whole range of different microphones from condensers to ribbon microphones. These will capture the sound somewhat differently, so it is up to you to arrange them correctly. There is no hardline rule for how this should be applied, but you will need to use audio equalization to somewhat match them. For example, the sound of a lavaliere microphone will likely be a lot dryer and will have less echo than a boom microphone, so you will want to remove the wet sound from that boom to better match the lavaliere. This is a process that is incredibly important for the continuity of dialogue.
Audio Location
An extension of the audio equalization process for microphones is to conduct the sound space as one that is supposed to be representative of a location. This is more true of film or video audio mixing since it requires that you exhibit a specific story space that the audience can believe, and therefore the audio needs to sound as if it is appropriate in a locaiton. For example, the sound quality in a large church will be different than that same sound in your backyard. Usually you will be filming in a more controlled location for audio than the location you are trying to portray, which means that you have to adjust it so that it fits the echo more perfectly for the assumed location. There are often built in tools for this, and the audio mixing software Pro Tools actually has a tool called T-Space to deal with this specifically.
Nearfield and Farfield
When you are actually putting together an audio mixing suite based on a digital audio workstation you have to create the right monitoring capabilities for audio playback. Audio does not just come out of a single locaiton, but actually has layers when you are in a correct theater. This is why you need to use nearfield and farfield speakers, which essentially means some set close to the position of the person mixing and some set further away. This is going to give you a more grounded understanding of what you audio actually sounds like when you are trying to figure out how to edit audio for your project.
References
Photos: Screenshots by Shane Burley.
Source: Author’s own experience.