Guide to Syncing Windows Phone 7 Devices

Advantages of Syncing Your Windows Phone 7
Hooking up your Windows Phone 7 to your PC will unleash a wealth of options – notably the ability to sync music with your device! The phones all come with a USB cable for connecting your device, and with the Zune desktop client installed you’ll be able to share music, images and videos from your desktop computer with your phone.
This is one of the key areas in which Windows Phone 7 differs with its predecessor, Windows Mobile. Whereas with the older mobile operating system you could use the device as a portable storage solution and save all sorts of files and folders to it, this isn’t (currently) possible.
In its place however is a much more effective and streamlined process for syncing Windows Phone 7.
Syncing Windows Phone 7 with Your PC
To sync your Windows Phone 7, you will need to download the Zune client to your PC. This client will run on Windows XP in 32-bit mode, as well as Windows Vista and Windows 7 – there is also a 64-bit version for the two newer operating systems.
You can download Zune from www.zune.net – it’s around 100MB, so might take a while depending upon your connection speed.
The Zune software takes the place of ActiveSync and Windows Mobile Device Center for Windows Mobile handsets. There is no syncing with calendar or contacts via your PC, however.
How To Sync Contacts and Calendar with Windows Phone 7
If you want to sync your calendar and contacts with your Windows Phone 7 device, you will first need to make sure that either you’re using Microsoft Exchange (in which case the sync will occur automatically when you setup an email account) or you have your calendar and contacts synced to Hotmail.
Now if you’ve upgraded to Windows Phone 7 from Windows Mobile there is a good chance that you had your contacts synced to your Hotmail account, particularly if you took advantage of the Microsoft MyPhone service. To sync contacts from Hotmail, add a suitable account via Settings > Email & Accounts > Windows Live.
Sync Music, Pictures and Video with Windows Phone 7
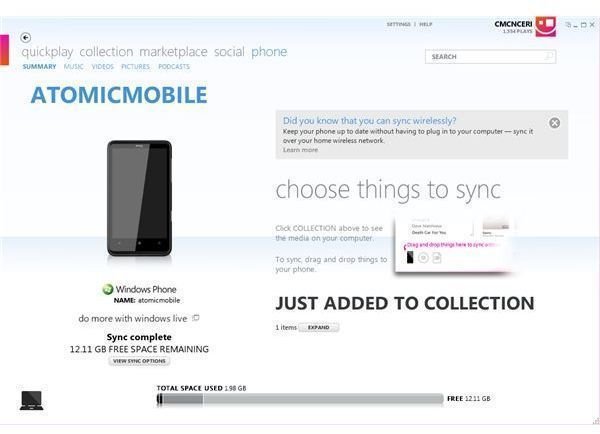
With the Zune client downloaded and installed, you can begin syncing music, video and images between your phone and your PC. Begin by connecting your phone to your PC via the USB cable – with both devices switched on and the Zune software running, your phone will be detected and its model identified. You should name your phone at this stage as well, to make identification easier.
If you have any images snapped on your phone already, these will be immediately synced to your computer – the same would occur if you had recorded any video or purchased any music or video via the Zune store on your phone.
By default syncing Windows Phone 7 content will send files to your primary folders for pictures, video and music – and you can change these in Settings > Collection. Here you just need to click Manage above the relevant section to then Add or Remove folder locations.
To send music, images and video to your phone, all you need to do is drag the content from the Zune client and drop it on the small phone icon in the bottom left corner!