CardStar App Review
The Problem

How many cards do you typically carry in your wallet or purse? There might be a few membership cards in there for various services and it seems as though every store nowadays offers some kind of reward card. The chances are good that you have a fair stack of cards in there. This results in an annoying search every time you’re asked for your membership or reward card as you flick through the pile to find the right one.
Sometimes you might not have the right card on you and you may end up missing out on your reward. Or worse if it’s a membership card you might have to turn round and go home to get it.
How about coupons? If you’re on a budget, or just enjoy saving cash when you can, then you’ll be used to cutting out special offers and clipping coupons to take with you on your shopping trip. Once again you have to fish around for the right coupon to get your discount. Surely there’s an easier way?
What is CardStar?
CardStar is here to help. This application is designed to consolidate all of your membership and reward cards into one. You can enter the card information or scan it into your smartphone. The app acts as a repository for all of your membership, club and reward cards and you can quickly retrieve the right one and the merchant can scan it using your smartphone screen.
Your smartphone effectively becomes a digital card with CardStar and since you always have your phone with you there’s no risk of forgetting a card and no rummaging around to find one in your wallet or purse. Good design in technology is all about making our lives easier and this app does exactly that.
Using CardStar
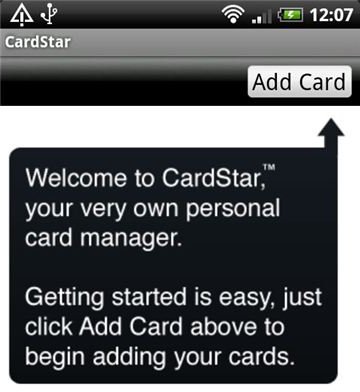
The app is a small download and you’ll have it installed in no time. It is presented in a plain and practical way which allows you to get the job done with the minimum of fuss. Upon first opening up the app you get the simple option Add Card.
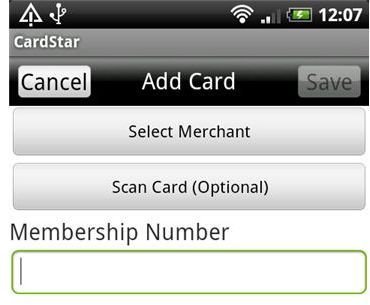
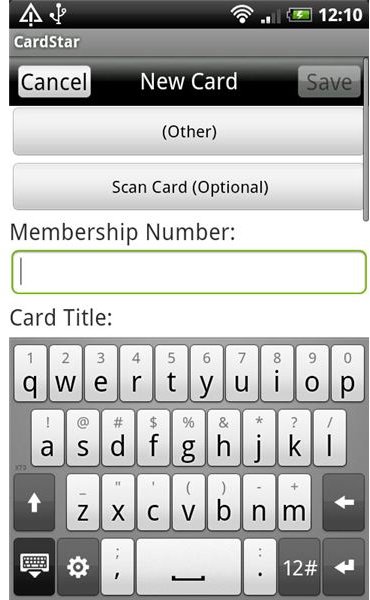
When you choose to Add Card you are faced with three options:
- Select Merchant
- Scan Card (Optional)
- Membership Number
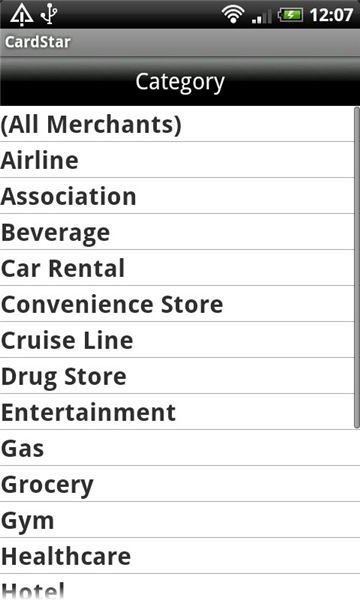
You can enter your info here quickly and easily. Let’s take the options one at a time. First up, you could go for the Select Merchant option. This will bring up a list of possible categories with all sorts of choices, from Airline to Entertainment to Hotels to Library. If you select one of those categories you’ll be faced with a few specific options that CardStar obviously has links to (for example in the Museums category you’ll find the Denver Museum of Nature & Science). The list is somewhat limited and obviously aimed primarily at US citizens but we can expect it to grow over time.
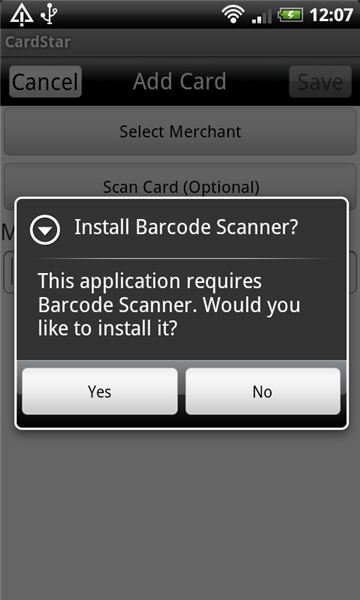
Probably the quickest option is to Scan Card, although you will need to install the Barcode Scanner if you don’t already have it. Luckily this comes up as a prompt and it is a quick and easy process.
Your final option is to enter the Membership Number and this is an essential step in the process. Once you have created a new card entry you can name it whatever you want and it will appear on the opening page of the app. This means that when you want a specific card you simply tap CardStar to open the app and select the card you want from the list that appears.
Early Days for CardStar
It must be mentioned that currently CardStar won’t work with every membership or reward card that you have. However it does have a higher rate of scanning success than any other app on the market.On the official website you can find an FAQ which provides a few hints and tips for anyone having difficulty using CardStar. I tested it on my HTC Desire and for the most part the CardStar app seems to perform very well. It is certainly very easy to use and the straightforward user interface is satisfyingly direct.
It is also completely free to download and use and, since it is such a strong idea, it is sure to grow in popularity with consumers and merchants alike.
CardStar for Merchants
It also offers merchants a fantastic array of options in terms of uploading store locators, information, coupons, incentives and even product recalls if necessary. It clearly adds value for merchants and allows them to create a more convenient loyalty option for their customers which should suit everyone concerned. They can also target their offers and information according to locality because the app can access the GPS functionality on your phone. This means you’ll only get offers that actually apply to your area which saves any frustration. For those reasons it seems very likely that more and more merchants will support the app and it should become increasingly useful in the future.
Download CardStar for Free
With over 1.4 million downloads so far CardStar is clearly doing something right. There’s no arguing, the idea is just so obviously a good one that it seems certain to catch on. After all, who wants to be carrying around a pile of cards everywhere they go? This clever app is completely free and is available to download for iPhone, Android phones and BlackBerry devices. You can find it via the website or by searching for CardStar in the App Store or the Android Market.
References
- CardStar, https://www.mycardstar.com/
- Screenshots taken by author.