Guide to BlackBerry Email and Exchange Servers

Activate Personal BlackBerry Email
BlackBerry devices require a special BlackBerry service book in order for you to set up and use your email services through your device. You can set up your personal email and a work email in similar fashions, but there is an extra step to have an email with an exchange server added to your device. To set up your personal email on your BlackBerry device, click the “Email Settings” icon on your screen. Type your username and password for your BlackBerry device in the corresponding “Username” and “Password” fields. If you do not know your BlackBerry services email and password, find out how to get your username and password by following the instructions in this link I provided for you. Click on the “Add An Email Account” link. Type the entire email address in the “Email Address” field. As an example, if your email address is at Hotmail, you would type “YourEmailHere@Hotmail.com.” Replace “YourEmailHere” with your actual name before the “@” symbol. Type your email password in the email password field. Click “Add” and the BlackBerry servers will check with your email server to ensure the correct security information was entered. If everything is okay, the BlackBerry screen will say, successfully added. You will now begin receiving emails on your device for the email address you just added. Repeat the process for any other personal email you want to add to your device. You can add up to 11 email accounts on your BlackBerry device.
BlackBerry Enterprise Service
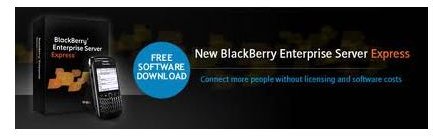
The BlackBerry Enterprise Service is a service book you need active on your device before you can add any corporate Exchange email address to the device. You can add a free BlackBerry Enterprise Server on your device from the BlackBerry website. The free BES product is called the BlackBerry Enterprise Server Express. You can add a monthly charged attached BES service to your wireless plan by contacting your wireless service provider. Normally, the attachable BES service is more secure and it will be added with an additional cost each month. The difference between the free version and the paid version is that the free version will not give you access to all of the services and secured features that the paid version will.
Activate BlackBerry Enterprise Service
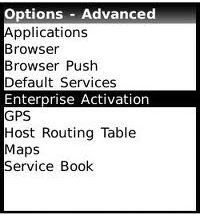
Now that you have the BES service book added to your BlackBerry device, you can now add your Exchange server email to your device. Contact your Information Technology department and let them know you want to have your email from your company Exchange server set up on your device. The IT representative that manages the BlackBerry Enterprise Server for your company will add your device information to the server. The representative will also set certain permissions for you and may also revoke certain permissions from your BlackBerry device to protect the company information that you will have access to on the BlackBerry. Now, you have to register your information the IT department approved you for on your device. Click on the “Options” icon on your BlackBerry and select “Advanced Options.” Click “Enterprise Activation.” Enter the BES username and password provided to you by the IT representative at your company. Click “OK.” Once all of the permission and certificates are loaded into the BlackBerry Enterprise Server for your company by the IT representative, you can now add your company email to your BlackBerry device using the Exchange server set up by your company.
Activate Corporate BlackBerry Email
The BlackBerry corporate email can now be added to your device. Normally the IT department and your business will set this up for you. But, if they do not, you can set this up yourself now that you have the BES service on your device. Click the “Email Settings” icon on your phone and enter your username and password for the BlackBerry services. Type in your company email username and password. Click “Advanced Settings.” Type in the incoming port number, the incoming server information, the security settings, the outgoing server information, the outgoing port number, the outgoing security settings. If you do not know this information, you will need to contact your IT department again to get the correct information. Every company is different because the entire server is customizable by your IT department, only they will know what needs to be entered there.