How to Use the Free Rollover Buttons in WYSIWYG Web Builder
WYSIWYG Web Builder offers a lot of free rollover buttons. The rollover buttons are really simple to create. You can choose from glass rollover buttons, gradient rollover buttons, graphic rollover buttons, and more. This tutorial will show you how to create the rollover buttons in WYSIWYG Web Builder. Load your Web Builder program and open the page that you want to add the rollover buttons to or create a new page to use for this tutorial.
Adding the Free Rollover Buttons to the Page
Look in the Navigation panel on the left and click the Navigationbar button. Using your mouse, draw a box on your page. The default buttons will appear. So, now you will need to edit the buttons. Right click on the buttons and click Properties in the menu.

Changing the Rollover Buttons
Now you can change the settings of the button in the box that just opened. Click the Style tab in the box. Go ahead and select your button before changing any of the other options. The button options are located in the Image section of the box. Drop the normal box down and select the button that you want to use. Then drop the mouse over box down and select your rollover button. There are a lot of buttons to choose from. So, browse through them and find the ones that you want to use. To see a preview of the rollover button, look in the bottom of the box. You will see the Preview section. Place your mouse over the button to preview it.
Changing the Text Options of the Rollover Button
Next, you can change the text options. You will find the text options in the top part of the box. Go ahead and change the text options to what you want. You can also change the text colors for the normal button and for the rollover button.
Applying a Sound Effect to the Rollover Button
If you want to apply sound to the button, click the browse button in the bottom section. When the box opens, locate the file that you want to use. Double click the file to open it. When someone hovers over the button, this is the sound that they will hear.
Adding the Links for the Rollover Buttons
The last step is to create the names for the buttons and link them. Click the General Tab and remove the items in the window. Click the item and click the Remove button. Then click the Add button and fill in the information for the button that you are creating. Click the OK button to save it. Click the Add button again and repeat the steps. Once you have all of your rollover buttons created, click the OK button.
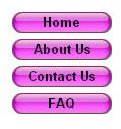
You will be carried back to the page in Web Builder and you will see the buttons that you chose. To edit the buttons, right click on the buttons and click Properties again. If you would like the .wbs file for the rollover buttons in my image, please click here.
This post is part of the series: WYSIWYG Web Builder
WYSIWYG Web Builder is a program for designing websites. In this series you will learn how to use Web Builder and how to create the different things in Web Builder.
- How to Create Status Messages in WYSIWYG Web Builder
- Add a Photo Slideshow to Your Website Using WYSIWYG Web Builder
- Add Free Java Clocks to a Website
- How to Use the Free Rollover Buttons in WYSIWYG Web Builder
- Creating a Marquee for Your Website With WYSIWYG Web Builder
- WYSIWYG Web Builder: Creating your Own Paypal Buttons for your Website
- How to Create a Glass Button Menu in WYSIWYG Web Builder