Adobe Illustrator CS3 Menus: Gold and Purple Floral Border Menu

This tutorial will show you how to create a gold and purple floral border menu. The background of the menu has a gradient applied to it. The border of the menu has a brush applied to it. The floral border is created by applying a brush to the stroke of the border. This tutorial will walk you step by step through creating this menu. You will need to be using Illustrator CS3 in order to create this menu. CS3 has the gradient style and the brush that we will be using.
Go ahead and create a new document to work on. Grab your rectangle tool from the toolbar and draw a rectangle for your menu. Draw the rectangle the size that you want the menu to be. You can resize it at any time by using the transform tool in the toolbar.
Applying the Gradient to the Rectangle
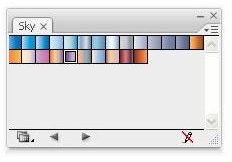
The first step in creating this menu is applying the gradient to the menu. You will need to open the Gradient box first. Click Window > Swatch Libraries > Gradients > Sky. When the Sky Gradient box opens, locate the Sky 19 gradient. Click the rectangle and click the Sky 19 gradient to apply it to the rectangle.
You will need to change the angle of the gradient. In the right panel of your program, you will need to look for the Gradient Tab. It should be located between the Stroke tab and the Transparency tab. Click the gradient tab and change the angle of the gradient to 90. That is the background part of the Gold and Purple Floral Border Menu.
Applying the Floral Border to the Menu
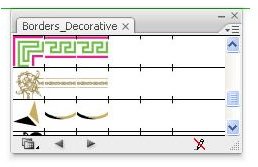
Now, we will apply the border to the menu. You will need to open the Borders Decorative brush by clicking Window > Brush Libraries > Borders > Borders_Decorative. The box will open and you will need to look for the gold floral border. You are looking for the border called Rococo. Placing your mouse over the border will display a box with the name of the border. Once you find the border, click the rectangle to select it and then click the border to apply it.
Applying the Drop Shadow and Text
The last two steps is to apply the drop shadow and the text links. Apply a default drop shadow by clicking the menu and clicking Effects > Stylize > Drop Shadow. Leave the default settings and click OK.
Then select the text tool and start typing your text. You can change the font style, size, and color to what you want. Here are the options that I used for my font.
Font Style – Bradley Hand
Font Size – 21
Font Color - # 4D285A
After you have finished your menu, you can export the menu and add it to your site.
Need the Adobe Illustrator File for this menu? You can download the Gold and Purple Floral Border Menu here.
This post is part of the series: Adobe Illustrator CS3 Menus
In this series, you will learn how to create different types of menus in Adobe Illustrator CS3.
- Adobe Illustrator CS3 Menu: Rose Gradient Drop Shadow Menu
- Adobe Illustrator CS3 Menus: Mirror Menu
- Adobe Illustrator CS3 Menus: Sapphire Beveled Arch Menu
- Adobe Illustrator CS3 Menus: Black and Gray Scribble Arrows Menu
- Create a Gold and Purple Floral Border Menu in Illustrator
- Adobe Illustrator CS3 Menu: Blue Gradient Snowflakes Menu