Adobe Illustrator CS3 Menus: Mirror Menu

This menu reminds me of a mirror, so that’s how it got its name. The mirror menu is created using a graphics style. The graphics style that we will be using was actually a button style but I made the menu and applied the style and it turned out really nice. So, this tutorial will show you how to create the Mirror Menu. Create a new document to work on and we will get started.
Drawing the Rectangle for the Mirror Menu Background
The first step to creating this menu is to draw the background part of the menu. The background part is created using the Rectangle Tool. Select the rectangle tool from the toolbar on the left side of your window. Draw the rectangle on the document and draw it the size that you want the menu to be.
Applying the Graphic Style to the Mirror Menu
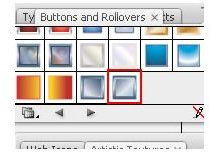
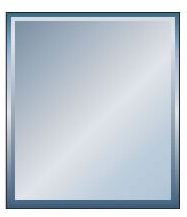
Next, you will need to apply the graphic style to the mirror menu. Go to the top of Illustrator and click Window > Graphic Libraries > Buttons and Rollovers. When the box opens, look for the Steel Normal style. You can place your mouse over the styles to see the names of them. Once you find the style, click the rectangle and then click the style to apply it.
Adding the Swirls and Curls to the Mirror Menu
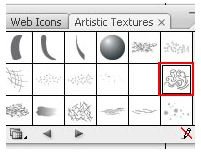
Next, we will add the swirls and curls design to the mirror menu. I used a symbol for this design, so you will need to open the symbols box. Go to the top of your window and click Window > Symbol Libraries > Artistic Textures. When the box opens, locate the Impressionism symbol. Again, you can place your mouse over the symbols to see the names of them
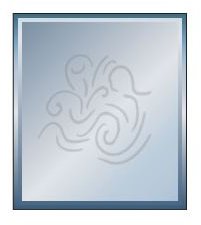
Once you find the symbol, click it and drag it to the mirror menu. You will probably need to resize it. You can resize it by clicking it and selecting the transform tool. Make it as large as you want it. Now you will need to drop the transparency of the symbol. Locate your Transparency box in the tool panels on the right. If you can’t find it, go to the top of your window and click Window > Transparency. Drop the transparency down to 25% and set the mode to Normal.
Adding Your Text to the Mirror Menu
Now you can start adding the text links to the menu. Select your text tool from your toolbar and type what you want on the menu. You can use the font style, size, and color of your choice. I just threw text on mine to show you what it would look like. I did select the color of the text to match the top of the mirror. The hex code for the color of the text is # 2B5E66. You can use this color or you can use another color.
After you have added your text, you can resize the menu if you need to. Then you can export the menu.
This post is part of the series: Adobe Illustrator CS3 Menus
In this series, you will learn how to create different types of menus in Adobe Illustrator CS3.
- Adobe Illustrator CS3 Menu: Rose Gradient Drop Shadow Menu
- Adobe Illustrator CS3 Menus: Mirror Menu
- Adobe Illustrator CS3 Menus: Sapphire Beveled Arch Menu
- Adobe Illustrator CS3 Menus: Black and Gray Scribble Arrows Menu
- Create a Gold and Purple Floral Border Menu in Illustrator
- Adobe Illustrator CS3 Menu: Blue Gradient Snowflakes Menu