Learn How To Install Joomla! on a Web Server--Install Joomla with Ease
Should You Install Joomla?
Joomla is a Content Management System (CMS) that allows you to build sophisticated web sites even if you’re not an advanced web developer. If you’ve been thinking about creating a business web site or even a professional blog site, consider installing Joomla to give yourself more control over your site’s appearance and functionality.
The following steps will walk you completely through a Joomla installation.
Joomla! Web Installation
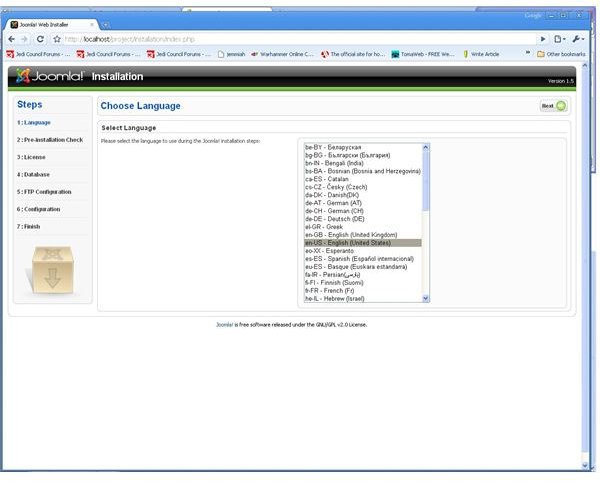
The first thing you see will be this:
1. Select your language (en-US is default). Click “Next”.
2. On the next screen, you should see all “Yes”’s. If you don’t, it means your host doesn’t meet all the requirements for installing Joomla! and you should give them a call.
3. Click “Next”.
4. Read the GPL, then click “Next”. You will see this:
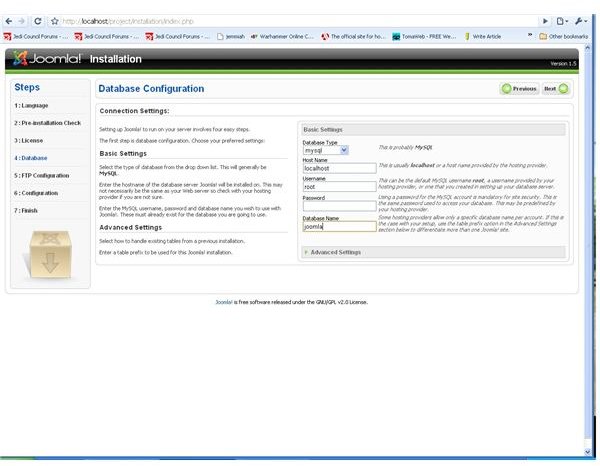
5. This information is unique to your hosting provider.
Database Type: this will pretty much always be “mysql”.
Host Name: this will almost always be “localhost”.
Username: this is provided to you by your host.
Password: this is provided to you by your host.
Database Name: this is something you will usually have to manually create through a control panel on your host’s website. You can attempt to type a name in and see if it auto-creates, but it more than likely will not. If you cannot find a place to create the database on your host’s website, call them and have them set it up. Then, type the chosen database name in this box.
6. Click “Next”.
7. For FTP configuration, enter either your FTP credentials for your web server (the ones you used for Filezilla) or create an FTP account specifically for Joomla! to use. This can usually be done on your host’s website.
8. Click “Next”. You will see this:
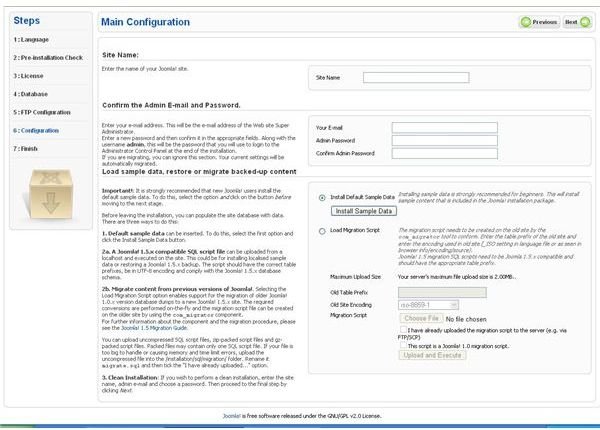
9. Choose a name for your site.
10. Enter your email address and choose an Admin password.
11. You may choose to install sample data into the site or do a fresh installation. Sample data allows you to see what your site is going to look like once it has content. However, once you have a good idea of how to use Joomla!, removing the sample data becomes a chore. Future guides will explain how to add content into a blank site, so whether you want to do tinkering on your own with sample data is entirely up to you. My standing recommendation, however, is to not install it.
12. If you decide to add sample data click “Install Sample Data”. When you see “sample data installed successfully” click “Next”.
13. On the next page you will see a big red message to remove the “Installation Directory”. Return to your Filezilla FTP client. You will probably have to reconnect to your server. In the root directory of your server (\ indicates root), right-click the folder named “Installation” and select “delete”.
14. Click “Next”. Installation is now complete. In the top right-hand corner of the browser you will have two options. One will direct you to your new website, the other to the administration panel for your new website.
15. To access your administration panel in the future simply append /administrator to the end of your website’s URL.
This post is part of the series: Joomla! 1.5 Installation Guide
In this series we learn all the steps of getting started on a Joomla! powered website. Learn how to install Joomla! on your PC to test it, how to get adequate hosting, and how to install on your live host.