Flash Game Development with Flex and Actionscript: Embedding Resources and Adding Game Objects
When writing a new program there is always a point where you first get to see the fruits of your labour. With the state and rendering “plumbing” now done we can start doing some fun stuff by adding graphics to our game and displaying them on the screen. But before we do let’s take a look at what changes we have to make in the main.mxml file.
Getting to the Fun Part
<mx:Application
xmlns:mx="https://www.adobe.com/2006/mxml"
layout=“absolute”
width=“600”
height=“400”
frameRate=“100”
creationComplete=“creationComplete()”
enterFrame=“enterFrame(event)”
currentState=“MainMenu”>
<mx:State
name=“Game”
enterState=“enterGame(event)”
exitState=“exitGame(event)">
</mx:State>
<mx:State name=“MainMenu”>
<mx:AddChild relativeTo="{myCanvas}” position=“lastChild”>
<mx:Button x=“525” y=“368” label=“Start” id=“btnStart” click=“startGameClicked(event)”/>
</mx:AddChild>
</mx:State>
</mx:states>
<mx:Canvas x=“0” y=“0” width=“100%” height=“100%” id=“myCanvas”/>
<![CDATA[
protected var inGame:Boolean = false;
public function creationComplete():void
{
}
public function enterFrame(event:Event):void
{
if (inGame)
{
GameObjectManager.Instance.enterFrame();
myCanvas.graphics.clear();
myCanvas.graphics.beginBitmapFill(GameObjectManager.Instance.backBuffer, null, false, false);
myCanvas.graphics.drawRect(0, 0, this.width, this.height);
myCanvas.graphics.endFill();
}
}
protected function startGameClicked(event:Event):void
{
currentState = “Game”
}
protected function enterGame(event:Event):void
{
GameObjectManager.Instance.startup();
inGame = true;
}
protected function exitGame(event:Event):void
{
GameObjectManager.Instance.shutdown();
inGame = false;
}
]]>
</mx:Script>
</mx:Application>
There is only one change made to the exitState function which calls the GameObjectManager shutdown function. This will allow the GameObjectManager to clean up its resources when we leave the Game state. Now let’s move onto the changes to the GameObjectManager.
GameObjectManager.as
package
{
import flash.display.*;
import mx.collections.*;
import mx.core.*;
public class GameObjectManager
{
// double buffer
public var backBuffer:BitmapData;
// colour to use to clear backbuffer with
public var clearColor:uint = 0xFF0043AB;
// static instance
protected static var instance:GameObjectManager = null;
// the last frame time
protected var lastFrame:Date;
// a collection of the GameObjects
protected var gameObjects:ArrayCollection = new ArrayCollection();
// a collection where new GameObjects are placed, to avoid adding items
// to gameObjects while in the gameObjects collection while it is in a loop
protected var newGameObjects:ArrayCollection = new ArrayCollection();
// a collection where removed GameObjects are placed, to avoid removing items
// to gameObjects while in the gameObjects collection while it is in a loop
protected var removedGameObjects:ArrayCollection = new ArrayCollection();
static public function get Instance():GameObjectManager
{
if ( instance == null )
instance = new GameObjectManager();
return instance;
}
public function GameObjectManager()
{
if ( instance != null )
throw new Error( “Only one Singleton instance should be instantiated” );
backBuffer = new BitmapData(Application.application.width, Application.application.height, false);
}
public function startup():void
{
lastFrame = new Date();
new Bounce().startupBounce();
}
public function shutdown():void
{
shutdownAll();
}
public function enterFrame():void
{
// Calculate the time since the last frame
var thisFrame:Date = new Date();
var seconds:Number = (thisFrame.getTime() - lastFrame.getTime())/1000.0;
lastFrame = thisFrame;
removeDeletedGameObjects();
insertNewGameObjects();
// now allow objects to update themselves
for each (var gameObject:GameObject in gameObjects)
{
if (gameObject.inuse)
gameObject.enterFrame(seconds);
}
drawObjects();
}
protected function drawObjects():void
{
backBuffer.fillRect(backBuffer.rect, clearColor);
// draw the objects
for each (var gameObject:GameObject in gameObjects)
{
if (gameObject.inuse)
gameObject.copyToBackBuffer(backBuffer);
}
}
public function addGameObject(gameObject:GameObject):void
{
newGameObjects.addItem(gameObject);
}
public function removeGameObject(gameObject:GameObject):void
{
removedGameObjects.addItem(gameObject);
}
protected function shutdownAll():void
{
// don’t dispose objects twice
for each (var gameObject:GameObject in gameObjects)
{
var found:Boolean = false;
for each (var removedObject:GameObject in removedGameObjects)
{
if (removedObject == gameObject)
{
found = true;
break;
}
}
if (!found)
gameObject.shutdown();
}
}
protected function insertNewGameObjects():void
{
for each (var gameObject:GameObject in newGameObjects)
{
for (var i:int = 0; i < gameObjects.length; ++i)
{
if (gameObjects.getItemAt(i).zOrder > gameObject.zOrder ||
gameObjects.getItemAt(i).zOrder == -1)
break;
}
gameObjects.addItemAt(gameObject, i);
}
newGameObjects.removeAll();
}
protected function removeDeletedGameObjects():void
{
// insert the object accordng to it’s z position
for each (var removedObject:GameObject in removedGameObjects)
{
var i:int = 0;
for (i = 0; i < gameObjects.length; ++i)
{
if (gameObjects.getItemAt(i) == removedObject)
{
gameObjects.removeItemAt(i);
break;
}
}
}
removedGameObjects.removeAll();
}
}
}
Here we have added 3 new variables: gameObjects, newGameObjects and removedGameObjects. The gameObjects collection will hold all the GameObjects that exist in the game (the GameObject class is used to represent any element in the game, and is described below). GameObjectManager will loop through this collection to update and render the GameObjects. The other two collections, newGameObjects and removedGameObjects, hold GameObjects that have been created or removed during the render loop. The reason for this is because it is almost always a bad idea to modify a collection while you are looping through it. The following code is an example of what you want to avoid.
for each (var gameObject:GameObject in gameObjects)
{
// this is a bad idea…
gameObjects.addItemAt(1, new GameObject());
gameObjects.removeItemAt(2, new GameObject());
}
This is not just a limitation of ActionScript or Flex; a number of programming languages expressly prevent the modification of a collection while looping over it. Even if it is possible to modify a collection inside a loop it is still a bad idea because the code becomes very hard to debug if something goes wrong. We avoid this situation by adding all newly created GameObjects into the newGameObjects collection (via the addGameObject function) and adding any GameObjects that have been shutdown into the removedGameObjects collection (via the removeGameObject function). These two collections then get “synced” with the main gameObjects collection before we enter a loop through the insertNewGameObjects and removeDeletedGameObjects functions.
To the startup function we add code to create and initialise a Bounce object. This object will not be part of the final game, but exists as a demonstration of how to extend the GameObject class to create an element within the game. The code for the Bounce class will be detailed below.
Our shutdown function, which used to be empty, now calls shutdownAll. ShutdownAll in turn calls shutdown on all GameObjects that have been created. This way we can clean up all GameObjects with one call to the GameObjectManagers shutdown function when leaving the Game state (via the exitGame function in our Application class).
Enterframe has been updated to include calls to the insertNewGameObjects and removeDeletedGameObjects, which as mentioned before allow the gameObjects collection to reflect any GameObjects that have been started or shutdown. We also loop over the gameObjects collection and call enterFrame on all the GameObjects. The enterFrame function in the GameObject class is where the GameObject (and any class that extends it) will update itself. For example an enemy will update its position on the screen during a call to enterFrame. Finally we make a call to drawObjects, which prepares the back buffer and then calls copyToBackBuffer on all GameObjects. It’s in the copyToBackBuffer function that a GameObject will draw itself to the frame.
Now that we have seen how the GameObjectManager manages a collection of GameObjects, let’s look at the GameObject class.
GameObject.as
package
{
import flash.display.*;
import flash.events.*;
import flash.geom.*;
/*
The base class for all objects in the game.
*/
public class GameObject
{
// object position
public var position:Point = new Point(0, 0);
// higher zOrder objects are rendered on top of lower ones
public var zOrder:int = 0;
// the bitmap data to display
public var graphics:GraphicsResource = null;
// true if the object is active in the game
public var inuse:Boolean = false;
public function GameObject()
{
}
public function startupGameObject(graphics:GraphicsResource, position:Point, z:int = 0):void
{
if (!inuse)
{
this.graphics = graphics;
this.zOrder = z;
this.position = position.clone();
this.inuse = true;
GameObjectManager.Instance.addGameObject(this);
}
}
public function shutdown():void
{
if (inuse)
{
graphics = null;
inuse = false;
GameObjectManager.Instance.removeGameObject(this);
}
}
public function copyToBackBuffer(db:BitmapData):void
{
db.copyPixels(graphics.bitmap, graphics.bitmap.rect, position, graphics.bitmapAlpha, new Point(0, 0), true);
}
public function enterFrame(dt:Number):void
{
}
}
}
This class is designed to be extended to create more specific game elements like bullets, the player, the enemies etc. It has 4 properties. The position property simply defines the position of the GameObject on the screen. The coordinates (0,0) indicate a position in the top left of the screen, and the coordinates (1,1) indicate a position on the bottom right. The zOrder property defines the “height” of the object on the screen. A GameObject with a low zOrder (like a building on the ground) will be drawn beneath a GameObject with a higher zOrder (like the player). The graphics property is a reference to a graphics resource, which will be described later. This graphics resource is the picture that gets drawn to the back buffer. And finally the inuse property simply flags the object as being active in the game. We will use this property to allow the use of resource pooling later on.
The startupGameObject and shutdown functions should start to look familiar. The startup and shutdown pair of functions will be a common theme as we add more classes. In the GameObject they simply initialise variables, and add or remove the GameObject from the collection maintained by the GameObjectManager. The copyToBackBuffer function takes the pictures stored in the graphics property and copies them to the back buffer. The enterFrame function here is empty. This is because the GameObject is designed to be extended by more specialised classes, and it’s these specialised classes that will add logic inside the enterFrame function. The Bounce class is an example of how this is done.
Bounce.as
package
{
import flash.geom.*;
import mx.core.*;
public class Bounce extends GameObject
{
// movement speed of the bouncing object
protected static const speed:Number = 100;
// direction that the bouncing object should move (1 for right/down, -1 for left/up)
protected var direction:Point = new Point(1, 1);
public function Bounce()
{
super();
}
public function startupBounce():void
{
super.startupGameObject(ResourceManager.BrownPlaneGraphics, new Point(0, 0));
}
override public function shutdown():void
{
super.shutdown();
}
override public function enterFrame(dt:Number):void
{
super.enterFrame(dt);
position.x += direction.x * speed * dt;
position.y += direction.y * speed * dt;
if (position.x >= Application.application.width - graphics.bitmap.width)
direction.x = -1;
else if (position.x <= 0)
direction.x = 1;
if (position.y >= Application.application.height - graphics.bitmap.height)
direction.y = -1;
else if (position.y <= 0)
direction.y = 1;
}
}
}
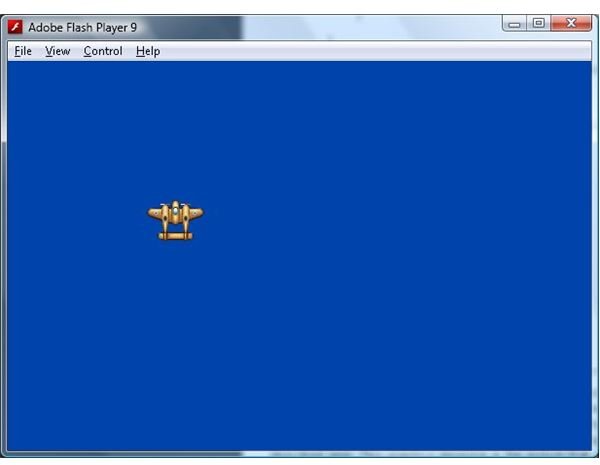
The Bounce class is an example of a class that extends the base GameObject class to add some specialised logic to game element. In this case that logic is to simply bounce around on the screen.
Bounce has 2 properties. Speed defines how quickly the object will bounce around on the screen, and direction defines the x and y directions that the object is currently moving in.
Once again we have a pair of functions to startup and shutdown the object. I told you they would be a common theme. In this case we simply defer back to the GameObject startup and shutdown functions.
The enterFrame function is where the object updates itself during the render loop. The Bounce object simply moves in a straight line until it hits the edge of the screen, at which point it reverses direction. It’s not very smart, but the Bounce class will not play a part in the final game; its only purpose is as a simple demonstration how a GameObject is extended.
The final two classes that have been created to allow us to start drawing to the screen are the Resourcemanager and GraphicsResource.
Resource management is an important aspect of any game. How will you package the graphics and sound effects used by your game? How do you load them? Where are they stored? These are simple questions that can have big implications. Roughly speaking Flex gives you three options for accessing graphics and sound resources. The first is to load them from the local disk. While this is the traditional way to load resources it is not practical for a game that will be run from the web. For that Flex also allows you to load resources stored on a web server. But while this does eliminate the need to save anything to the end users local drive, it does mean that the game SWF file and the other game resources need to be stored as separate files. Thankfully Flex offers a 3rd option: embedding the resources directly into the final SWF file.
To embed a resource you use the Embed tag. As long as the file your are embedding is recognised by Flex (and that includes a huge range of graphics formats, as well as MP3s for sound) Flex will compile the file directly into the final SWF file, and expose the contents of the file through a class.
The ResourceManager is used as a place to embed and access the game resources. It has no functions at all: it’s only purpose is to expose properties that represent the embedded resources. Here we have defined 1 graphics resource: the brownplane.png image.
ResourceManager.as
package
{
import flash.display.*;
public final class ResourceManager
{
[Embed(source="../media/brownplane.png")]
public static var BrownPlane:Class;
public static var BrownPlaneGraphics:GraphicsResource = new GraphicsResource(new BrownPlane());
}
}
In order to use the embedded graphics we need to separate the alpha (or transparent) layer from the original picture. If you look back to the copyToBackBuffer function in the GameObject class you will see that the copyPixels function uses both the bitmap and alphaBitmap properties of a GraphicsResource object. Extracting and exposing these elements from an embedded picture is the sole purpose of the GraphicsResource class. Lets take a look at the GraphicsResource class now.
GraphicsResource.as
package
{
import flash.display.*;
public class GraphicsResource
{
public var bitmap:BitmapData = null;
public var bitmapAlpha:BitmapData = null;
public function GraphicsResource(image:DisplayObject)
{
bitmap = createBitmapData(image);
bitmapAlpha = createAlphaBitmapData(image);
}
protected function createBitmapData(image:DisplayObject):BitmapData
{
var bitmap:BitmapData = new BitmapData(image.width, image.height);
bitmap.draw(image);
return bitmap;
}
protected function createAlphaBitmapData(image:DisplayObject):BitmapData
{
var bitmap:BitmapData = new BitmapData(image.width, image.height);
bitmap.draw(image, null, null, flash.display.BlendMode.ALPHA);
return bitmap;
}
}
}
GraphicsResource has the two properties mentioned above: bitmap and bitmapAlpha. These are extracted from an embedded image passed into the constructor by the createBitmapData and createAlphaBitmapData functions. Once extracted they are in a form that is convenient to use with the copyPixels function used in the GameObject’s copyToBackBuffer function.
So what have we achieved here? We have built on the groundwork laid in parts 1 and 2 of the series to embed some resources (ResourceManager and GraohicsResource), created the base class for more specific game objects (GameObject), and then finally combine it all to add a moving object to the screen (Bounce).
In part 4 of the series we will add an object that the player can control, as well as create a scrolling background for the player to fly over.
Go back to Flash Game Development with Flex and ActionScript
Related Files
Images
Related Articles

Getting to know the Irrlicht 3D engine
This tutorial series shows you how to use the free 3D engine Irrlicht.
This post is part of the series: Game programming with Flex
Learn how to create a Flash game using Flex with this step by step series.
- Flash Game Development with Flex and Actionscript - Getting Started
- States & Double Buffer Rendering in Flex 4.0
- Flex & Actionscript Tutorial: Adding Game Actions
- Creating an Interactive Animated Background With Flex and Actionscript
- Adding Weapons to Your Game: Flex & Actionscript Tutorial
- Collision Detection With Actionscript
- Adding Bitmap Animations With Flex and Actionscript
- Adding Music and Sound FX With Flex and Actionscript
- Defining Levels: Game Design With Flex and Actionscript
- Actionscript Tutorial: Add a Scrolling Tiled Background