How to Create an Email Signature in Gmail
How to Create an Email Signature
Email signatures can be a useful tool for providing contact information or advertising services and products in every message that you send out. To make that easier, Gmail has a setting that allows you to create an email signature which appears at the bottom of any email that you create, respond to, or forward.
Email signature add a professional look to your email and allow you to include your title, contact information, or even ads or Web site links that might be useful to email recipients.
To create an email signature in Gmail:
1. Sign into your Gmail Account.
2. Click the Settings link located in the top right corner of any Gmail window.
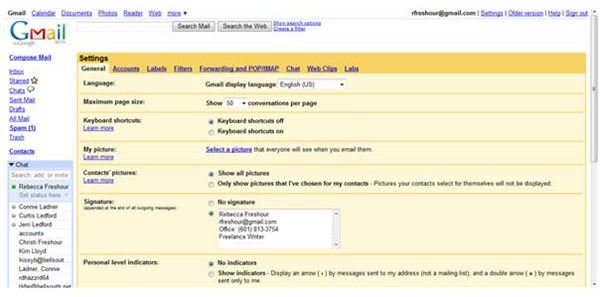
3. If you’re not taken there automatically, select the General Settings tab (the first tab).
4. Scroll down to Signature options.
5. Select the radio button next to the Signature text box to activate your email signature.
6. Enter the signature that you like appended to the emails you send. Pay attention to formatting so that the signature displays the way you intend for it to.
7. Scroll to the bottom of the page and click Save Changes.
Your new signature appears bottom of any email that you create, respond to, or forward. Just remember that emails you send to your contacts may be forwarded to people you don’t know. Don’t include information you’re not comfortable with strangers having. Don’t include your home address or phone number. Instead, try to use a cell phone number or post office box.
To edit your email signature, follow steps 1-5 above. Then, in step 6, change the information in the signature text box as desired. Or, to remove the signature, click the radio button next to the No Signature. The email signature will no longer be included in your messages. And don’t forget to save any changes that you make before you navigate away from the Settings page.