
Have you been putting off your plans for building a wood fired baking oven, just because you’re not sure how to go about it? Follow this illustrative guide and you’ll soon have a marvel to admire, right there in your background.
Who can resist a freshly baked bread or pizza? Especially one that’s made in a conventional wood fired oven! The modern-day electric and gas ovens can never even stand close to something baked over a wood fire. The wood imparts a distinct flavor to the food that is nearly impossible to replicate. So, if you’re missing that distinct flavor in your bakes, here’s a detailed wood-fired oven construction plan.
Things You’ll Need to Construct the Oven
-
Bricks
Advertisement -
Loam or Clay (Loam is available at most gardening supply stores)
-
Sand
Advertisement -
Chopped Straw or Straw Chaff (It’s available at animal feed stores as well as gardening stores.)
-
Mortar (Regular construction mortar)
Advertisement -
Metal Bars ( Preferably Iron)
-
Concrete Slab
Advertisement -
Pipe and Rain Cap for the Chimney
-
Stone Tile
Advertisement -
Door Hinges
-
A tin door or a piece of wood to make the oven door.
Advertisement
Instructions for Making the Baking Oven
Before you get started with the project, you need to decide on the place where you can install your wood fired oven. Look for an ideal corner in your backyard, and if you’re not keen on getting a rain shelter made for it, then you must look for some covered space. But make sure that whatever place you choose, it has good airflow to keep the fire burning and it’s easy to install the chimney for the smoke. Even though we’re making the oven with clay, you can be sure that it won’t melt away in the rain. The reason you need to have a rain shelter to protect it, is that a wet oven is really difficult to fire up. When you’ve found the right spot, here’s how to build your own firewood oven.
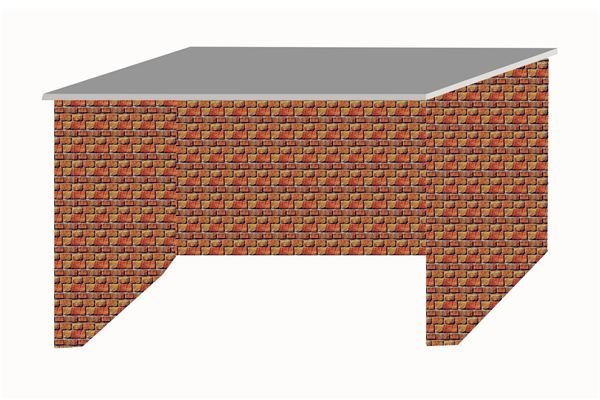
Step 1 – Preparing a Platform
First we’ll make the platform for the construction of your baking oven. For this we’ll raise three walls, and cover it up with a concrete slab as shown in the image below. Raise the walls using bricks and mortar, and as for its height – adjust it to suit your comfort. And, as for the width and breadth just keep in mind the space you have and the size of oven you want to make. An oven made on a 3 feet by 3 feet platform may be quite suitable for most types of cooking. The enclosure under the platform will work as storage for firewood. You might have to halt your project for a day or two to allow the mortar to set, during which you must keep curing the construction with water.
Step 2 – Preparing the Base
Next, that’s when your platform is ready; we’ll begin making the base of the oven. This is the place where you’ll light the fire. To make this we’ll need bricks and cob mixture. To make the cob mixture, mix one part sand with two parts of clay and one part straw chaff. If you’re using loam, you don’t need to mix in the sand as it already has sand in it. Chopped straw is added to this mixture to give it extra strength and to prevent the clay from cracking as it dries up or when the fire heats it up. Since, this project is going to take a couple of days or it may even run into weeks, do not make all the cob mixture right away.
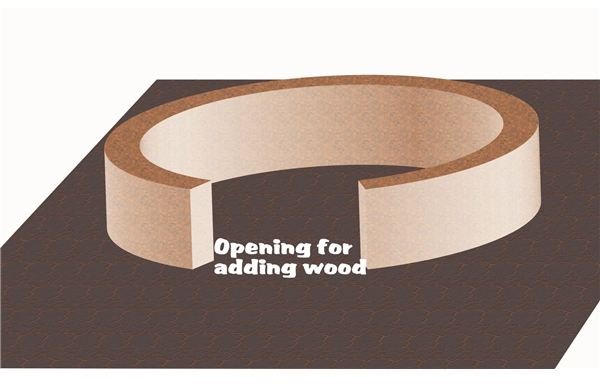
On the platform draw a circle – this will serve as the external perimeter of the oven. Use bricks and cob mixture to raise a circular structure, as shown in the image. The ideal height for this structure would be anything above 10 inches. Remember to keep the front side open. When your base structure is ready let it rest for a few hours or preferably for a day.
Step 3 – Fixing the Baking Surface
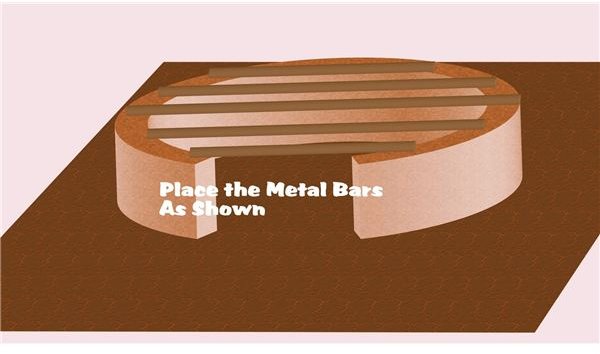
When you’re ready to move on to the next step, cut the metal bars and arrange them on the oven base as shown in the image. Secure them to the walls of the existing base with a layer of cob mixture.
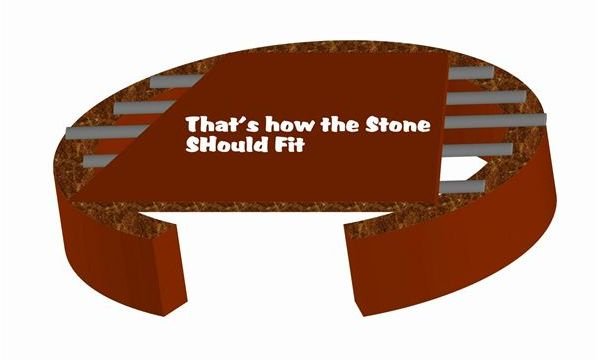
For the baking surface we’ll use the stone. Natural quarry tile and granite, are the most preferred baking surfaces because both these can endure high temperatures, without any signs of cracking. You can use any other stone, but just make sure that the top surface is really smooth and it can tolerate the heat. The stone tile should be cut into a square that fits well within the perimeters of the oven base. Place the stone on the base as shown in the image. The stone should rest on the iron bars and the corners of the stone can be secured into the oven base using a layer of cob mixture.
Step 4 – Making the Dome of the Oven
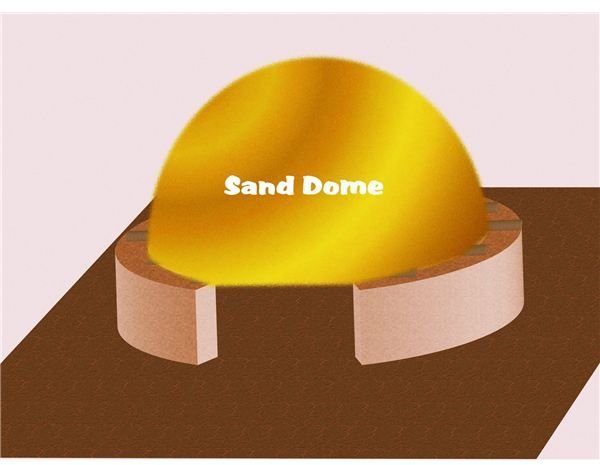
The next step in building the wood fired oven is to make the dome. For this you’ll again need the cob mixture, but before that we’ll build a strong support structure to make the dome shape. For this we’ll use wet sand, fill up the interiors of the base structure with sand. Keep adding sand to make a dome shape. Build the sand dome within the internal circumference of the base as shown below. And be sure to compress the sand well, so that it provides good support to the dome.
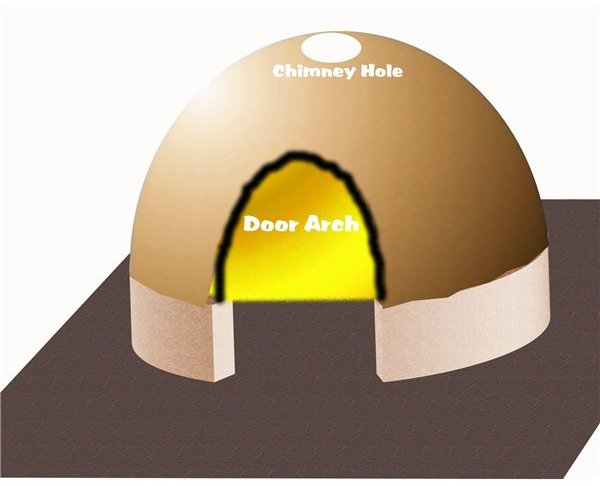
Start layering the sand dome with the cob mixture, and keep smoothening it out with a wet hand. Leave an arched shape in the front, where we’ll make the access door later. Also leave a hole at the top where the chimney pipe will be fixed. Just take a look at the image below to understand what we’re talking about.
Step 5 – Adding the Door to the Oven
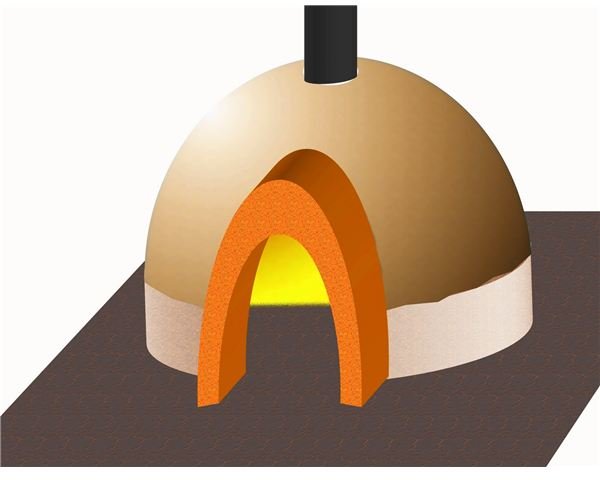
To make the doorway, curve a piece of cardboard and place it in the arch that we had made for the doorway. Add some support to it, so that it doesn’t sink in when you place a cob mixture layer on it. Build the doorway of the oven, using cob mixture as shown below. You can add the door hinges to one of the walls of this doorway, while it is still wet.
Step 6 – Completing the Oven
After letting it rest for a day or two, secure the chimney pipe at the top using some cob mix, to keep it in place. Now you need to give your oven some time to dry and harden. Let the oven dry for a week or more depending on how cold and humid your place is. Touching it before the cob has completely dried can cause the structure to sink in.
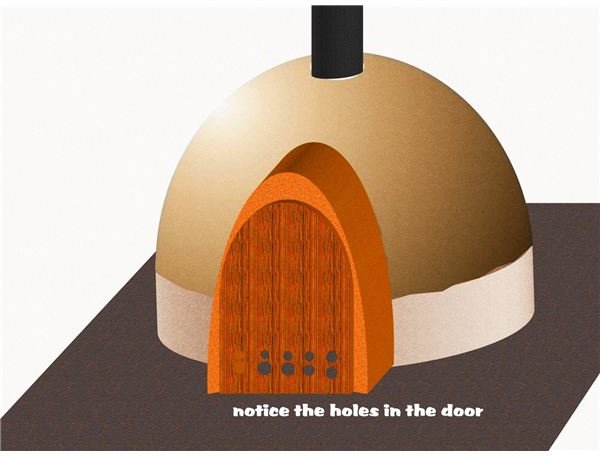
When the structure seems strong enough for use, remove all the sand from inside it. And finally fix the door to it. To make the door you can either use wood or a metal door. Whichever material you choose, make some holes near the bottom of the door, from where the oven can suck in air for the fire. The holes should be made only in the bottom 10 inches of the door. If you’re planning on making a wooden door, you must coat the inner side with a half inch thick layer of cob. This will prevent the door from getting burnt. And here’s what your wood fired oven will look like.
Lastly, just remember that this wood fired oven construction plan requires a lot of patience, as it can take anything from a week to fifteen days to complete. But for sure, your patience will be rewarded with the sumptuous baking treats you’ll get to enjoy once you’re done with the project.
References & Credits:
This article is based on the knowledge and personal experience of the author.
Image Credit:
Images by – Sidharth Thakur


