With these easy to follow, step-by-step plans, you can build your own composter from scratch in a single afternoon. Materials can be purchased new or reclaimed for added environmental friendliness.
The easiest, most versatile DIY composter is a worm bin. If you want to build your own composter from scratch, but don’t have much experience with compost, this is an excellent starter project. These composters are simple to build and maintain, can be used indoors or out, and are limited only by the size of your bin and amount of worms you place in them. Worms can eat all types of vegetarian organic waste, from coffee grinds to potato peelings, stale bread ends to leftover vegetables. Worm bin composters are odorless, if managed correctly, making them perfect no matter if you live on a farm or in an apartment in the city.
Materials Needed
Several 10-16’ non-pressure treated 2x4’s
½” plywood, OSB, or similar sheet wood
Damp cardboard the size of your bin lid
Leaves or other organic litter
A small handful of clean dirt
Shredded Newspaper
Drill and drill bits
Galvanized nails
2 door hinges
Food scraps
Worms
A Word or Two About Your Materials
In terms of building your DIY composter, the use of plastic storage bins, old wooden footlockers, and small shipping crates are excellent choices for worm bins. Alternatively, you can build your own wooden container box from 2x4s and ½” plywood or even use old dresser drawers, if they are deep enough. You can even build compost bins out of garbage cans . No matter if you buy new or use reclaimed materials, you will need bins with lids, in a dark color that does not let in light.
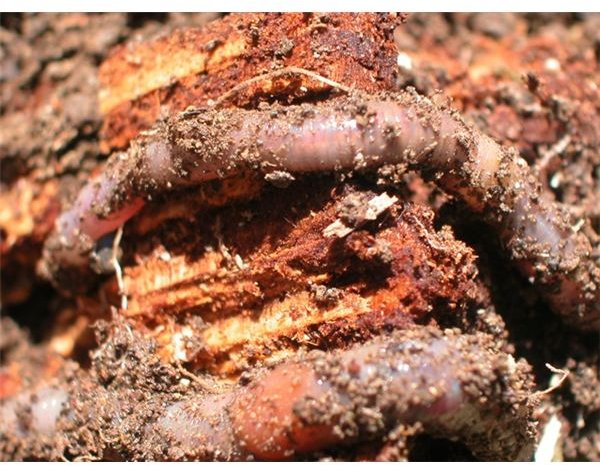
Red worms, also known as red wigglers, are best for composting organic matter. One pound of redworms can handle a half a pound of organic waste per day. To find redworms, you can buy them directly from a wholesaler or simply visit a local horse or dairy farm. Redworms can be found in abundance free at many local farms. You can also find your own by leaving a wet piece of cardboard outside for a day or two, then digging through the first 3 inches of dirt under the cardboard. As these are a type of earthworm, you can identify redworms by their pinkish color and tell-tail band around the middle.
Red Worms
Build Your Bins
If you truly want to build your own composter from scratch, you can build your own bins. The lifespan of wooden worm bins varies, depending on the quality of wood used and the amount of moisture maintained. Generally, you can expect a wooden worm bin to last several months, longer if moisture levels are low and the wood is good quality.
The design is simple. To start, decide how big you want your DIY composters to be, then cut materials accordingly.
- Use 2x4s to create a flat square the size you want your finished bins. Lay them out much like a picture frame. Use galvanized nails to secure each 2x4 to the next. Alternatively, you can use a variety of metal braces found at your local hardware store to secure the frame corners.
- Cut plywood to cover the square completely and nail in place.
- Cut four pieces of 2x4s equal to the depth you want your finished bins. Nail one 2x4 upright to each corner. For added stability, you can nail two 2x4s at each corner, in an L shape, parallel to the edges of your base frame. Be sure to allow ½” for plywood sides to keep your bin edges smooth. The easiest way to nail side posts is from underneath, through the base.
- Wrap all four sides in plywood. Be sure to make allowances in your measurements so that plywood sides meet evenly at each corner.
- To build a lid, simply cut plywood to fit over the top and reinforce with two 2x4s cut to fit and nailed parallel to each other across the plywood. The 2x4s will help keep the lid from warping. For truly sturdy lids, make your lids identical to your base with the same picture frame-style covered with plywood.
- Use two door hinges to attach the lid at the back of your bin. Attach a simple drawer pull or handle to the top of the lid to make it easier to lift up.
Continue on to Page 2 to learn how to set up your DIY composters and start your worm bins.
Prepare Your Bins
Your DIY composter will need the ability to drain and have air circulate through the bin. As such, you will need to drill holes through the bottom, sides, and lids of your bins. When drilling ventilation holes in your bins, use larger drill bits in the bottom of your bin and smaller drill bits on the sides and lid. You will want larger holes in the bottom (approximately ¼”) so that when you harvest your vermicompost, the worms can crawl out of the bottom of the old bin and into a new one. For harvesting purposes, you’ll want at least two bins, constructed so they easily stack on top of each other.
No matter the exact size of your bins, drain holes in the bottom should be evenly spaced over the entire bottom of the bin. On the sides, you will want to drill small holes towards the top of the sides, approximately 1½ to 2 inches apart. On one lid, drill roughly 25-35 evenly spaced holes for additional ventilation.
Get Your Worms Started
When your bins are ready, wet shredded newspaper and wring it out. Newspaper should be damp, but not dripping. Fill the bottom of your bin with approximately 4 inches of fluffed, not packed newspaper. Add leaf or other organic matter and a handful of clean dirt. The dirt helps the worms better digest their food. Add worms and food scraps. Cover the bedding with damp cardboard and close the lid.
You can feed your worms at a rate of ½ pound of organic scraps per pound of redworms. If you place a tray or other catching mechanism underneath your bins, you can harvest any drainage. This liquid compost is great fertilizer for indoor plants. In terms of bedding, periodically check your bins. As bedding is used up in the composting process, add more damp bedding to continue composting or harvest the humus and start a new bin. How often you will need to add fresh bedding depends on the size of your bin, number of worms, and the bedding material.
Notes and Troubleshooting
When you feed your worms, be sure to bury the food scraps in the bedding to prevent fruit flies and odors. If the bedding feels dry, mist it periodically with a spray bottle filled with regular tap water. When the bedding is gone, you’re ready to harvest your humus and start again.
Harvesting can be accomplished by starting a new bin with fresh bedding and food. Instead of feeding in the old bin, stack the old bin on top of the new one. The worms will work their way through the bottom ventilation holes and into the new bin, drawn by the new food. Make sure bins are a snug fit so light does not show through. Otherwise, your worms may huddle in dark areas of the old bin, rather than moving to the new one. Alternatively, you can dump your bins onto a tarp and manually move worms to their new home. Be sure to also move cocoons so new worms can hatch in the new bin.
To prevent worms from escaping your bins, keep them on a solid surface such as a concrete pad, table, or other surface off the ground and feed them regularly. This will help keep worms from burrowing out of the bin through the ventilation holes in search of fresh food. If you notice worms escaping, this generally means conditions in the bin are not to their liking. This could be the result of too much moisture, lack of food, or poor air flow.
Vary the bedding used for better nutrition. In addition to damp newspaper, you can use aged manure, shredded dead leaves, dead plants, or even sawdust.
If bedding becomes too compact during composting, this usually indicates higher moisture than needed. Mix in dry bedding and fluff. Worms need air ventilation. Lifting and fluffing compacted bedding and mixing in drier bedding stabilizes moisture levels, provides air circulation, and will reduce odors.
On average, it takes approximately 2 to 3 months for worms to use up their bedding, depending on the material. To keep worms healthy, harvest humus at least every 75 days and store in plastic bags until needed.
Moisture levels and air circulation are the most important factors for healthy worms, besides food. If food sits too long, stop feeding until all food is consumed. Rotting food adds to moisture levels. High moisture can drown worms. Likewise, poor air circulation contributes to bad odors and high moisture levels. Periodically check ventilation holes and turn bin contents to encourage good air flow.
References and Resources
Washington State University: https://whatcom.wsu.edu/ag/compost/wormbins.htm
Grit Magazine: Compost Science, What’s Happening in Your Compost Bin? https://www.grit.com/garden/compost-science-whats-happening-in-your-compost-bin.aspx
Images courtesy of morgueFile user, kittenpuff1


