
Anyone can build a home entertainment wall to create a custom look. Start with entertainment wall center plans. Choose the wall entertainment center you like best. Build your own and save money while having a custom piece.
Build a home entertainment wall that is both functional and customized. You do not needed to be a master DIYer in order to create a wall entertainment center. You need just a few materials, guideline, and determination.
Decide on the entertainment wall center plans that fit your needs. Planning is the most important thing when building a wall. You need to decide what wall section you need and the size. You need to figure out what you’ll be including on the wall in addition to the TV: do you need a rack for CDs and DVs, tapes, DVD player, music system, etc.? The plan would mainly depend on the stuff you have available at your place and the space limitation of the wall.
Below are steps to create a custom unit from premade materials.
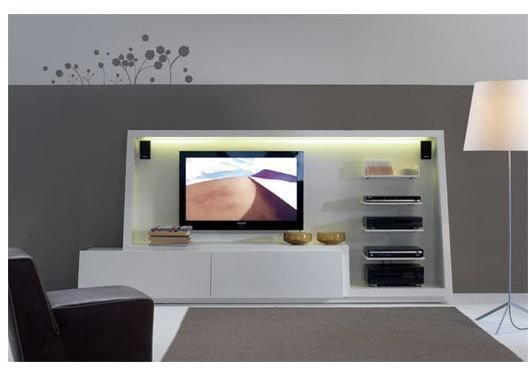
Image Credit: https://www.cgsgroupinternational.com/PICTURES/PICTURES/WALL%20UNITS/9 _wall_g.jpg
Materials Needed
Here is a list of tools and materials you need to build the home entertainment wall. Ensure to collect everything before starting the project.
- Premade cabinets with matching veneer
- Contact cement
- Paintbrush
- Finishing nails
- 2 x 4s
- Drywall screws
- Drill
- Saw
- Hammer
- Tape measure
- Level
- Clamps
- Pry bar
- Stud finder
- Countersink drill bit
Step 1. Make a Platform
Remove the trim from the wall the unit is going on. Build a platform for the cabinets to sit on out of 2 x 4s. It should measure about 3 ½ inches high. Secure the parts with drywall screws.
Step 2. Install Main Cabinet
Saw off the bottom trim from the main cabinet. Flip the cabinet upside down to make the larger portion to hold the television. Set it in the center of the built platform.
Step 3. Add Height
Since the television will be placed in this part, you need to make sure the shelf is even with the front edge of the cabinet. Add plywood and secure with screws. This will ensure correct height for TV mounting and viewing and make it easier to put the television in the cabinet after it is finished.
Step 4. Apply Veneer
Cut the veneer for the inside of the unit to give the center a professional look. Attach with contact cement. Cover all sides, top, bottom, and back.
Step 5. Join The Side Units Together
Clamp the bookcases to the smaller cabinets. Join the pieces with 2 ½ inch screws through the face frames. Spread out some sort of fabric and lay the assembled piece on its side.
Step 6. Cover The Outer Edge
Cut veneer to fit the outer side of the unit to maintain the same color look throughout the unit. Adhere the skin with cement. Remember to cover both ends.
Step 7. Secure All Units Together
Place side units on platform next to the main cabinet. Screw them together using 2 ½ inch screws through the face plates. Secure to the platform by screwing through the bottom of the cabinets.
Step 8. Stabilize The Center
Use a stud finder to ensure you secure the center to solid wood. Screw into place to make sure the center is sturdy.
Step 9. Install Hardware And Cut Out Cable Holes
If you want to use roll-out shelves for easy access to individual components to help make your home entertainment center more organized , fasten the metal tracks to the sides of the cabinet. Next, cut out the holes that allows you to connect the components and plugs without seeing the cables.
Step 10. Finishing Touches
Cover the platform with molding that matches the color of the cabinets. Next add the crown molding to complete the finished look.
Image Credit: https://www.momoy.info/uploads/interior-design/Agustus-2008/matrix-1.jpg


