Map Geocache Finds: Showcasing a Map of Geocache Finds
A membership to Geocaching.com allows you to post a map of your geocache finds and download files that you can use to create other maps. Read on to learn about some of these sites and how to use them.
Create Files and Map Geocache Finds
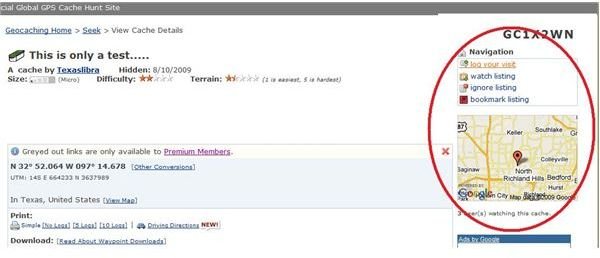
Geocaching.com is the premier geocaching website. In order to map your geocache finds you will need to register for a free basic membership or $30 a year premium membership. Log into your account and go to the detail page of the geocache you found and want to map. Click Log Your Visit at the top of the page. Click the Type of Log drop-down menu and click on Found It. Enter the date on which you found your geocache as well as any comments you have about the geocache or the find itself.
If you left a trackable item in the geocache, such as Geocoins or Travel Bugs, select it from the Inventory box. Click Submit Log Entry.
If you have a photo of the geocache or your find, you can upload it as well.
Another option on Geocaching.com is to download a file of your geocache finds that you can use to map your geocache finds. To do so, log into your Geocaching.com account and click on Hide & Seek a Cache in the menu at the left of the page. Scroll down the Seek a Cache search options until you see the Found by Username option. Enter your own user name and click Go.
It will display a list of all of the geocaches you have found. Click the Check All button and then click the Download Waypoints button. If you have not yet agreed to the license agreement, you will need to do so.
Save the file of your geocache finds to your desktop or another location. If you are a basic member your file will be a .LOC file, which only contains basic data. If you download Easy GPS, you can use it to open the .LOC file and then save it as a .GPX file. You will also need to open the file with a text editor, such as Wordpad. Press Ctrl+H to open the Replace dialog. Enter
If you are a premium member, you will download a .GPX file, which can be used by supporting applications.
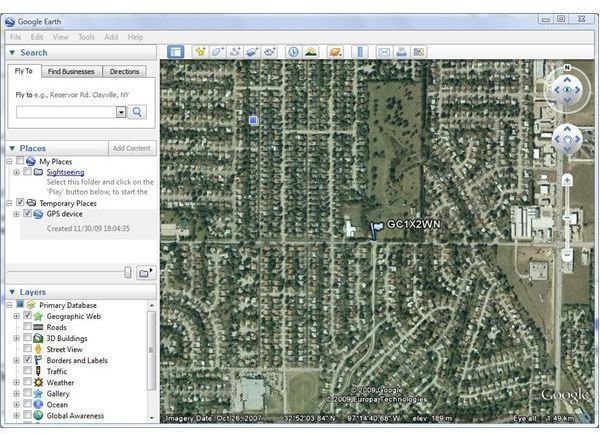
Download Google Earth. Drag and drop your file onto the Google Earth map and you will have an instant Google Map of your geocache finds.
Some other websites and applications with which you can map your geocache finds include <strong>GPS GPX Interactive Map</strong>, <strong>NASA World Wind</strong>, <strong>GPXchange</strong>, <strong>Trail Central</strong> and <strong>GPS Visualizer</strong>.
Find more geocaching articles on Bright Hub’s Geocaching Channel. New articles are being added all the time, so be sure to check back often.