Nikon D5000: Edit White Balance
Using the Nikon D5000
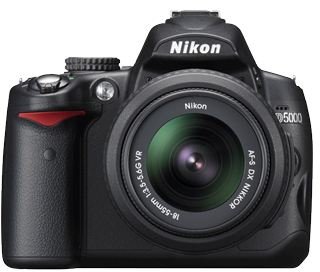
The Nikon D5000 is a mid-range DSLR camera. It offers 12.3 megapixel image quality, and it features a 2.7-inch color LCD screen. This camera comes with both auto and manual focus capability. The camera also features different white balance settings.
You can change the white balance settings based on the time of day or quality of the light when taking pictures with the Nikon D5000. Edit white balance problems in post production.
Using Manual Settings
Before you even think about editing the white balance, think about how to use it first. If you want to adjust the white balance, get out of the auto mode. You really can’t change the white balance settings in auto mode. Instead, set the camera to manual, especially if you want to start using your D5000 camera like a professional.
Look around your current surroundings, and see what the current conditions are. This will help you pick out a white balance setting. A light meter can also help you figure out what the lighting conditions are. The D5000 has seven different manual white balance modes. It also gives users the option of saving preset manual modes, which allows you to save up to five manual modes.
Available Modes
The Nikon D5000 also comes with some other modes, including the following:
- Fine Tune by Kelvin mode: This mode allows you to manipulate the white balance between 2,500 Kelvin and 10,000 Kelvin. This gives you a lot more control over the white balance.
- Fluorescent: This setting is specifically for different types of fluorescent lighting, including lights that you find in a studio or office building. The Nikon D5000 comes with seven different settings for this mode.
- Incandescent: This is specifically for incandescent light bulbs.
- Direct Sunlight
- Cloudy
- Shade
You also have the option of using your flash. Always see if you can use another white balance setting before using the flash. Flash tends to overexpose subjects. If you are trying to photograph something in the distance, it will only illuminate whatever object is right in front of you. So, your actual subject will be in the shadows.
Editing White Balance
Once you are done, import all of the photographs from the Nikon D5000. Edit white balance with a program like Adobe Photoshop. While each program is different, generally it involves making adjustments to the image. In Photoshop, follow the below steps:
- Go to Adjustments and Levels.
- The Levels popup box will appear.
- Select the White Point eyedropper.
- Click on a white part of the image.
- Set the Black Point using the above steps.
- Find a neutral gray area of the image, and click on it with the Neutral eyedropper.
- Slide the histogram amount slider to the left or right to adjust the white balance.
- Click OK.
These are the basic steps for editing white balance. You can experiment more with your images to make them more vivid and to add more contrast.
References
Eye Fetch, https://www.eyefetch.com/tutorial-white-balance-ps.aspx