Batteries - Light Bulb Simple Circuit Experiment for Elementary Students
I remember the day; I was hardly 8 years of age; when I built my first electric torch using a couple of cells and a bulb. The amount of joy and excitement that filled me then is inexpressible. My torch had a small square wooden base with a few nails fixed into it. These nails acted as a clamp for the cells as well as the bulb. A small piece of wire, when connected across the bulb and the battery, would instantly light up the torch.
Although the circuit may look quite simple and petty to the grown ups, for children the discovery seems quite huge and the happiness overwhelming.
This article presented here explains a simple circuit experiment using batteries and a light bulb (or a LED). The project is specifically intended for those inquisitive school students who may quite become the electrical and electronic engineers of the future.
Before proceeding into the experiment, let’s first learn regarding the parts required for it.
Parts List
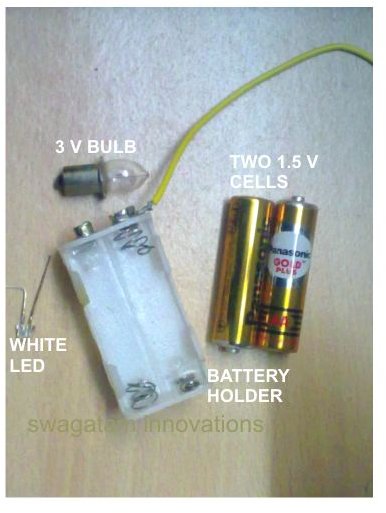
You will need the following material for the experiment:
(Click Image to Enlarge)
-
3V torch bulb or a white LED = I
-
Battery, Pencil Type = 2
-
Battery holder = 1
-
A small piece of wire (about 10 inches long), stripped appropriately at both ends.
The Experiment
Once the materials are procured the result can be simply obtained through the following steps:
-
Fix the cells into the battery holder, and observe proper polarity. Always attach the flat end of the cell to the spring side of the holder (See Image And Click to Enlarge).
-
You will find the battery holder has two lugs terminating through one of its ends, which constitutes the poles of the fixed battery.
-
The spring end lug is the negative and the other one is the positive terminal.
If you are using a bulb, you may have to follow the following procedure:
-
Strip one end of the procured wire enough (about 2 inches), and make sure you don’t cut off the strands (that may make the connections weak). The other end may be kept at about an inch long.
-
Holding the strands together, twist them into a single strong wire.
-
Now, wind and twist the wire around the body of the bulb so that the bulb is now fixed firmly at one end of the wire.
-
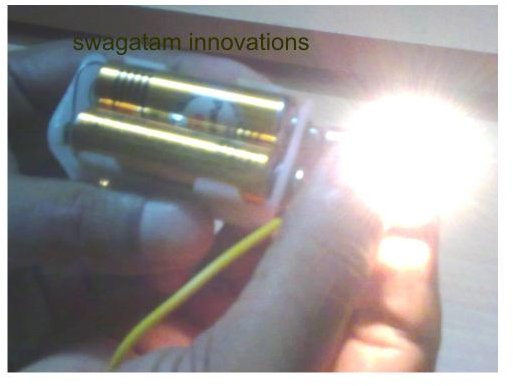
Connect the other stripped end of the wire to either the positive or the negative lug of the battery holder (here polarity is immaterial as a bulb may be connected any way round).
-
Your torch is ready now. Touching the bottom oval point of the bulb to the free lug terminal of the battery holder will instantly light up the bulb.
If a LED is used instead of a bulb, the connections will require a bit more attention. Do it in the following method:
-
You will find the LED has two leads, one a bit longer than the other. The longer one is the anode (positive) and the shorter one is the cathode (negative). Once you understand the polarity of a LED, things will get much simpler.
-
Strip off the ends of the given wire equally, about a cm long, and twist the strands to make them stronger.
-
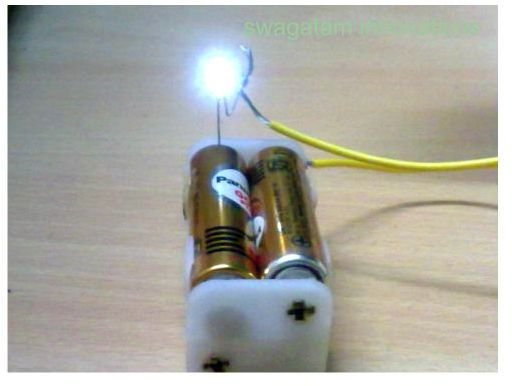
Bend the shorter lead of the LED at 90 degrees from its center and connect one end of the wire by twining it around this terminal. Also, connect the other end of the wire to the NEGATIVE lug of the battery holder by twisting it around the lug.
Your LED torch is ready. Touching the free end of the LED to the free end of the battery holder will instantly produce a bright dazzling light from the LED.
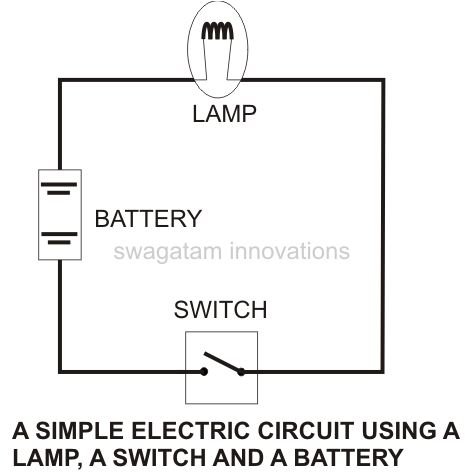
Since this simple circuit using batteries and a light bulb (or a LED) is meant just for an experimental purpose, a switch has not been included. A switch would have also make the whole set up pretty cumbersome and difficult to handle.
Just another note I would like to add for the somewhat mature readers – LEDs will always require a resistor to be connected in series with it if the supply voltage is much greater than its forward voltage drop. In the above experiment the voltage is quite within the tolerable limits of a white LED so the inclusion of a resistor wasn’t felt to be necessary.
Read More
The Light Bulb Experiment - https://www.upscale.utoronto.ca/IYearLab/liteblb.pdf
Monster Sciences - https://www.monstersciences.com/electricity-science-experiments/49-electricity-experiment-e01-a-simple-circuit.html