Want to keep the data on your thumb drive away from prying eyes? TrueCrypt, running in “Traveler” mode on your flash drive, provides transparent, seamless encryption and decryption and can automatically run itself upon insertion. This article guide provides step-by-step instructions to set it up.
Introduction
In “How to Create a Hidden, Encrypted Folder on Your USB Flash Drive ,” we accomplished what we set out to do using TrueCrypt, but we found some small problems along the way. One was that the container file in which the hidden volume was placed is itself visible. Another was that the file space allocated to the container file is not hidden from the operating system. It’s clear that something is there.
The security model assumed that if the user were ever forced into divulging the password to the container file, the antagonists would never know that the hidden volume was there and would be distracted by the files they find in the outer volume that look sensitive.
At best, it appears that this scheme could succeed most easily if the container file and the hidden volume were very small – certainly not the 2 GB affair we used for an example.
So what if we don’t want to be cloak and dagger about it? What if we want to encrypt the entire card and be blatant about it?
OK. Let’s look at encrypting all of a USB flash drive and then running TrueCrypt from the flash drive itself. We’ll be using an 8 GB PNY Attaché USB flash drive formatted to Vista’s NTFS file system (for large file size support). We’ll even make it auto-run in Windows to start itself.
Note: Running TrueCrypt in “Traveler mode” requires that the user have administrator’s privileges in Windows. If you are running on a machine on which you’re not the administrator, you’ll need to get someone with administrator privileges to install it for you. This is needed because TrueCrypt uses a device driver to provide on-the-fly, transparent encryption and decryption, and normal users are not allowed to install device drivers. For more information about what normal users can and can’t do with TrueCrypt Traveler, please see their documentation and find the section entitled “Using TrueCrypt Without Administrative Privileges.”
Assuming that your privileges are squared away, let’s proceed. If you already have TrueCrypt installed, please scroll down to the next section.
Installing TrueCrypt
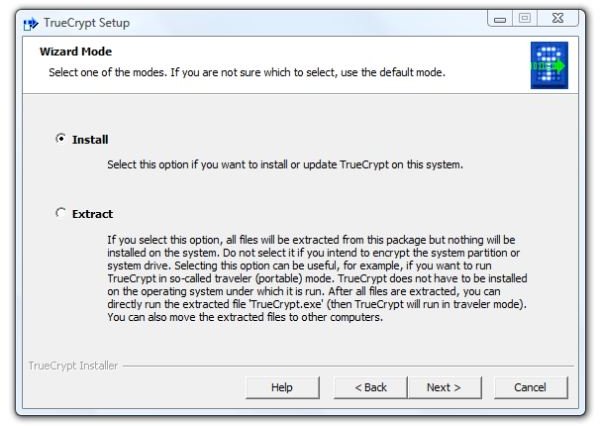
1. First, download the application and run the installer . You’ll immediately be faced with a choice: install it to the computer, or merely extract the files. Since we assume that you are doing this with the PC which you will primarily use the card, select “Install” for the normal mode and “Next” to continue.
Image
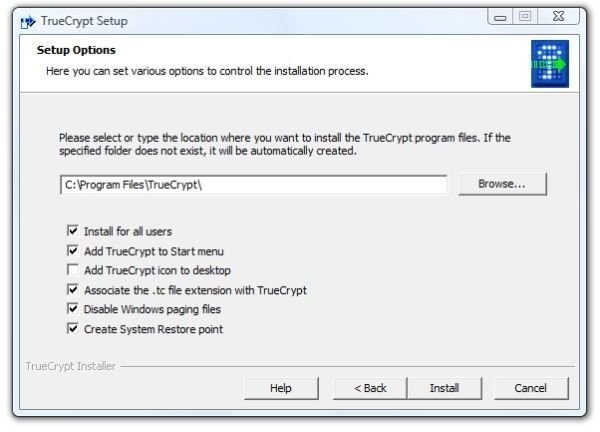
2. And then there are more choices. Do you want to install for all users on the PC? (Probably not if associates or other family members use the PC. Probably so if you are the sole operator of the PC.) Do you want to add TrueCrypt to the Start menu and put an icon on the desktop? (Maybe or maybe not, depending on your needs. The basic unit of security is trust, and I trust that I can control access to my computer. I also have enough desktop icons.) Disabling the Windows paging files (virtual memory on the hard drive) is for those paranoid enough to fear black helicopters. Unless you are really, really worried about some of the content of memory ending up being written to the hard drive, which would take forensics to decipher, I suggest avoiding this setting. On the other hand, associating the .tc file extension with TrueCrypt may be something to not do. This from the theory that the PC doesn’t need to tell everybody and sundry who may be watching that any file in any open folder is a TrueCrypt file. (And that’s how paranoid I am.)
Image
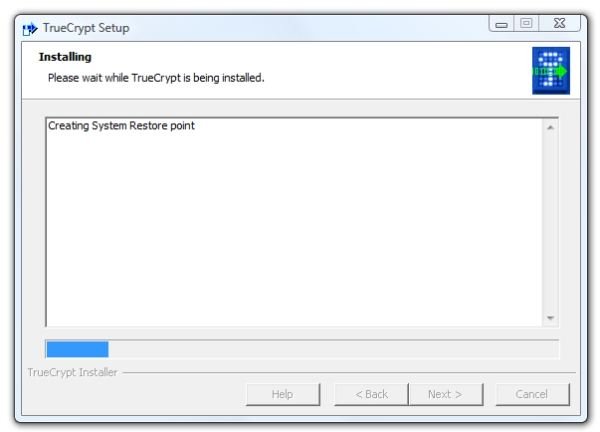
- Click “Install” and it will start creating a system restore point.
Image
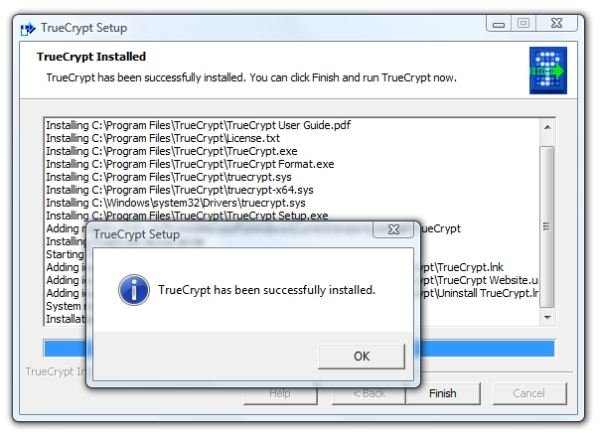
- Soon after the restore point is created, installation will be complete. Click “OK” and click “Finish”.
Image
Installing the “Traveler” Files to the Drive
In order to have TrueCrypt auto-start when the USB flash drive is inserted, we must first ask TrueCrypt to install the portable files. This is easily done.
1. Start TrueCrypt and click Tools, then Traveler Disc Setup.
Image
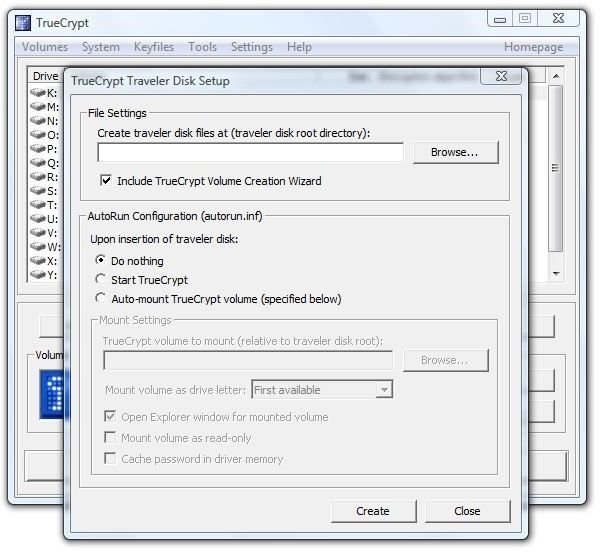
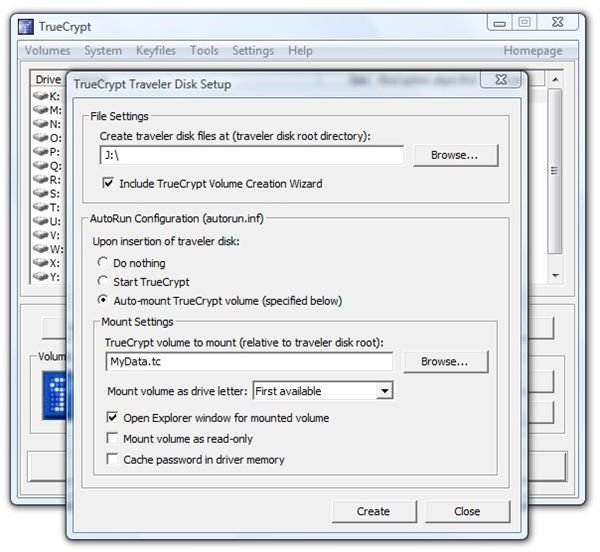
2. In the “File Settings” area, click “Browse” and navigate to the root directory of your USB Flash Drive. Select “Include TrueCrypt Volume Creation Wizard.” Select “Auto-mount TrueCrypt volume (specified below).” Enter the file name you want to use in the following step to create your TrueCrypt volume. You can give it the file extension .tc to help you remember what it is. We named ours “MyData.tc.” Finally, select “Open Explorer Window for Mounted Volume.”
Image
3. Click “Create” and TrueCrypt will very quickly report success.
Image
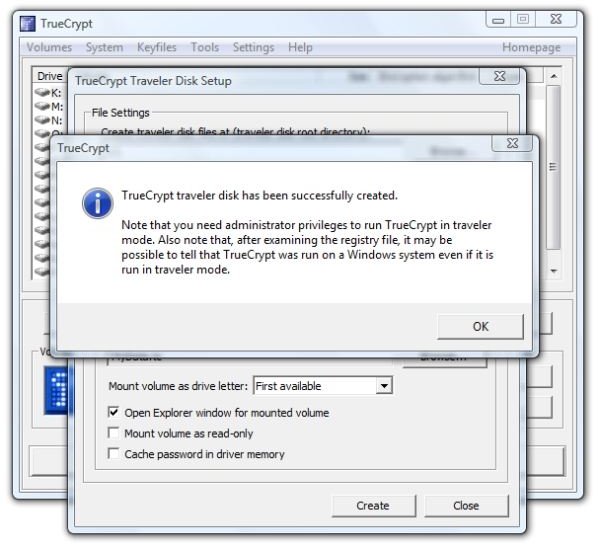
4. Let’s see what was put on the flash drive. In the root directory is “autorun.inf” and a TrueCrypt folder.
Images
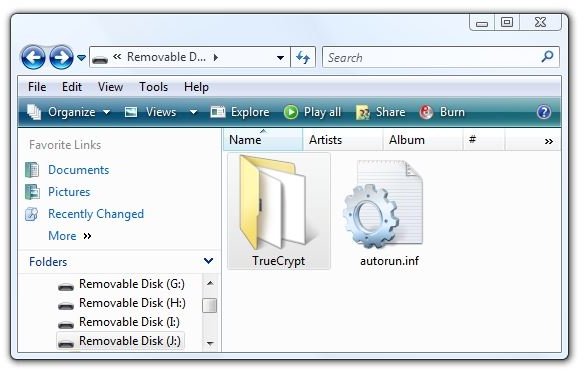
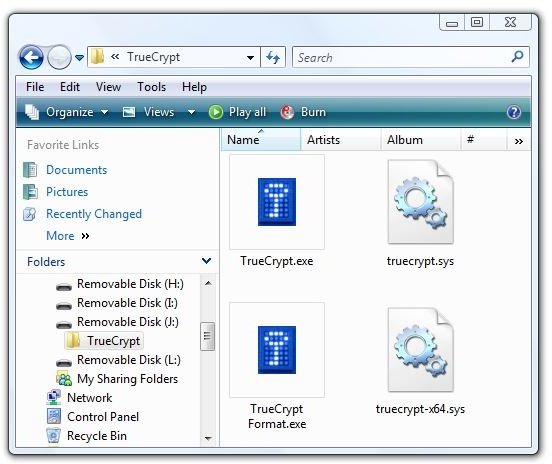
And selecting “Properties" for the drive shows that only about 3 MB of drive space were used.
Image

Creating the TrueCrypt Container File
The fastest way for the non-expert user to create a TrueCrypt data file is through the Wizard.
1. Start TrueCrypt on the PC and click “Create Volume.” This brings up the “Volume Creation Wizard.”
Image
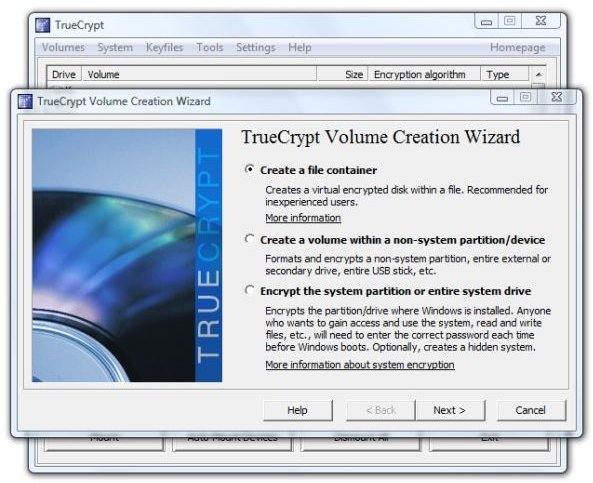
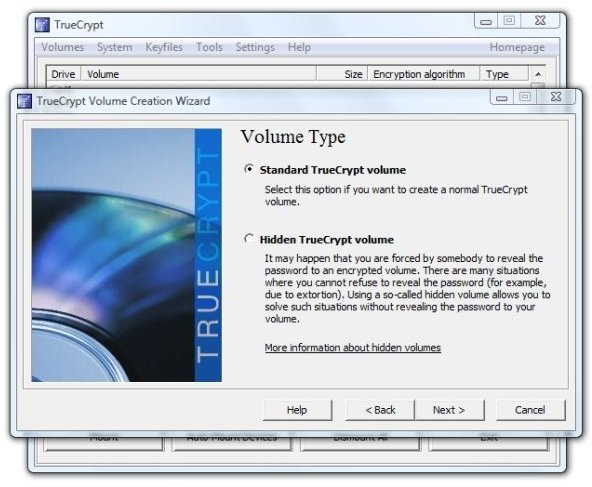
2. Select “Create a file container” and click “Next.” Select “Standard TrueCrypt volume” and click “Next.”
Image
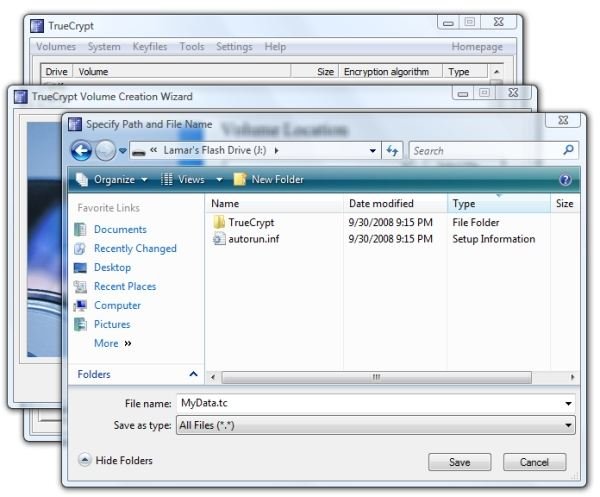
3. Click “Browse” under “Select File” and browse to the root directory of your USB flash drive. In the File Name field, enter the filename you decided on when installing the Traveler files to the drive.
Image
4. Back in the “Volume Location” dialog, click “Next.” This will open the “Encryption Options” dialog. Since the standard settings are good enough for the US government’s “Top Secret" classification, they are good enough for us. Accept the defaults and click “Next.”
5. The next screen is “Volume Size.” In our case, 7573.14 MB are available. Since it’s probably a good idea to leave some extra space, we selected 7550 MB as the size of our container file.
Image

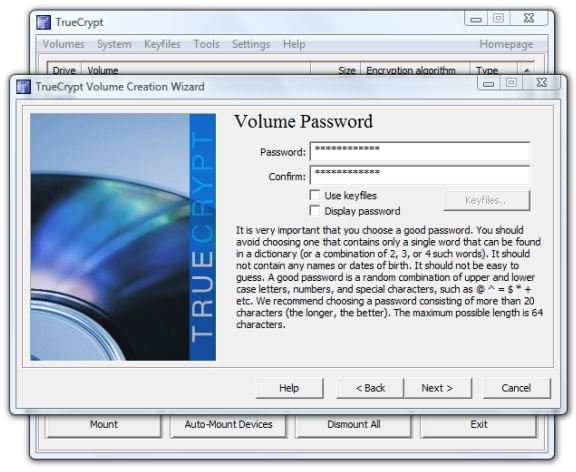
6. Here we may need to think about the password a little bit. Is the purpose of encrypting the contents of our USB flash drive to keep out prying eyes from our coworkers, to secure personal or corporate data if the card is lost or stolen, vital to national security, hands-off for the kids, or something in-between? Decide for yourself and then choose your password or passphrase appropriately.
Image
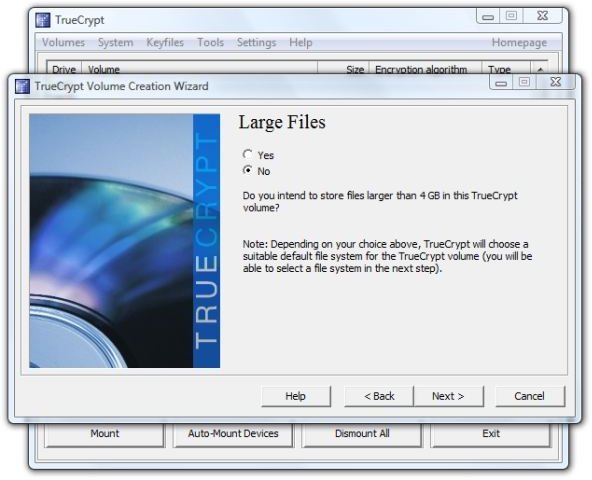
- Large files? Do you intend to use files over 4 GB in this volume? We formatted the drive itself to NTFS in order to get large file support for the container file itself, but is it likely that we’ll be using such large files in the container? For us it’s not, at least until high-definition video becomes commonplace, so we’ll select “No” here and click “Next.”
Image
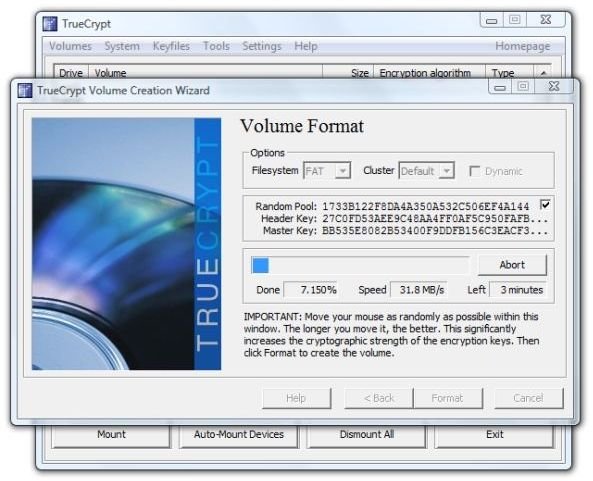
8. This opens the “Volume Format” dialog. We see that it chose FAT for the file format. The idea here is to waggle the mouse over the dialog for at least thirty seconds in order to get a good “random seed” for your encryption.
Then click “Format.”
It took about six minutes to format a 7550 MB volume on our flash drive. The activity light on the drive continued flashing about a minute after TrueCrypt reported success.
Image
9. Click “OK” in the dialog that reports a successfully created volume, and then click “Exit” to close the Wizard. This concludes creating the TrueCrypt container file.
Testing the Results
So what do we get? To find out, we clicked “Exit” in the TrueCrypt window and right-clicked the TrueCrypt icon in the system tray and selected “Exit” again. Then we right-clicked “Safely Remove Hardware,” also in the system tray, selected the USB Flash Drive, and clicked “Stop.”
Upon re-inserting the flash drive, the AutoPlay message looked like this.
Image
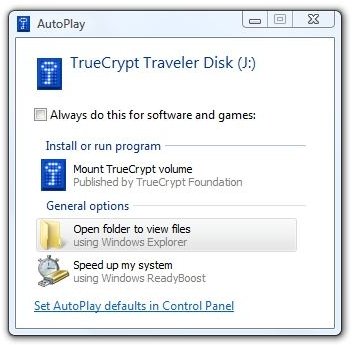
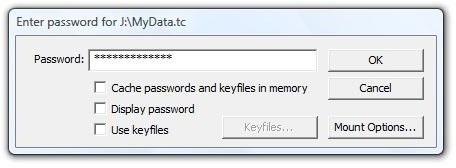
We clicked “Mount TrueCrypt volume” and got the password dialog that we’ve seen before.
Image
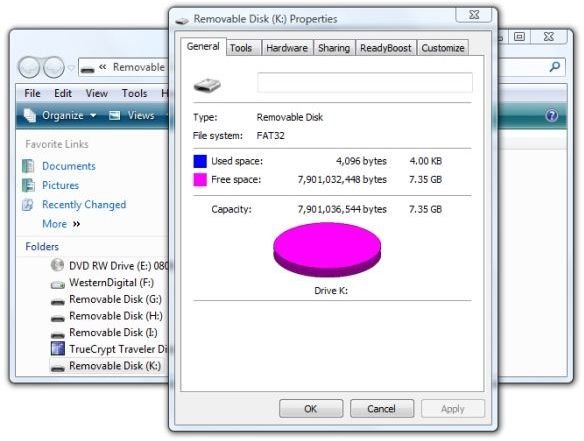
After entering the password, we got an open folder in Windows Explorer showing “Removable Disk (K:),” which is our mounted MyData.tc encrypted container. Clicking the drive in the left-hand panel and selecting Properties showed that the volume had 7.35 GB free space.
Image
Copying a 703 MB AVI movie to the flash drive took 22 seconds for Vista to show the operation complete and then another 19 seconds for the LED on the drive to stop flashing.
We then right-clicked TrueCrypt in the system tray and selected “Dismount all mounted devices.” Vista then continued to read the flash drive for several seconds. Opening drive J: under “Computer” (“My Computer” in Windows XP) then showed the original contents of the drive.
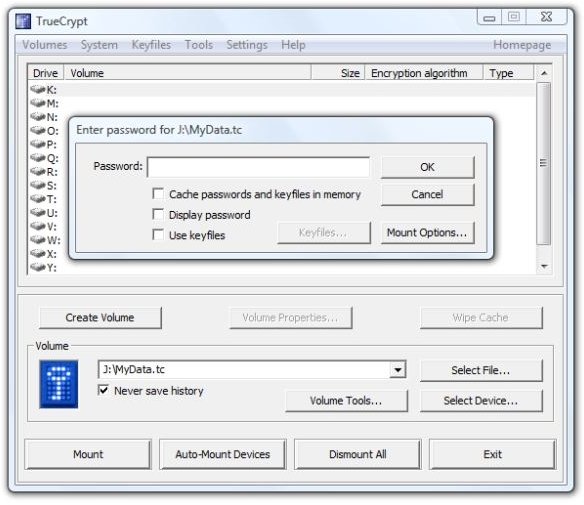
So far, so good. Let’s try mounting the encrypted volume in TrueCrypt from the PC. We restarted TrueCrypt and clicked “Select File.” We navigated to Drive J:, selected “MyData.tc,” and clicked “Open.” In TrueCrypt we clicked the K: drive letter in the upper part of the dialog. Then we clicked “Mount” and got the password dialog.
Image
And that opened on “Local Disk (K:),” and there’s our movie.
Image

Conclusion
Encrypting the entire USB flash drive and starting TrueCrypt from the drive upon insertion worked great. File operations were transparent, with no obvious indication that on-the-fly encryption and decryption were taking place. I even successfully played the movie that I copied to the flash drive in Gom Player on my desktop and the quality was excellent.
The experience will be less wonderful if the user does not have administrative privileges on the PC.
Overall, I think that encrypting the entire flash drive with TrueCrypt’s Traveler files installed to auto-start is preferable to creating a hidden, encrypted folder on the card.
There are situations, I suspect, when small units of important data, intrigue, and mortal danger make it more important to try to “hide in the crowd” using the hidden volume method.
We’ll look at an encryption method that does not require administrative privileges in the next article. Right now, I think I’ll watch the rest of the movie.
Thanks for reading this.
Link to this article:
https://www.brighthub.com/computing/windows-platform/articles/9565.aspx
Further Reading
Software as a Service - Microsoft Equpt Bundles Microsoft Office and Security in One-year Subscription Model - In an effort to reach out to home users, Microsoft introduces a subscription service that provides the home user with Office and with the OneCare security, antivirus, and PC management application. Is the public ready for software as a service? Will home users embrace software subscriptions for mainline applications?
Broken Down On the Information Superhighway - In the war against terrorism and media piracy the lines have been drawn - or have they? Highly visible is the conflict between the pipe owners and the content pushers, but are secret deals and treaties that affect the global use of the Internet, music, and movies being made out of the public eye? Read this to learn about the secretive “Anti-counterfeiting Trade Agreement” and who’s really behind ACTA.
“We’re Not Blocking P2P Traffic” - How Comcast Did It - Every network provider has the right to manage traffic on his own network. However, did Comcast go too far when they decided to interfere with traffic that belonged only to a few specific file-sharing protocols? Here we’ll look at the nuts and bolts of how Comcast actually did it.
How to Surf Anonymously: Get Lost in the Crowd with TOR - When you’re surfing the web, every data packet your PC sends out can tell the wrong people what you’re doing and with whom you’re communicating online. One method of anonymity is getting “lost in the crowd.” Here we’ll show you how.


