Need a backup method to start a Vista PC? Creating a bootable disc in Vista is not as easy as in previous versions of Windows, but it can be done. This article tells you how.
Vista start-up problems are nobody’s fun. In previous versions of Windows, the first step would be to try some troubleshooting by booting the PC from a CD or DVD. Previous versions of Windows and third-party applications made it very easy to create these bootable discs. (Some of us still have CDs from OSs-past in our collections.)
Vista is the first version of Windows that does not include a method to make a bootable disc.
This article is a follow-up to Windows Vista Backup - the Good, the Bad, and the Not so Hot , in which we discussed using the Backup Center in the Office, Enterprise, and Ultimate versions of Vista to back up the entire PC to external media such as a USB hard drive. This proved to be a pretty simple operation, but it left us with potential problems. To access a recovery partition (a space on the hard drive where the manufacturer stores the recovery environment), one needs to press F8 repeatedly during startup.
Obviously, if the hard drive has failed catastrophically, the user can’t access the recovery environment on the recovery partition. When this happens, the user needs another method to start the PC, perform diagnostics on the hard drive, and, if necessary, reinstall the operating system and user content from the external backup. This means that the user needs a bootable DVD or CD that can start the recovery environment.
In the first article, we talked about using the PC’s manufacturer’s “Rescue or Recovery” or “Recovery Manager” application to create bootable DVDs. The disadvantage of using these is that their focus is on restoring the computer to the new, out-of-the-box configuration, not the PC’s most recent state. We found that the HP utility created a bootable DVD, but it failed to provide a Vista recovery environment. This meant there was no access to the external backup during startup. Using HP’s solution requires that one (1) must have a full external backup, (2) must reinstall the factory configuration from the recovery partition, and (3) must run Windows Backup to restore from the external hard drive.
That’s no help if the recovery partition is damaged. It would be better to have a bootable disc that can diagnose drive and memory problems and provide the Windows recovery environment to restore your backup to the same or a new hard drive. Here are three approaches we can use to create a bootable Vista CD or DVD.
Please note that solutions one and two require access to a Vista DVD. If you don’t have or can’t obtain one, please scroll down and go to page three where a solution is shown that does not require a Vista DVD.
1. Copy a REAL Vista DVD
That’s right. The Vista distribution DVDs are not copy-protected. The Vista Ultimate DVD, which accounted for about 30% of retail (over the counter) sales, can install all the lesser versions, too. We’re interested in this because the retail DVD can start the recovery center to restore from an external backup. So the first step is to beg or borrow a real Vista DVD.
Not all burning applications do a great job copying bootable DVDs. You need one that can do a “sector-by-sector” copy. If you have two DVD burners, you can do a drive to drive copy. For the rest of us, I recommend using an application such as the freeware ImgBurn . Of course, I also urge you to donate to the project if you find the software useful.
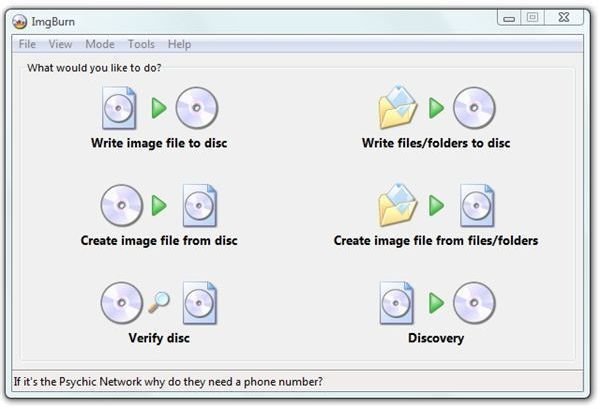
Here are the steps involved using ImgBurn. First, insert the Vista DVD and dismiss the auto-play message if it comes up. Then start ImgBurn and click “Create image file from disc.” The default will be to write the image to the root folder of the C: drive. That’s fine.
Select your DVD drive and click the start/burn graphic in the bottom of the application window. (Click the image to enlarge.)
ImgBurn
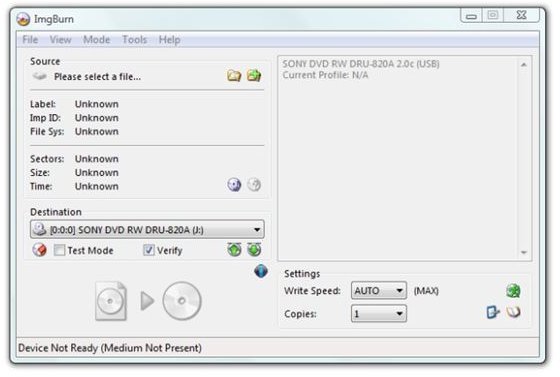
This will write an image file (.iso) to the root of your C: drive.
When ImgBurn finishes, close it. Remove the Vista disc and put a blank DVD-R in the drive. Click on “Computer” on your desktop and then on your C: drive. Click to sort by size and then right-click your .iso file. Select “Burn using ImgBurn.” ImgBurn will then restart and create a copy of the Vista DVD.
2. Make a recovery disc using something that Microsoft left out
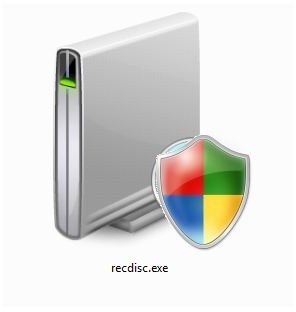
When Vista Service Pack 1 was in the beta phase, Microsoft included a small software utility called “recdisc.exe” that could create a bootable Vista DVD and mount a recovery environment. Although it still requires a Vista disc, it’s exactly what is needed to restore or recreate a user’s files and settings from an external backup.
There has yet to be any official word why this file was left out of Service Pack 1. In fact, a dummy version of this file was placed in the Windows/Win32 subdirectory during the SP1 upgrade.
One could suspect that Microsoft does not want us to be able to create a bootable disc in Vista. This is an odd position since the premium, non-home versions of Vista can create whole-hard-drive backups. The PC manufacturers, those same manufacturers that are no longer including Vista discs with new machines, may have asked Microsoft to withhold this capability. For one thing, they sell recovery discs. It also seems that their answer to every technical problem is to go back to the original configuration – unneeded applications, trial software, network and ISP solicitations, and all that junk.
Since Microsoft declined to release this utility, I can’t give you a link pointing to it. However, if you’ll do a Google search for
recdisc.exe
you’ll find some download links for it. Recdisc.exe seems to be “hard-wired” into the System32 folder. It won’t work if you download it to your desktop and simply double-click it there. Vista will ask for your permission and then . . . nothing happens.
Instead you’ll need to copy it to the System32 folder, and you’ll need to overcome the resistance that Vista puts in our way when we try to mess with things in the Windows folder. Here’s what’s involved.
- Start at “Computer” and navigate to C:/Windows/System32.
-
Locate the recdisc.exe program (or type “recdisc” in the search box to find it rapidly).
-
Right-click the icon and select “Properties.”
Advertisement -
Click the “Security” tab.
-
Click the “Advanced” button. This will open the “Advanced Security Settings” dialog.
Advertisement -
Click the “Owner” tab.
-
Click the “Edit” button. This will open another dialog labeled “Advanced Security Settings.”(Click through Vista’s asking permission if it occurs.)
-
Select your user name by highlighting it.
-
Click OK to take ownership of the file.
-
Back in the second dialog, click on the “Permissions” tab.
-
Look at your user name. Does it say “Full Control” under the Permission column? If it does, stop here.
-
If it does not, click your user-name and then click the “Edit” button.
-
To the right, click the “Full control” check-box under the “Allow column.”
-
Click OK, and the dialog should now show that you have “Full control” over the file.
-
Click OK until you close all the dialogs.
Now you can delete this file, copy it, move it, or do whatever you want with it. My suggestion is that you right-click it and rename it to recdisc.exe.save and leave it in the System32 folder. This is just in case Microsoft really is planning to use it in an update someday.
Now you’re ready to drag ‘n drop the recdisc.exe file that you found on the Internet into your System32 folder.
This is optional, but while you’re there, you might want to right-click the new recdisc.exe file and select “Send to Desktop.” This will create a shortcut on your desktop giving you ready access to the program.
To use it, simply double-click the icon to run the program. Have your Vista disc handy because it will soon ask for it.
3. Download and burn NeoSmart’s Vista bootable CD image
The nice folks at NeoSmart Technologies have created a set of Windows Vista Recovery CD image files. They are about 120 MB and are “out there on the torrents.” If you’re not familiar with working with .torrent files, it is not difficult. First, you’ll need to download the small torrent file and save it to a folder on your desktop.
A torrent file is really a request for a specific file. A torrent client is a program that knows how to use that request to download files that may be distributed on several different computers around the world or may be on only a few. A tiny, and easy to use bittorrent client is uTorrent. You will need a bittorrent client in order to download the actual .iso image file to create the bootable DVD. Here are the steps involved.
-
Use your antivirus program to scan utorent.exe if you’re paranoid. (I am.)
-
Run uTorrent from the folder in which it downloaded.
-
Select the defaults on the first setup screen. It’ll probably work fine.
-
Select File -> Add Torrent and navigate to the folder in which you placed the torrent file.
-
Click the torrent file and click “Open.”
Don’t be dismayed if your download starts very slowly. Usually with large files, it will eventually accelerate to a speed that “maxes out” your connection. This is what uTorrent looks like when the download is complete.
uTorrent
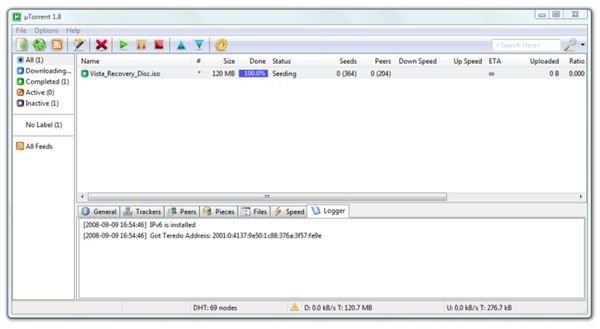
To access your completed file, right-click the line that shows the download and select “Open containing folder.” This is most likely to be /User/you/Downloads if you did not change any settings. Then find the .iso file.
Put a CD-R in your CD or DVD burner, right-click the .iso file, and select “Burn using ImgBurn.” (A download link for ImgBurn is in the first section.)
Conclusion
There are three ways to create a bootable Windows Vista disc. So, what do we get?
Using the methods above, in each case, we get a bootable DVD or CD that will display this screen.
Recovery Startup
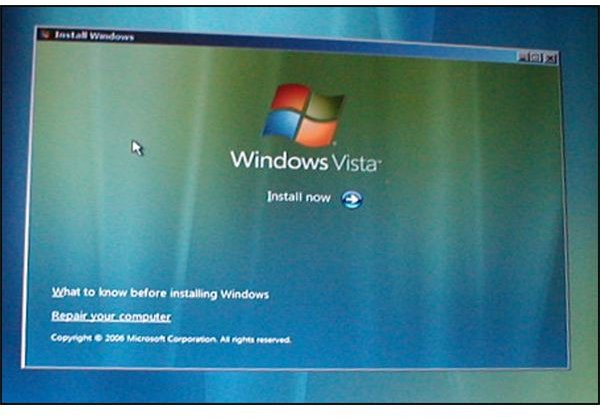
Selecting “Repair your computer” leads to this dialog.
Finding Windows Installation
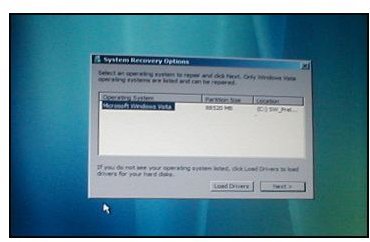
If it finds a backup on an attached external hard drive, it will offer to repair the Vista installation from there.
And that’s it! This concludes another section in the series about backup strategies in Vista. Thanks for reading.
Links
Want to link to this article?
https://www.brighthub.com/computing/windows-platform/articles/7050.aspx
Related Reading
Windows Vista Backup - the Good, the Bad, and the Could Be Better - Your version of Vista determines what class of Windows Vista Backup Center you can use. Office, Enterprise and Ultimate users can backup their entire hard drive. Starter, Home Basic and Home Premium users can only create backups based on their document and file types.
Setting Up Hands-free Incremental Backups in Vista - How to use Task Scheduler to set up automatic incremental backups for your Windows Vista Business, Enterprise, or Ultimate versions on your PC. Detailed instructions to schedule daily or weekly full incremental backups. We assume you have created a full backup on your internal or external drive.
How to Speed Up Vista’s Boot Time - Can you bake bread in the time it takes for your Vista PC to start up? Or does it seem that way? Fortunately, there are some relatively easy steps to take to speed up Windows Vista’s boot time. We describe four of them here.
How to Turn Your Vista Notebook into a Mobile Hotspot - Do you need to share your wireless Internet connection with your friends or colleagues? If they’ve got WIFI, the solution is easy and free. This article will tell you how.


