How to Stop Booting the Wrong Version of Windows
Why it Happens
For this to be an issue, you must have more than one installation of Windows on your computer. If an installation was supposed to replace or upgrade an existing version, booting the wrong version of Windows will be likely if you did not configure the booting options, or it was not your intention to have multiple versions to begin with.
How to Prevent It
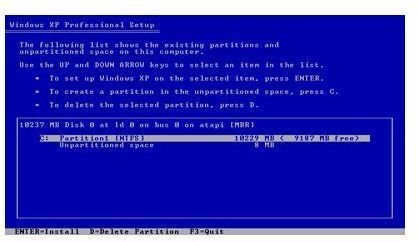
If your intention is to start a fresh installation, it is crucial to make a backup of your documents, pictures, videos, system settings, music and all that is important to you and then use the option “Delete Existent Partition” during the installation process.
Be warned! All your data will be permanently lost. However, this will ensure that only a single version of Windows is present in your system, and no booting sequence issues are possible.
How to Configure your Booting Options
If it is your intention to have multiple versions of Windows on your system, but the boot sequence is not correct, follow these instructions:
- For versions of Windows installed in different hard-drives within your computer:
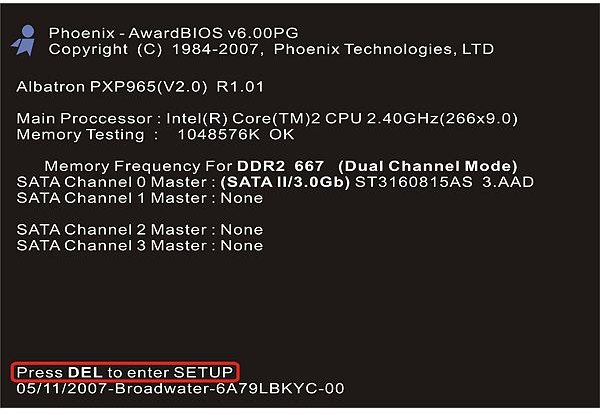
a) Enter your computer BIOS by hitting F2 or Del as soon as it boots (find out which keyboard key gives you access to BIOS by referring to your system’s owner’s manual, or by trial and error).
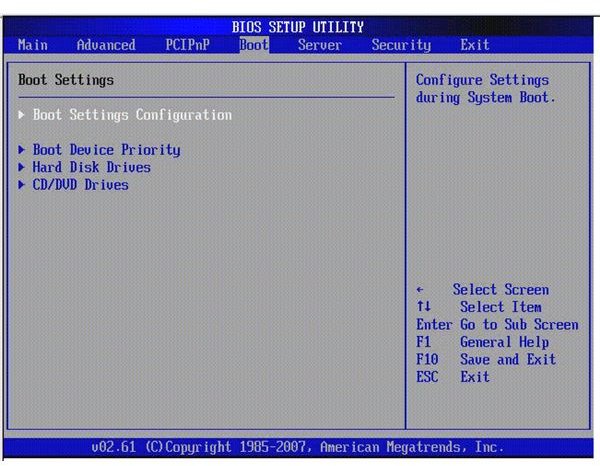
b) Enter the Boot Options of your BIOS Setup menu and change the primary boot sequence to be the hard disk in which your preferred version of Windows is located (or after CD/DVD drive, network, USB, Floppy drive as you prefer for convenience.)
c) Save your changes and exit BIOS. You will be set.
- For versions of Windows installed in the same hard-drive (According to Microsoft):
a) Right-click My Computer, and then click Properties.
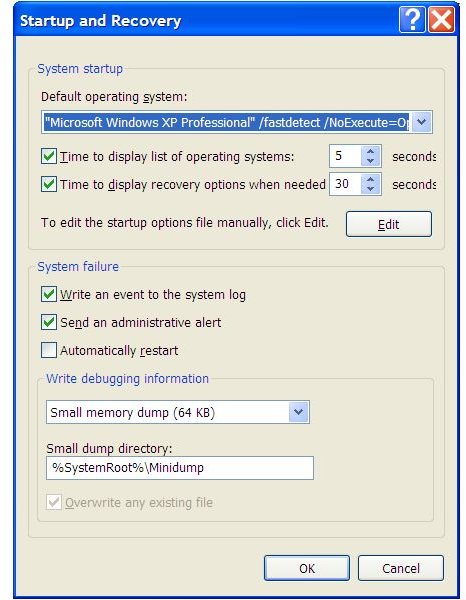
b) On the Advanced tab, click Settings under Startup and Recovery.
c) Under System Startup, click Edit.
d) Select your preferred primary version of Windows.
e) Save and exit. You are set.
- Alternative (Advanced) edit of the Boot.ini file (According to Microsoft): a) Click Start, and then click Run.
b) In the Open text box, type sysdm.cpl, and then click OK.
c) At the command prompt, type bootcfg /?.
d) On the Advanced tab, click Settings under Startup and Recovery.
e) Under System Startup, click Edit.
Warning: If you will attempt to manually edit the Boot.ini file, make sure to ALWAYS make a backup. If the file becomes corrupt, you will not longer be able to boot into Windows. Also, this option requires knowledge of its parameters in order to be successful. Refer to this Microsoft Article for more information.
Booting the wrong version of Windows may be annoying, but if configured right, it may be a convenience when older or newer versions of Windows are necessary to accomplish specific tasks.
Choosing Operating Systems before Booting
In order to have a choice of operating systems before booting, you need to change the time on Windows Startup settings from 0 to at least 20 or 30 seconds. That will allow you enough time to make your selection.
The menu with choices of operating systems will be automatically created with the installation of an additional operating system (even Linux). However, if the display time for the menu is set to “0”, it will not appear as you start your computer.
To change the time settings on Windows Startup follow the instructions number 2 (above), check the box on “Time to display list of operating systems:”, and change the time to an amount between 20 and 30 seconds. Click OK, and you are set.