How to Make an Image Backup with Windows 7
Windows 7 Images
If you want to know how to make an image backup with Windows 7, you’re in the right place. Microsoft’s new operating system is the most stable one yet, but it isn’t infallible. It’s still a very complicated piece of software that has a lot of dependencies and a lot of things that can go wrong.
If you’re an avid computer user, it makes sense to make a backup of your system so you can quickly recover if anything goes wrong. Having a recent image is the best way of getting yourself up and running if the worst happens. There are many third-party backup programs out there that can take care of this for you automatically. There is also the Backup and Restore function within Windows that works pretty well, too.
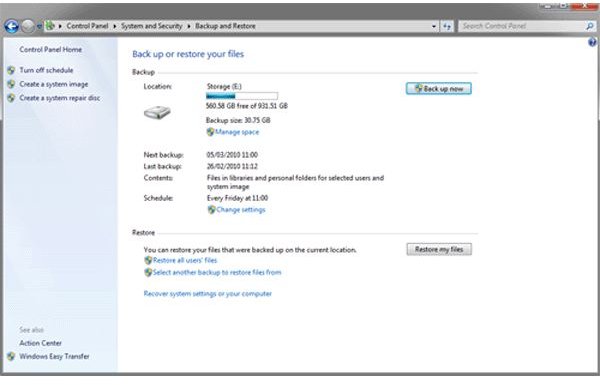
Go to the Control Panel, System and Security, then Backup and Restore. Here you can either perform a manual backup or configure a schedule to do it automatically. A backup can either be a complete clean image of a fresh system or an incremental one taken at regular intervals to reflect changes.
A clean image is a good way of getting a virgin system up and running as quickly as possible. These are useful if you have had a fresh build, installed all your software and have everything just how you like it. Taking a backup then allows you to restore the machine to that time if you need to.
An incremental backup is taken regularly, and the image is modified to reflect any changes that have taken place since the last one. These backups are useful if you work on the computer or otherwise have changes that you want to be able to restore if you need to. Either way, the principle is the same.
You can’t put an image on the disk you’re backing up. For this to work, you’re going to need either a second hard drive, DVD writer or external storage. You’re also going to need to think about what you want to image. The default setting is the whole system, which you won’t need. It’s best to select a system image and personal folders, then add things as you see fit.
To get it started, click the Create a system image link, then select the location to save the image to, and click Next. The following window will ask you to choose what to back up. Here, it’s down to you to choose the optimal setting as each system is going to be set up differently. Try to select the least possible while getting everything you need. A backup is both time and space intensive so you want to be able to perform the task in a reasonable time and without using up all your spare disk space.
Once you’re happy, click the Start backup button and leave it to perform the image. You can do other things on your PC while it’s working, but be aware that any large system changes or file saves can cause the backup to fail.
So that’s how to make an image backup with Windows 7. It’s a fairly straightforward procedure and is easy to schedule if you want to. In fact I suggest doing just that, then you won’t forget to make the images, and you’ll always be protected.