IE 6 and 7 offer a tool, the Phishing Filter, to ward off scammers with phony websites trying to steal information from people just like you. If the feature is causing problems with your browser, however, learn how to disable the Phishing Filter in Internet Explorer.
What is the Phishing Filter?
Phishing is the term for a type of scam. Phishers use fraudulent means to acquire personal information from unsuspecting consumers. For instance, scammers may create a website with a nearly identical URL to the PayPal web address. The scammers then send out phony emails informing the recipients that there is a problem and they need to update their account. The email will provide a link to the phony website, which is also created to look just like the real site. If you were to receive such an email, follow the link and “log in” to the page, the phishing scammers would then have your PayPal user name, password and access to your entire account.
The Internet Explorer Phishing Filter works in the background while you browse the Internet. The filter scrutinizes the web pages you visit, watching for suspicious content or features to protect you from phishing scams and identity theft. If the filter finds questionable material, it will provide a warning to you.
If you receive a barrage of false warnings, however, or the filter seems to cause your browser to lag or freeze, you may decide to stop using it. If so, you will need to know how to disable the Phishing Filter in Internet Explorer.
Disable the Phishing Filter
The Phishing Filter is not automatically enabled. If you are using Internet Explorer 6, you have to download the Phishing Filter add-in for the Windows Live Toolbar. To disable the Phishing Filter in Internet Explorer 6, go to the Tools menu on the toolbar. Select Toolbar Options, click on OneCare Advistor and then clear the Turn on Microsoft Phishing Filter check box.
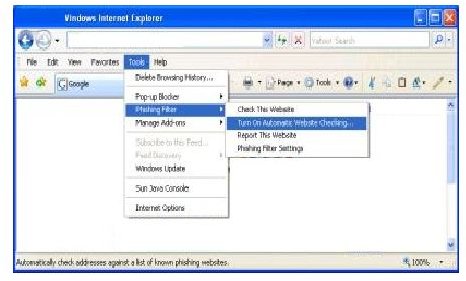
While the Phishing Filter is built into Internet Explorer 7, it is not enabled automatically. The first time you use Internet Explorer, you will be prompted to enable it. If you need to know how to disable the Phishing Filter in Internet Explorer 7, begin by opening the IE browser window. Go to the Tools menu, point to Phishing Filter and select Phishing Filter Settings. An Internet Options dialog box will open. Scroll down in the Settings box and select Disable Phishing Filter under Phishing Filter. Click OK to apply the changes and close the dialog box.
Other Options
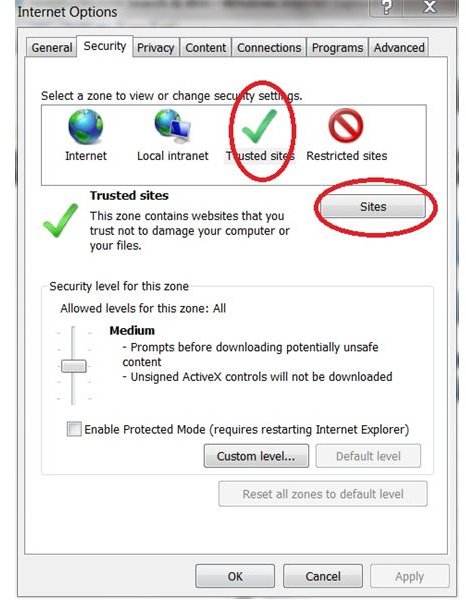
If you don’t want to disable the Phishing Filter in Internet Explorer but want to make changes to it, you can add a custom list of websites that you trust. Open Internet Explorer, go to the Tools menu and select Internet Options. Go to the Security tab of the Internet Options dialog box. Click Trusted Sites in the Select a Zone section and then click the Sites button. Enter the URL of the first site you want to allow as trusted and click Add. Enter all of the sites you want to allow.
For more tips, read How to use Windows Internet Explorer’s Phishing Filter .


