Access Your Yahoo Mail in Windows Mail / Outlook Express with YPOPs!
Yahoo POP Access for Free?
In one of my previous articles, I wrote about how to set up your Gmail account with Windows Mail. But for users who have been using yahoo email IDs for years; it is awkward to dump that account just because it doesn’t work with your email client.
Yahoo doesn’t provide POP access for free, unlike Gmail. In fact, Gmail seems to be the only good email service provider which provides POP access for free. So, does it mean you are left without any option but to access your yahoo mail with the web interface? No! You can still access your yahoo account from an email client without upgrading your account to a premium membership by using YPOPs.
YPOPs? What’s that?
YPOPs is an open source application which provides free POP3 and SMTP access to your yahoo mail. It acts as a medium between yahoo and your email client. Simply put, it acts as an interpreter between your email client to which it provides POP3 interface and yahoo to which it provides an http client interface. In a similar way it provides SMTP access also.
How to Get YPOPs with Windows Mail
Step One:
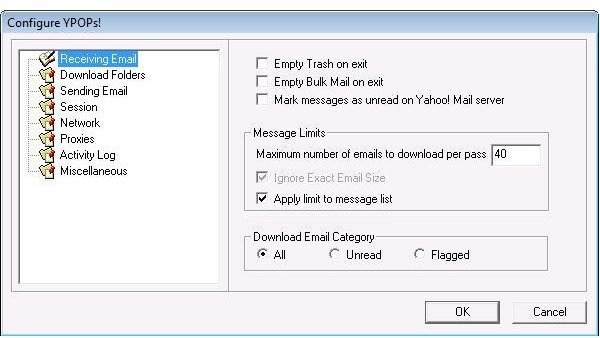
First you need to download YPOPs. The latest stable version is YPOPs! 0.9.5.1 and you can download it here. There is a newer version available (0.9.6. Alpha 1) too, but it is still in the Alpha stage and contains bugs. Install and run YPOPs. The YPOPs icon will appear in the system notification area. You can access its settings (Image 1 - click on the image to enlarge it) by double clicking on the icon. Now let’s see how to configure Windows Mail to work with YPOPs.
Step Two:
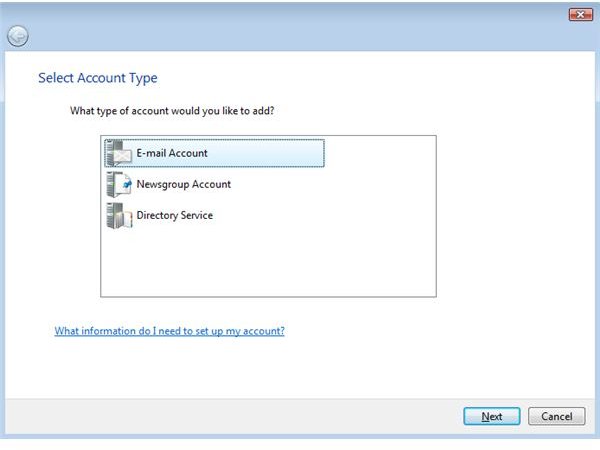
Start Windows Mail and Go to Tools > Accounts. Click on ‘Add’. Select the type of the account as Email (Image 2) and click ‘Next’.
Enter the display name (how you want your name to appear in the ‘from’ field of the outgoing messages) as you desire and click ‘Next’.
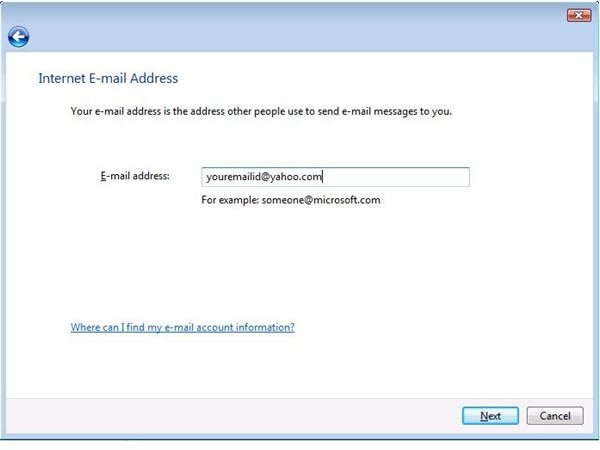
Enter your yahoo email address and click ‘Next’ (Image 3).
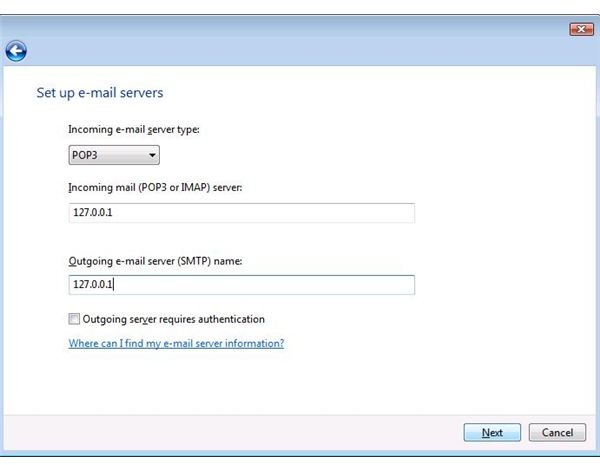
In the next screen enter ‘127.0.0.1’ as the server name for both POP and SMTP servers (Image 4) and click ‘Next’.
The wizard prompts you for your username and password. Enter the required information and click ‘Next’. Check the box ‘Do Not download my e-mail at this time’ and click ‘Finish’.
Step Two Screenshots

**Step Three:
**
Go back to your Internet Accounts screen and select the account you have just created and click on Properties. Click on the ‘Servers’ tab and check the box “My Server requires authentication” (Image 5).
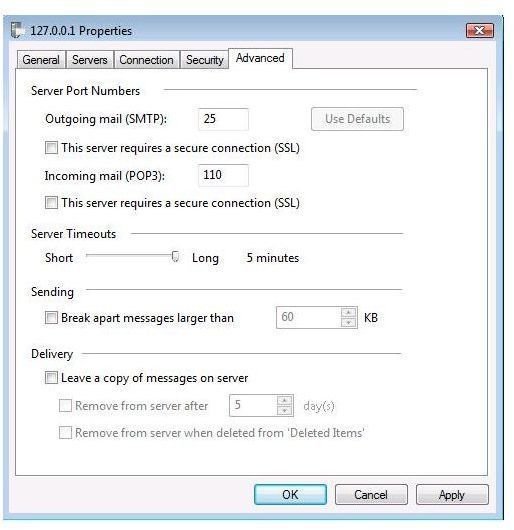
Navigate to the advanced tab and set the server timeout to 5 minutes (Image 6). Click Apply and OK.
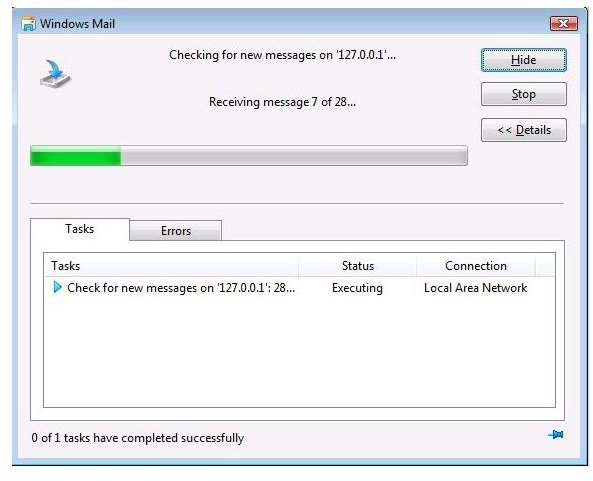
You are done setting up Windows Mail to work with your yahoo account. Make sure YPOPs is running and click on Send/Receive to start downloading emails to your email client (Image 7).
YPOPs with Outlook Express
For Windows XP users who don’t have access to Windows Mail, you can set up your Outlook Express to work with YPOPs.
Step One:
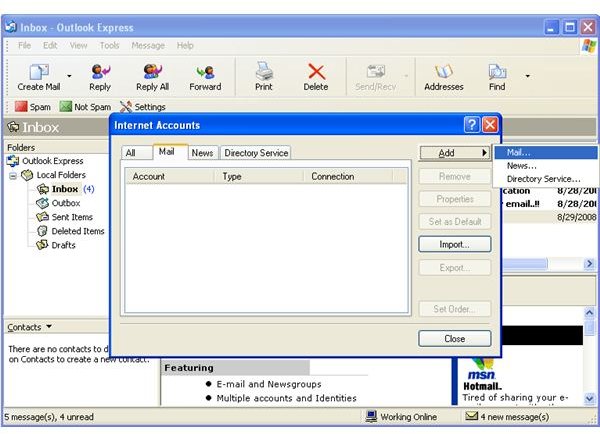
Setting up Outlook Express with YPOPs is almost similar to setting up Windows Mail with YPOPs. Start Outlook Express and Go to Tools > Accounts. Click on ‘Add’ and select ‘Mail’(Image 8).
Step Two:
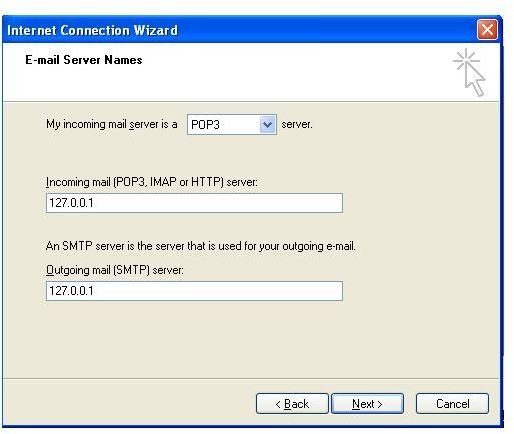
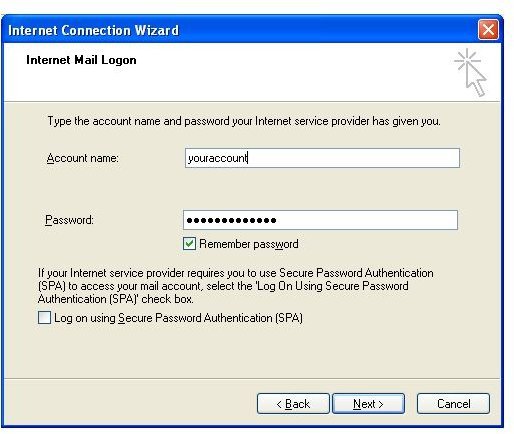
Enter your display name and click ‘Next’. In the next step, enter your email address and click ‘Next’. In the next screen you will be asked to enter e-mail server names. Select POP3 as the incoming mail server type and enter ‘127.0.0.1’ as the server name for both POP3 and SMTP servers. (Image 9) and click ‘Next’. Enter your yahoo username and password in the next step and click ‘Next’ (Image 10) and then ‘Finish’.
ScreenShots of Step Two

Step Three:
Now go back to your Internet accounts screen (Tools -> Accounts), and select the account you’ve just created and click on ‘Properties’. Go to the ‘Servers’ tab and check the box ‘My server requires authentication’ (Image 11).
Step Four:
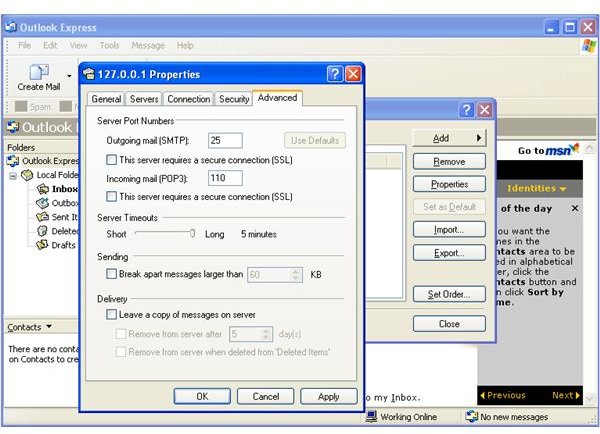
Next go to the ‘Advanced’ tab and set ‘Server Timeouts’ to ‘Long’ (Image 12). Check the box ‘Leave a copy of messages on server’ if you want your emails not to be deleted from yahoo when you download them. Click ‘OK’ and close the Internet accounts screen. Make sure YPOPs is running and click on ‘Send/Receive’ to start downloading emails from yahoo to your Outlook Express.
You’re done!